❌

Reading view

"A great budget lens for astrophotography, the sharpness produced at f/1.8 and f/2.8 is exactly what you want." Viltrox AF 16mm f/1.8 FE lens review

Key specs

Type: Full-frame prime lens

Focal length: 16mm

Maximum aperture: f/1.8

Lens mount: Sony FE, Nikon Z

Weight: 19.4 oz (550 g)

Dimensions: 3.35 x 4.06-in (85.2 x 103 mm)

Filter thread: 77 mm

Release date: May 2023

As you know, prime lenses come in a wide range of sizes and focal lengths, and every once in a while, one comes along and seems to grab you by the scruff of your neck. One such lens is the Viltrox AF 16mm f/1.8 FE, which is an impressive and useful lens for astrophotography thanks to its wide-angle field of view and fast maximum aperture.

This lens is one of the wider prime lenses that are available and could be one of the best third-party lenses for astrophotography. With a price of just $464 (Β£533), this is one of the most cost-effective wide-angle primes, but rather than being a second-rate lens, its build quality and image quality are fantastic. It’s not the best, but it’s undoubtedly a lens you would enjoy.

Image quality is excellent overall, with no need for lens corrections, except for vignette removal when shooting wide open. With near-perfect sharpness and minimal distortion and aberrations straight out of the camera, perhaps the weight of the lens is a small price to pay.

The lens is made up of 15 elements in 12 groups and is built like a tank, with an all-metal body. It is pretty heavy, though, weighing in at 19.4 oz (550 g) despite its relatively compact size. Attach this lens to one of the best Sony cameras and you will have a formidable combination. The 16mm f/1.8 is also available in the Nikon Z-mount.

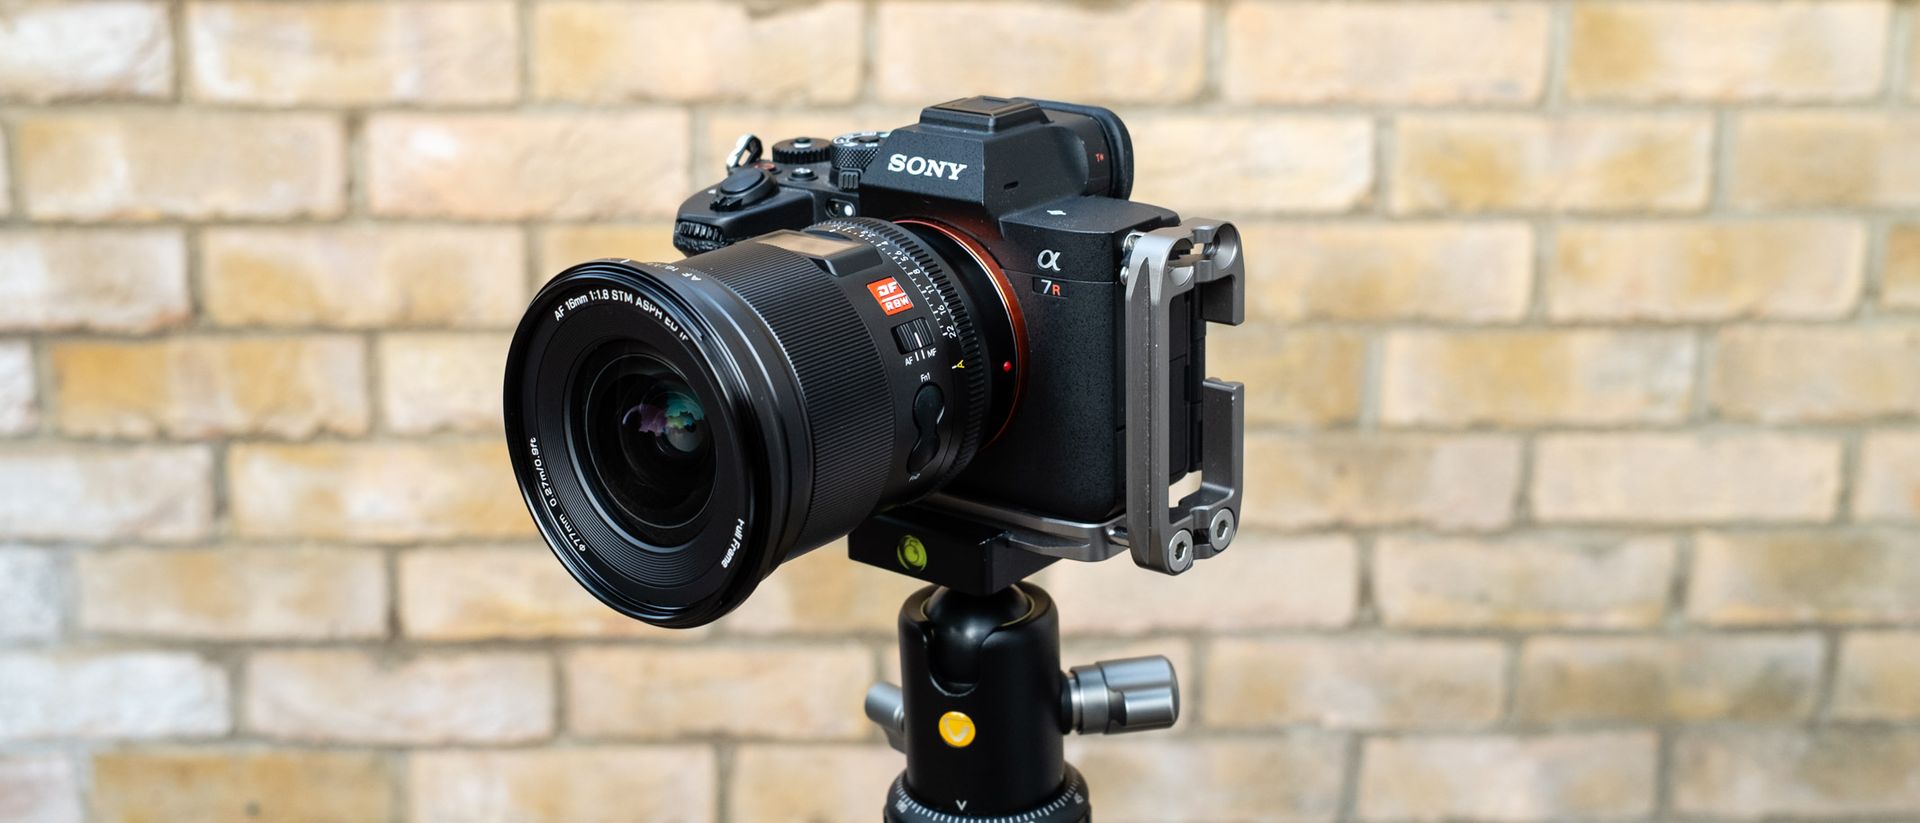
Viltrox AF 16mm f/1.8 FE lens review

Viltrox AF 16mm f/1.8 FE: Performance
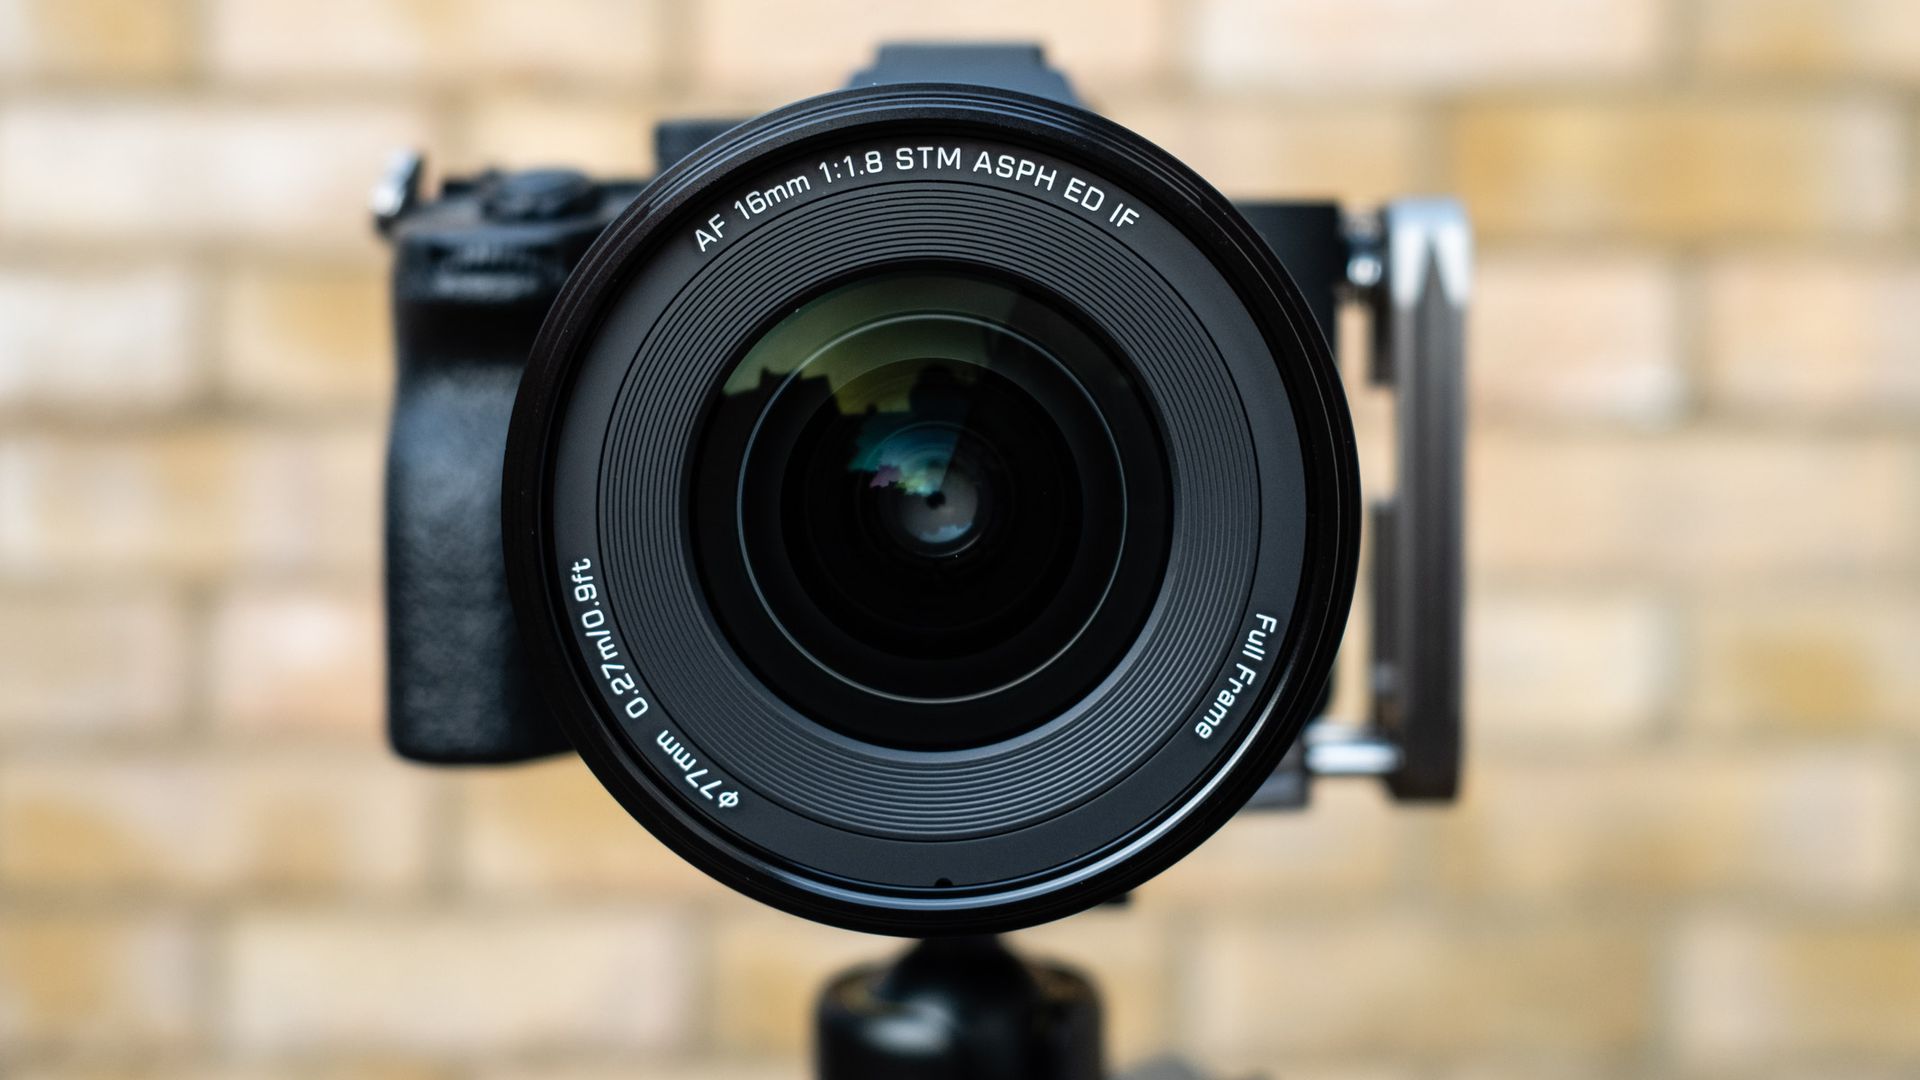
Viltrox AF 16mm f/1.8 FE front view

The Viltrox AF 16mm f/1.8 FE has a 77 mm filter thread. (Image credit: James Abbott)
  • Great image quality
  • Impressively sharp at f/1.8
  • Excellent corner sharpness

With a focal length of 16mm and a maximum aperture of f/1.8, this is clearly a great lens for astrophotography from a technical point of view. The light-gathering capabilities are excellent, to say the least, and during testing it was possible to shoot at a range of ISO levels with a moonless sky. Even ISO 800 was often high enough for a correct exposure.

The image quality produced by the 16mm f/1.8 is great, with excellent levels of sharpness across the frame. What’s most important here is that even corner sharpness is fantastic when wide open at f/1.8. This is the aperture setting where vignetting is at its strongest, but it reduces drastically when you stop down to f/2.8 and is completely gone by the time you stop down to f/4.
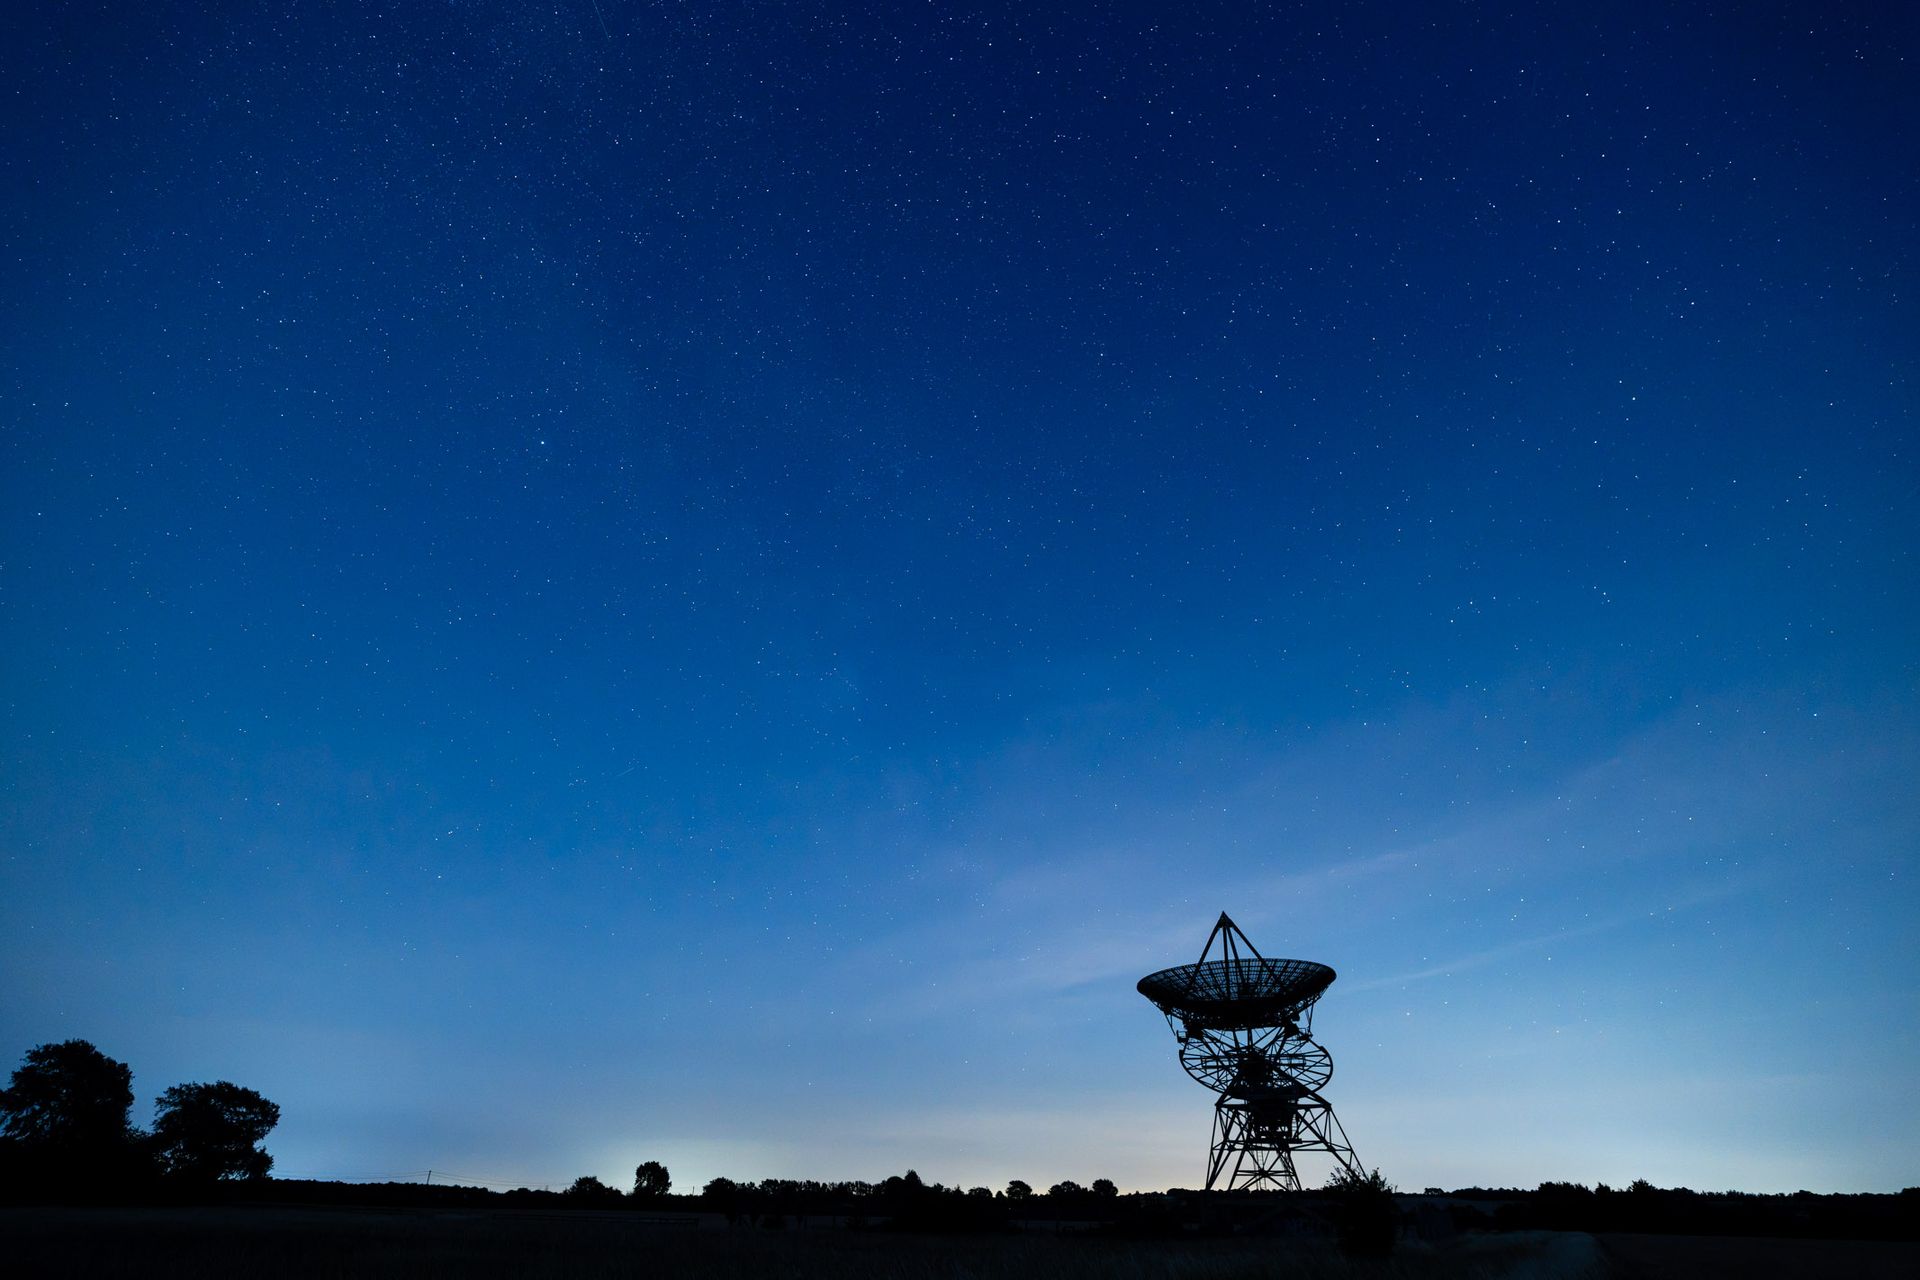
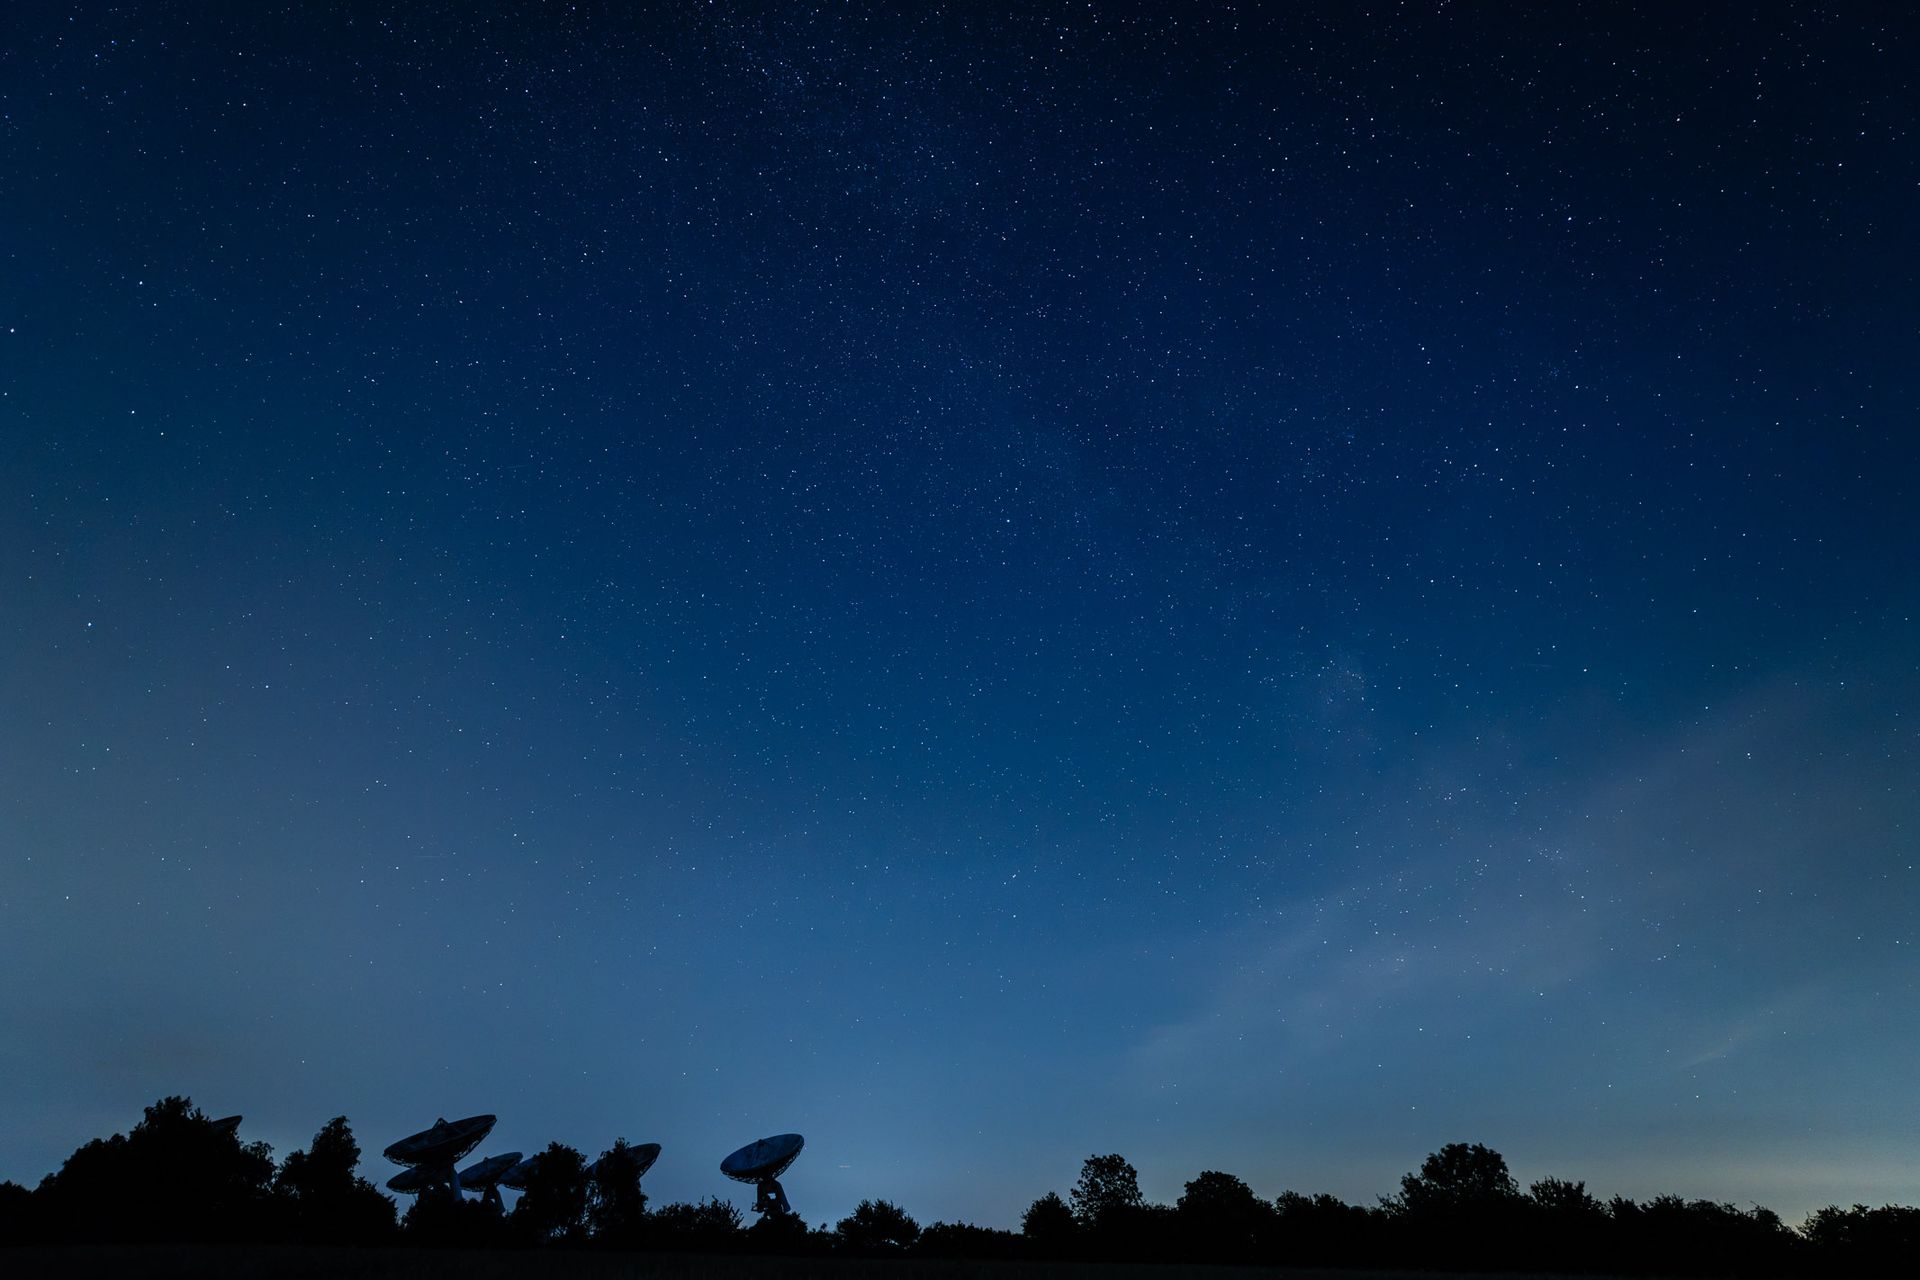
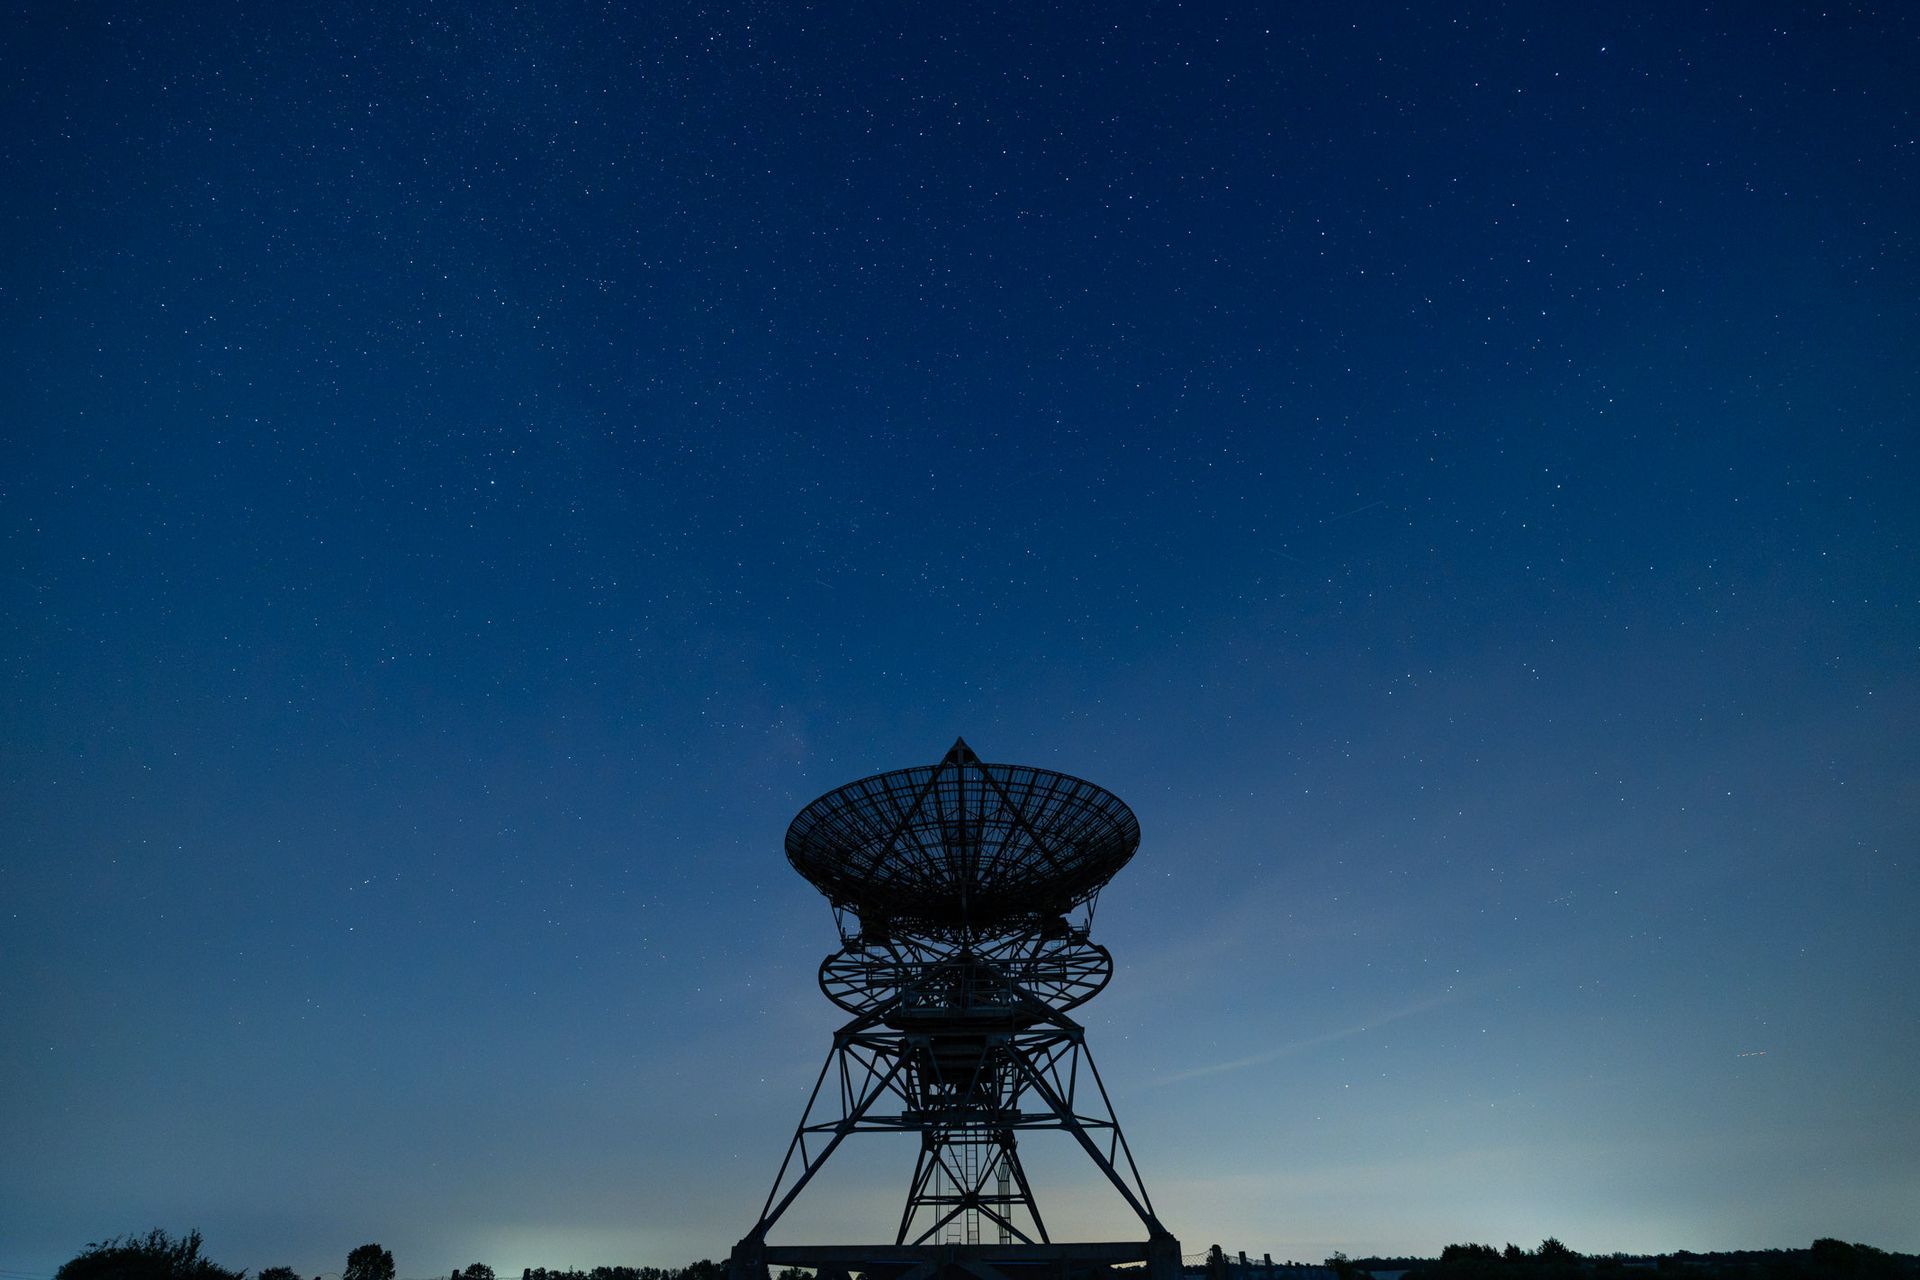
Photo of a radio telescope in front of the night sky taken with the Viltrox AF 16mm f/1.8 FE
Aperture f/2.8, shutter speed 5 secs, ISO 1600. Shot with a Sony A7R V and a Viltrox AF 16mm f/1.8 FE on a Three Legged Thing PUNKS Brian 2.0 tripod.James Abbott
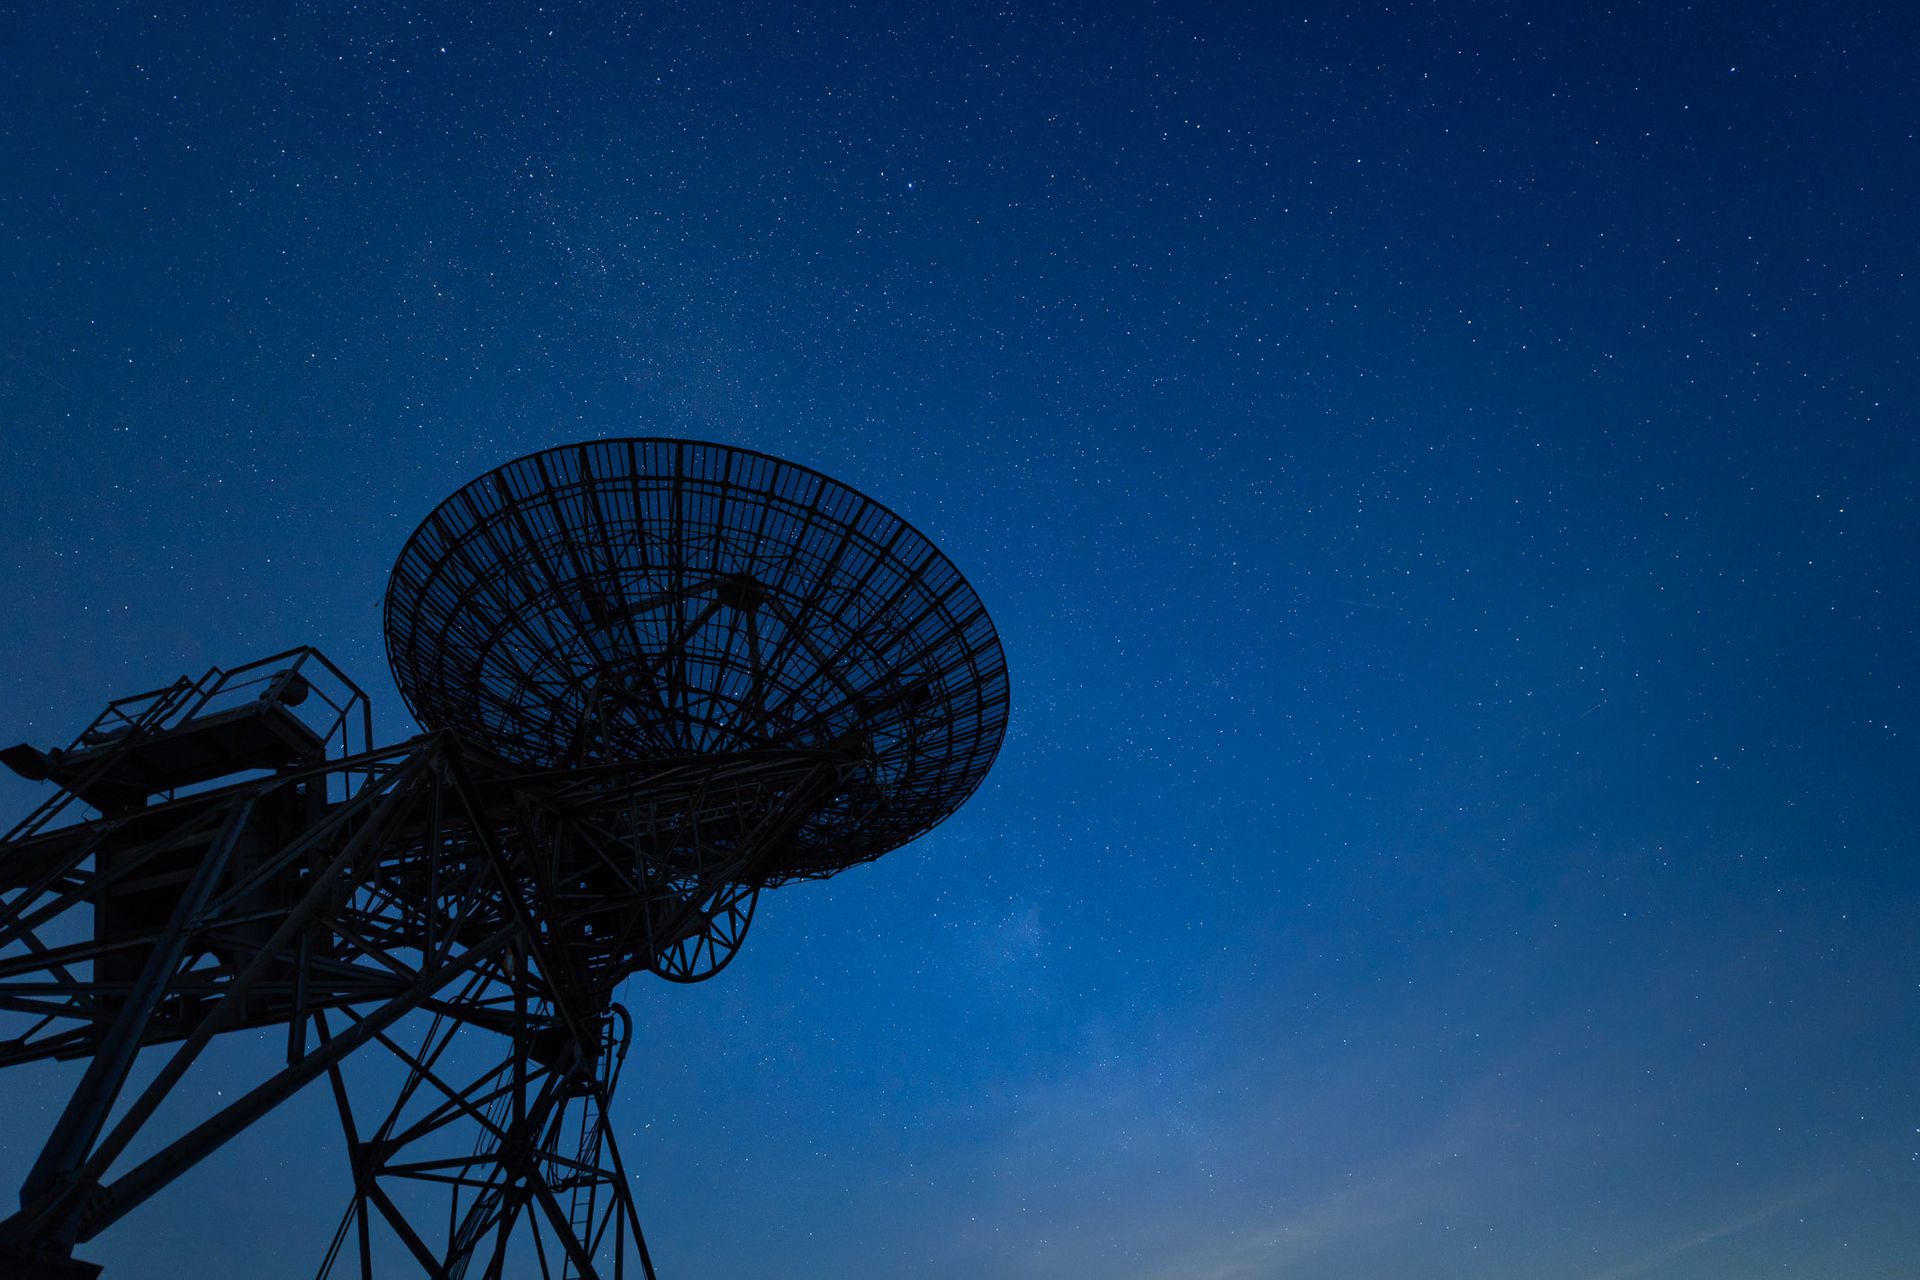
Photo of radio telescopes in front of the night sky taken with the Viltrox AF 16mm f/1.8 FE
Aperture f/1.8, shutter speed 5 secs, ISO 400. Shot with a Sony A7R V and a Viltrox AF 16mm f/1.8 FE on a Three Legged Thing PUNKS Brian 2.0 tripod.James Abbott
Photo of a radio telescope in front of the night sky taken with the Viltrox AF 16mm f/1.8 FE
Aperture f/2.8, shutter speed 5 secs, ISO 1250. Shot with a Sony A7R V and a Viltrox AF 16mm f/1.8 FE on a Three Legged Thing PUNKS Brian 2.0 tripod.James Abbott
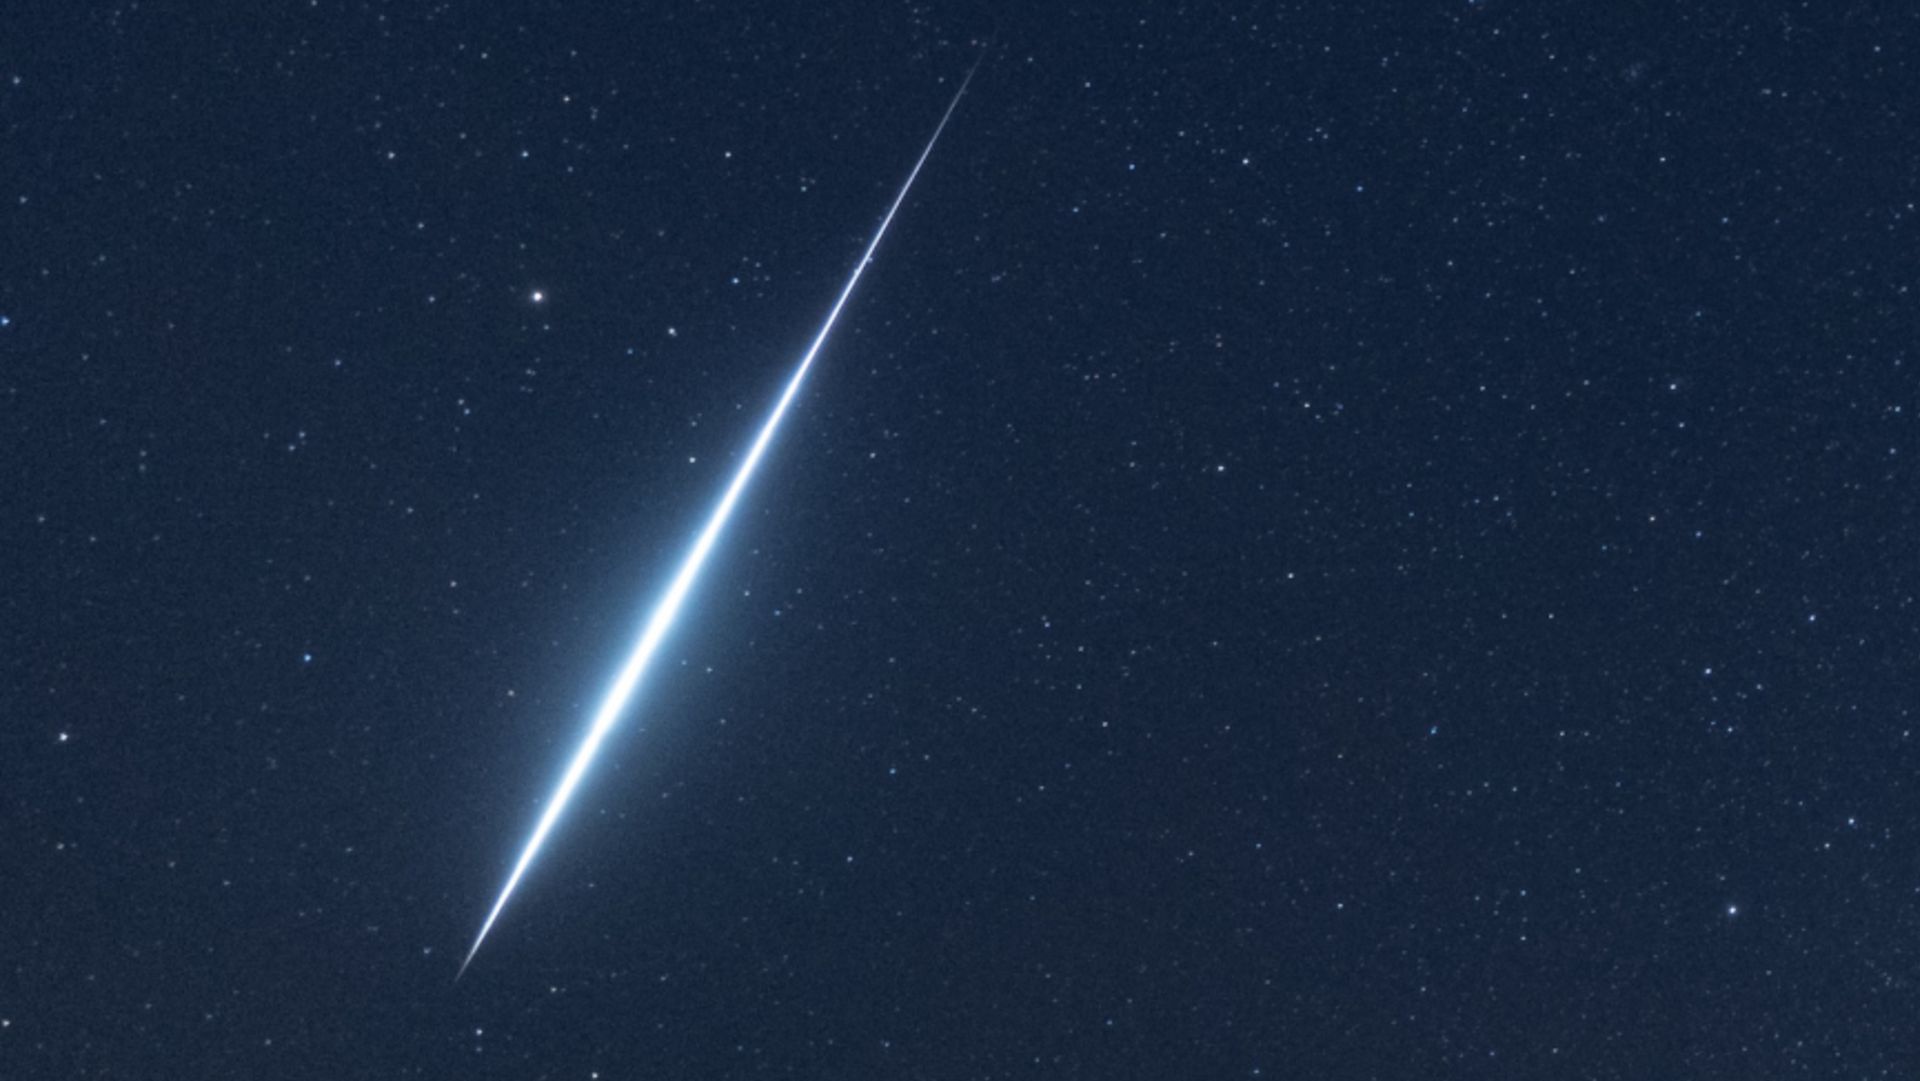
Photo of the night sky taken with the Viltrox AF 16mm f/1.8 FE
Aperture f/1.8, shutter speed 5 secs, ISO 800. Shot with a Sony A7R V and a Viltrox AF 16mm f/1.8 FE on a Three Legged Thing PUNKS Brian 2.0 tripod.James Abbott
Photo of a radio telescope in front of the night sky taken with the Viltrox AF 16mm f/1.8 FE
Aperture f/1.8, shutter speed 5 secs, ISO 800. Shot with a Sony A7R V and a Viltrox AF 16mm f/1.8 FE on a Three Legged Thing PUNKS Brian 2.0 tripod.James Abbott

Luckily, though, there is a lens profile in Adobe Camera Raw and Adobe Lightroom that completely removes vignetting. There’s also only minimal chromatic aberration and a tiny amount of barrel distortion, which is impressive given the wide field of view produced by the lens.

As mentioned before, sharpness is great wide open and improves incrementally as you stop down up to the sweet spot of the lens, which is f/8. Sharpness drops slightly at f/11, and it’s at f/16 where diffraction begins to soften the image overall. This increases further when you stop down to f/22.

These latter apertures aren’t relevant to astrophotography; the medium ones aren’t either but the sharpness produced at f/1.8 and f/2.8 is exactly what you want.

Viltrox AF 16mm f/1.8 FE: Design
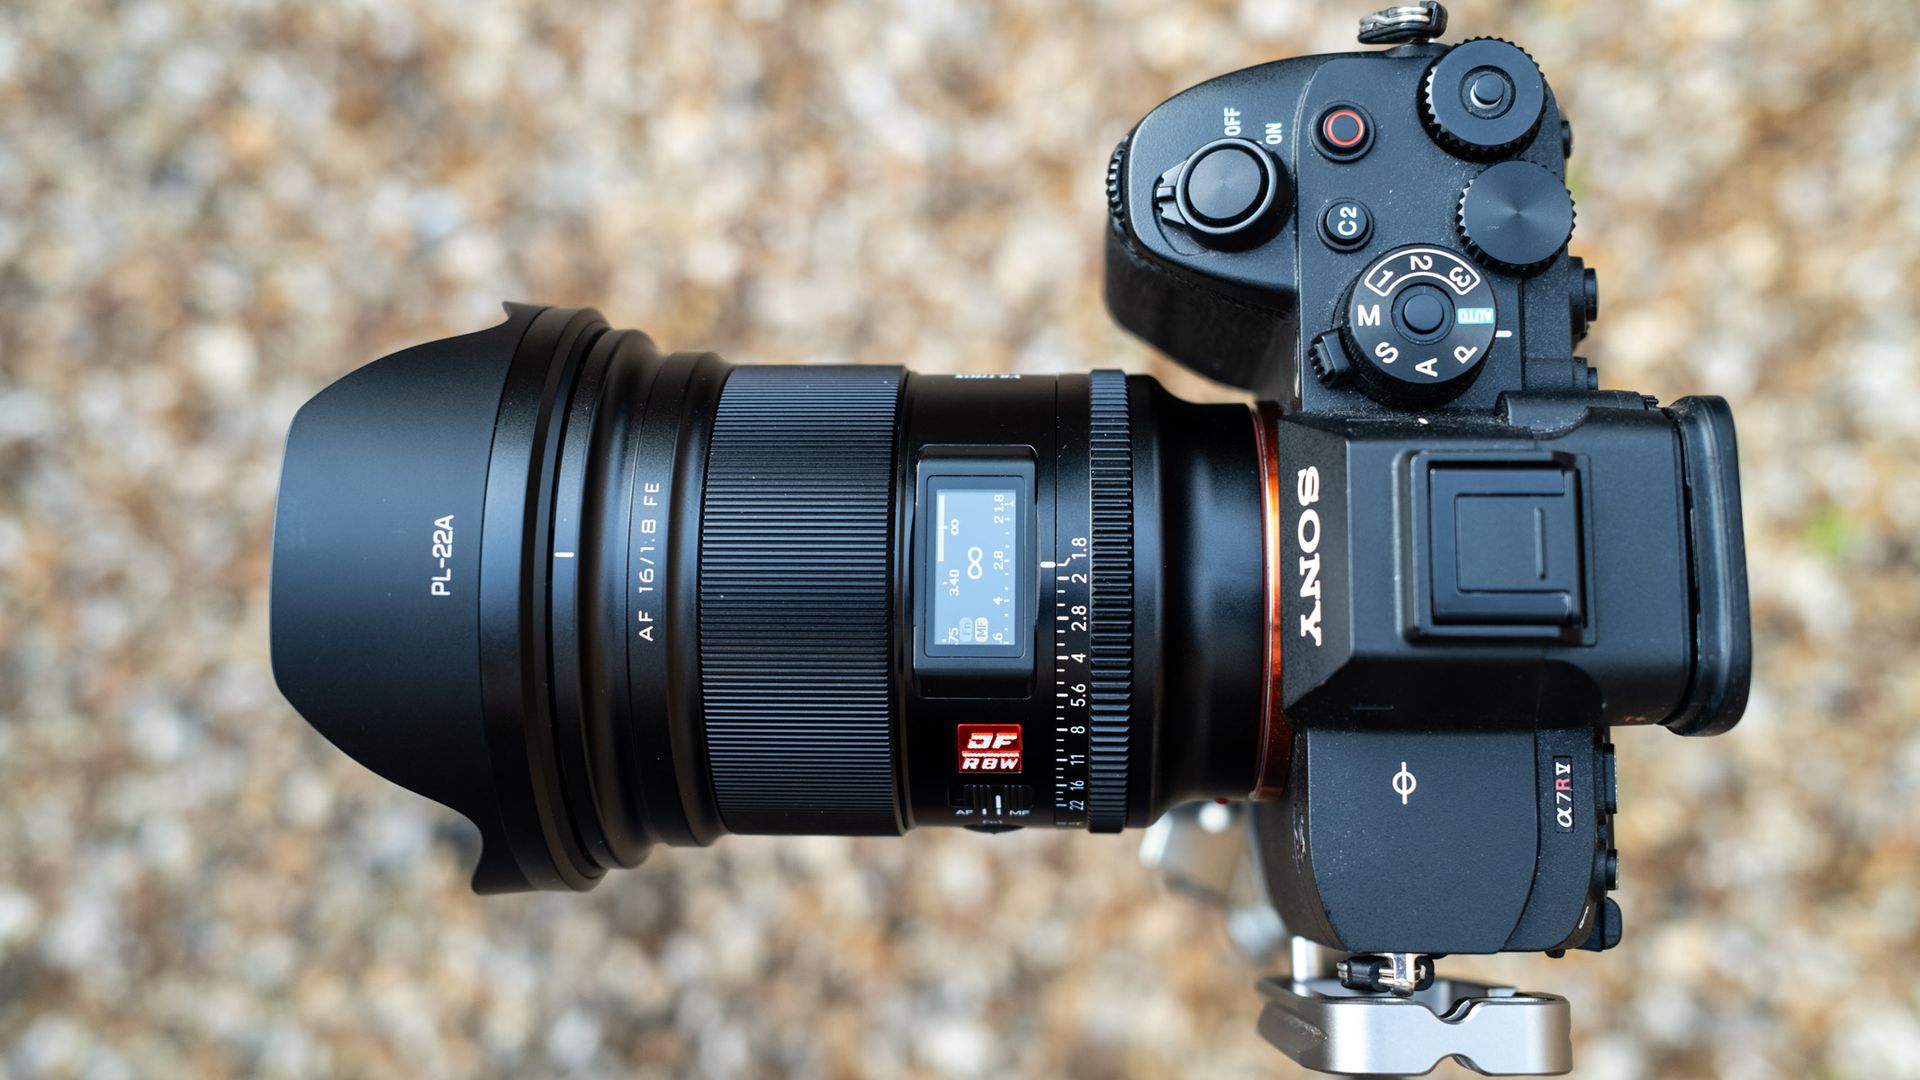
Viltrox AF 16mm f/1.8 FE top view

The Viltrox AF 16mm f/1.8 FE lens is compact but quite heavy. (Image credit: James Abbott)
  • Weather-sealed build
  • Compact yet heavy
  • Great handling

The 16mm f/1.8 lens is something of an oddity in one respect: it’s both compact and heavy considering its size, although this comes down to its optical construction. The lens weighs 19.4 oz (550 g) with a size of just 3.35 x 4.06 in (85.2 x 103 mm). It does, however, balance well with Sony A-series cameras.

The 16mm f/1.8 is made up of 15 elements in 12 groups, including four ED glass and three aspherical lenses. The optical construction is designed to deliver sharpness, detail and high contrast with minimal distortion. It’s fair to say it achieves these. Of course, you will experience some perspective distortion when tilting the lens up to capture more of the night sky when there are ground elements in the foreground.

Unlike some wide-angle lenses, the front element isn’t bulbous, and it features an HD nano multilayer coating with a water-resistant and antifouling coating. The filter thread is also just 77mm, so you can easily attach screw-in and square filters if you use them for your astrophotography.

The minimum focusing distance of the lens is 10.6 inches (27 cm), which is great for landscape photographers but less important for astrophotographers.
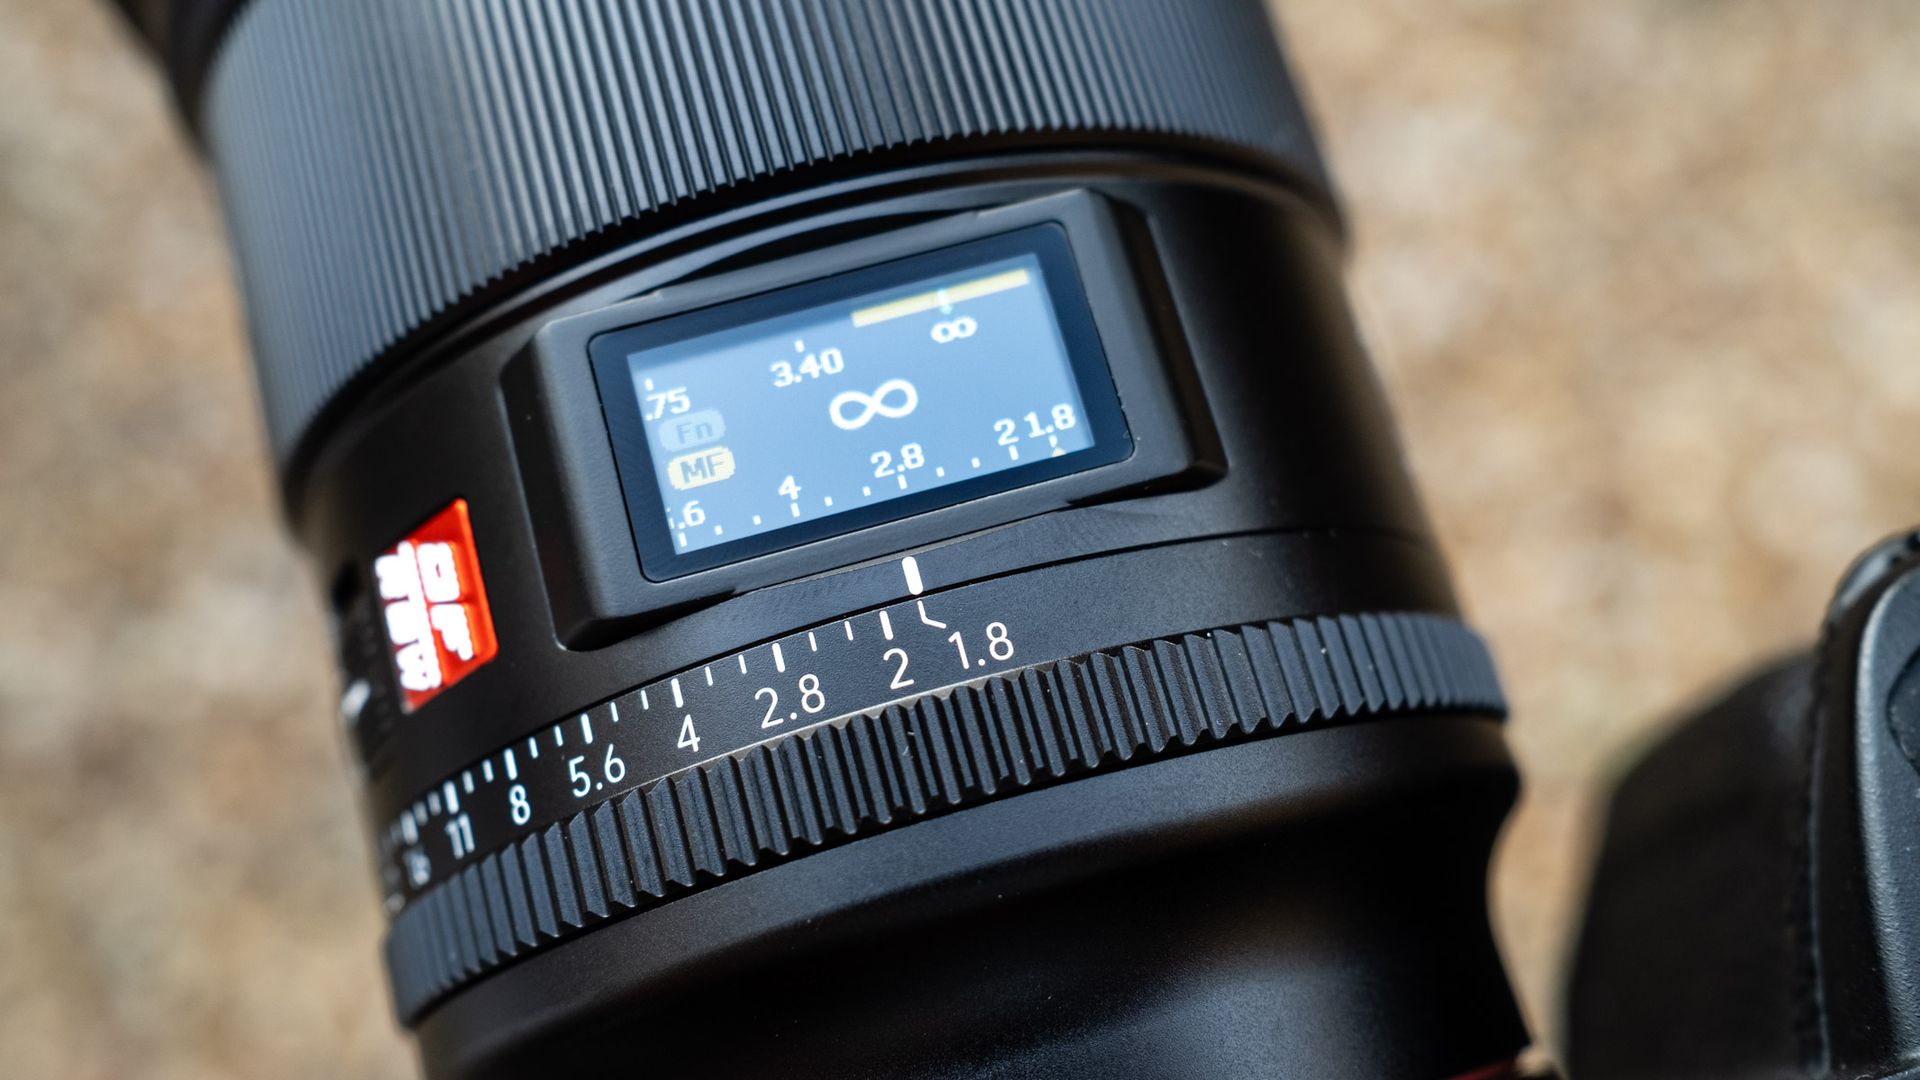
Viltrox AF 16mm f/1.8 FE color screen
The color screen is great for night shooting.James Abbott
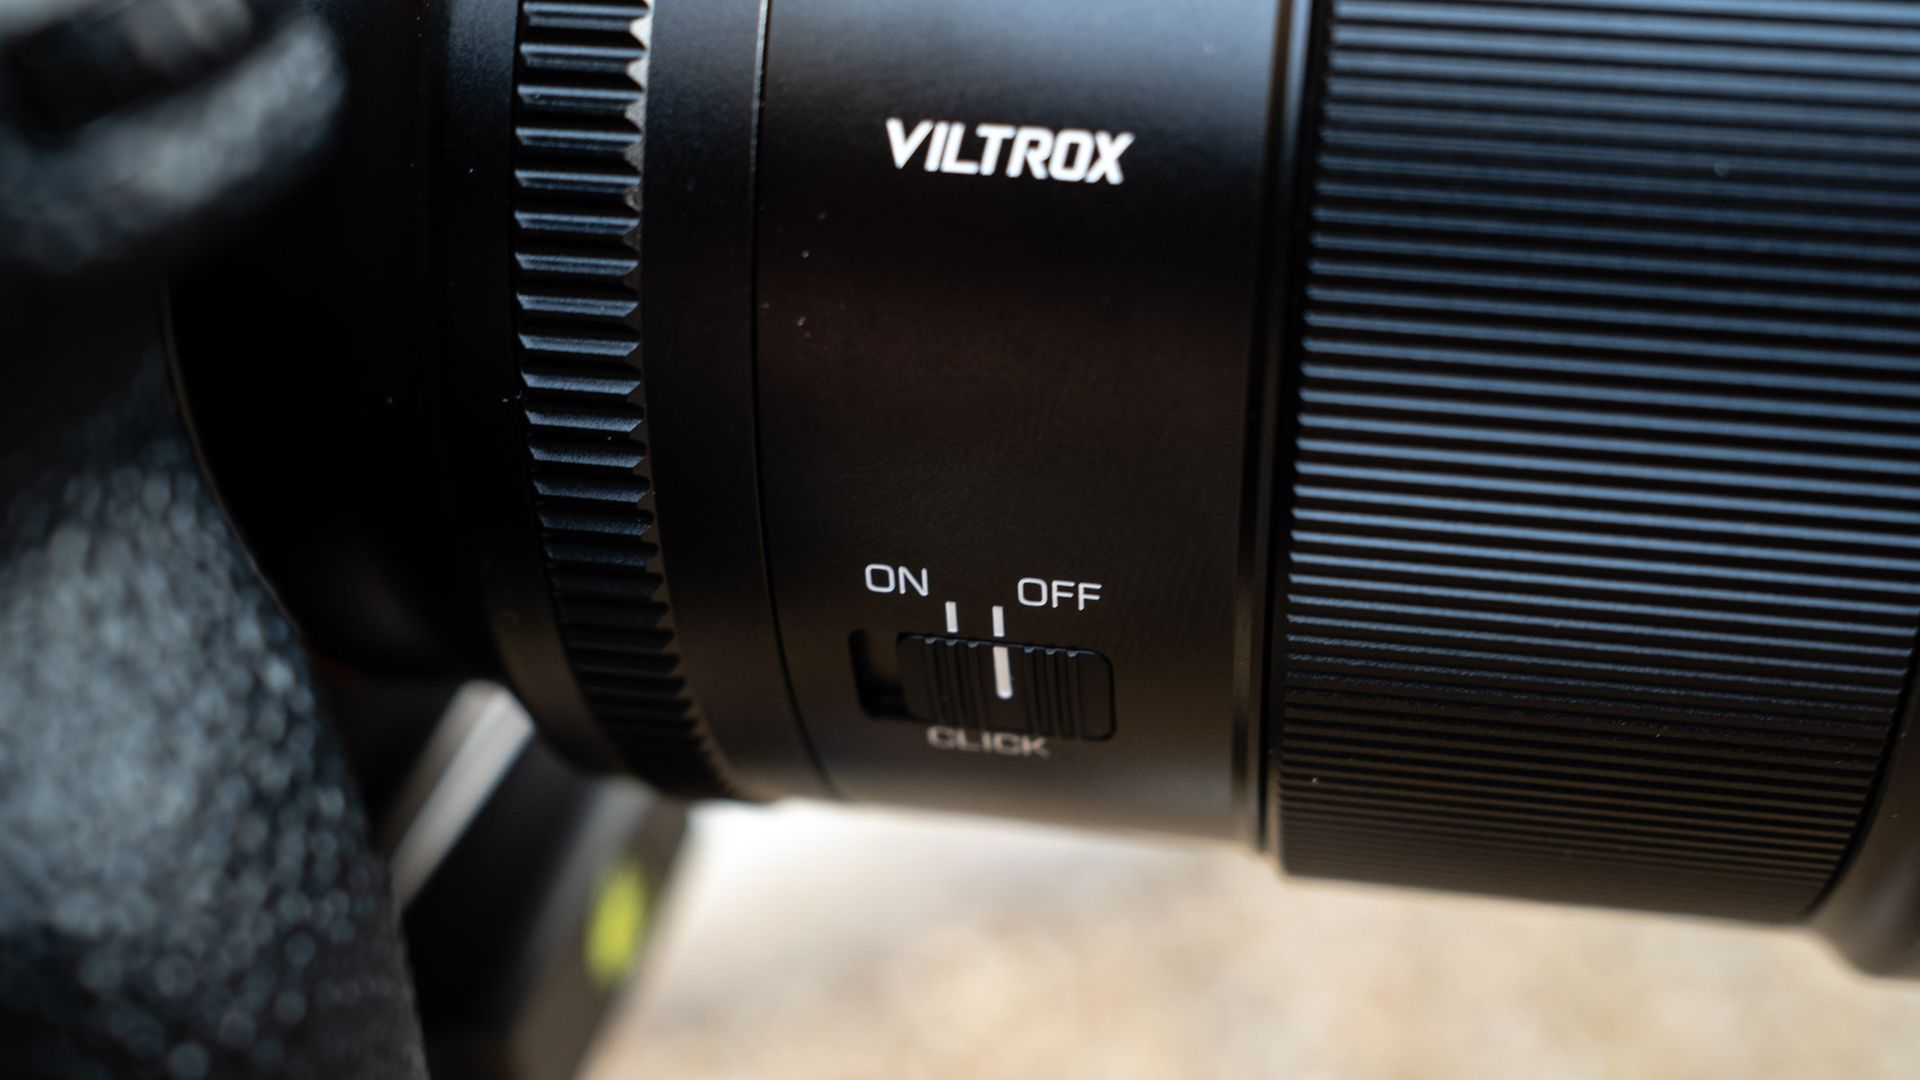
Viltrox AF 16mm f/1.8 FE aperture click switch
The aperture ring can be set to click or clickless operation.James Abbott
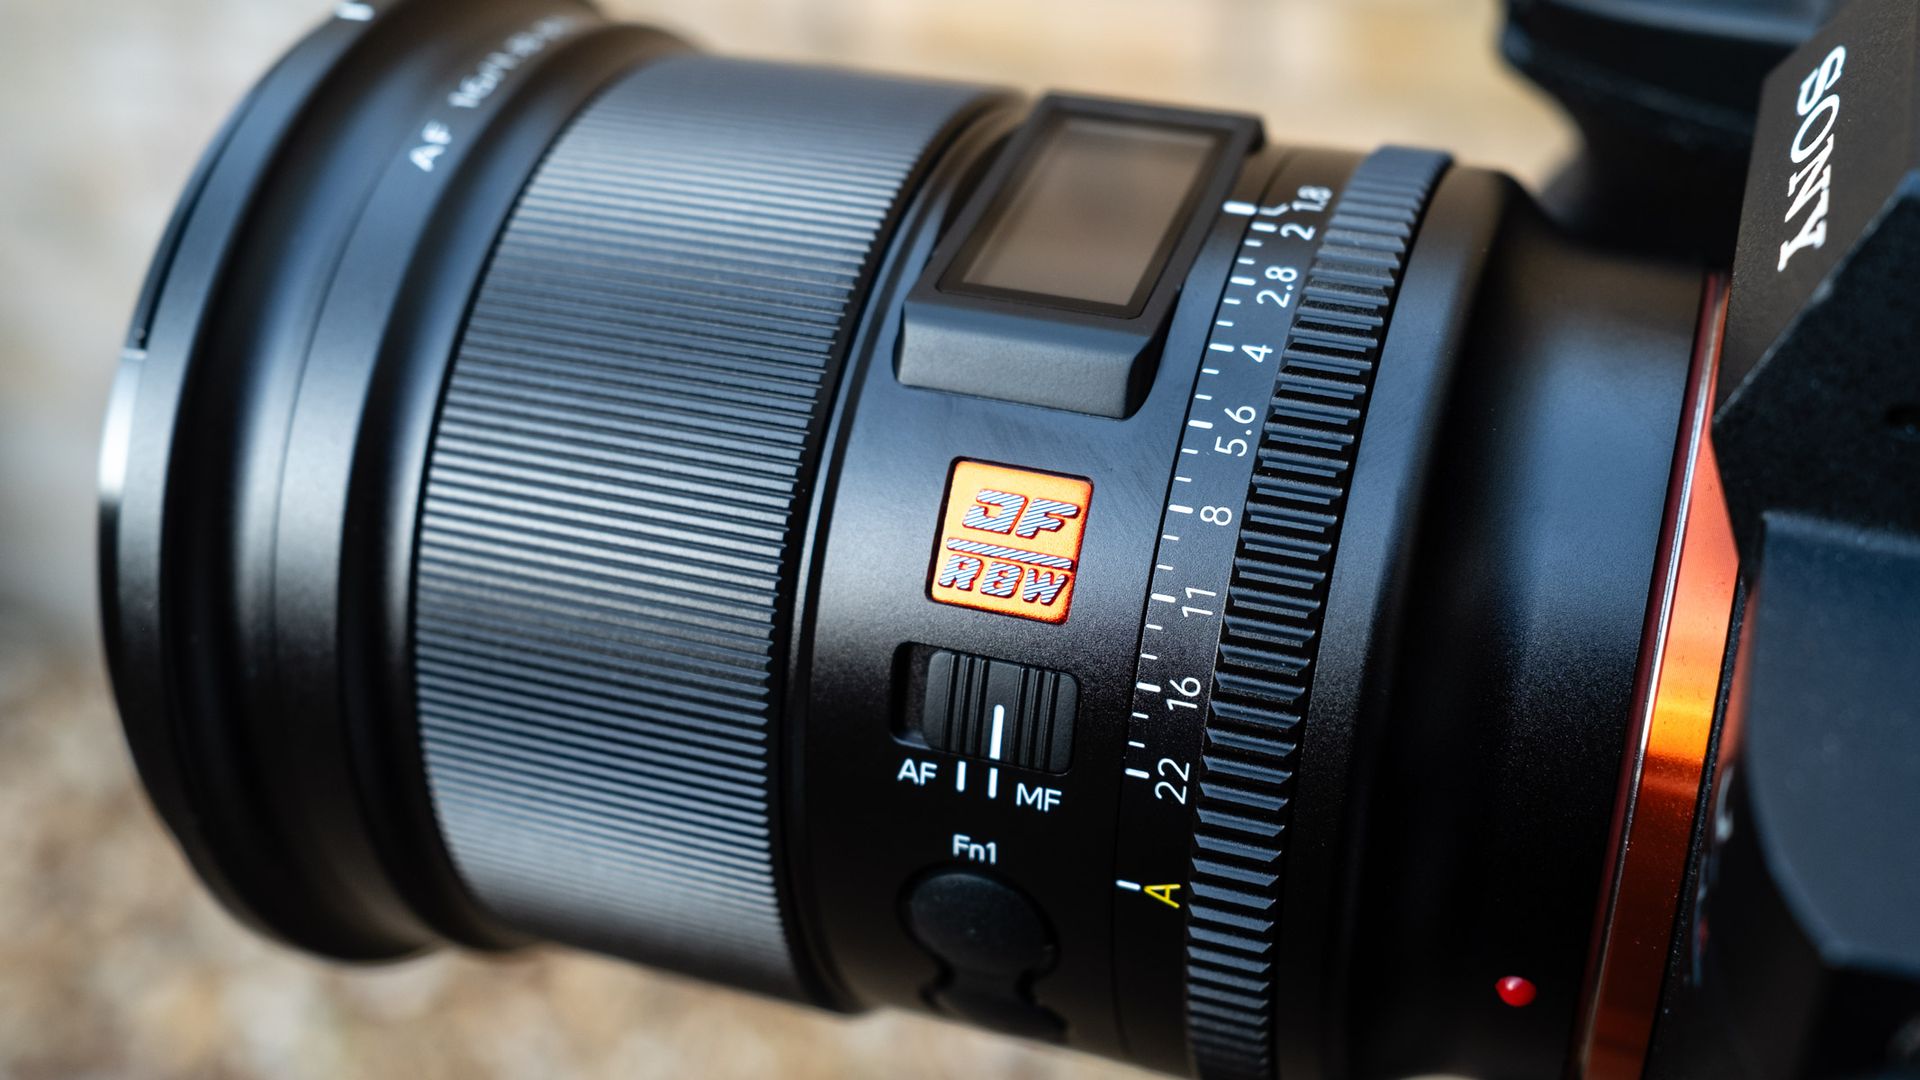
Viltrox AF 16mm f/1.8 FE controls close up
Main controls on the left side of the lens.James Abbott
Viltrox AF 16mm f/1.8 FE close up of the controls
The all-metal body has a premium look and feel.James Abbott

Build quality is impressive thanks to an all-metal body and weather-sealing. This gives the lens a premium look, and it feels robust in the hand. There’s also a useful digital color screen that displays lens information.

When it comes to controls, there are possibly a few more on this lens than you might find on the average prime. There’s a manual focusing ring that’s wide enough for use when wearing gloves, a manual aperture ring that can be set to stepped and stepless operation using a switch on one side of the lens, two customizable Fn buttons and an AF/MF switch.

Viltrox AF 16mm f/1.8 FE: Functionality
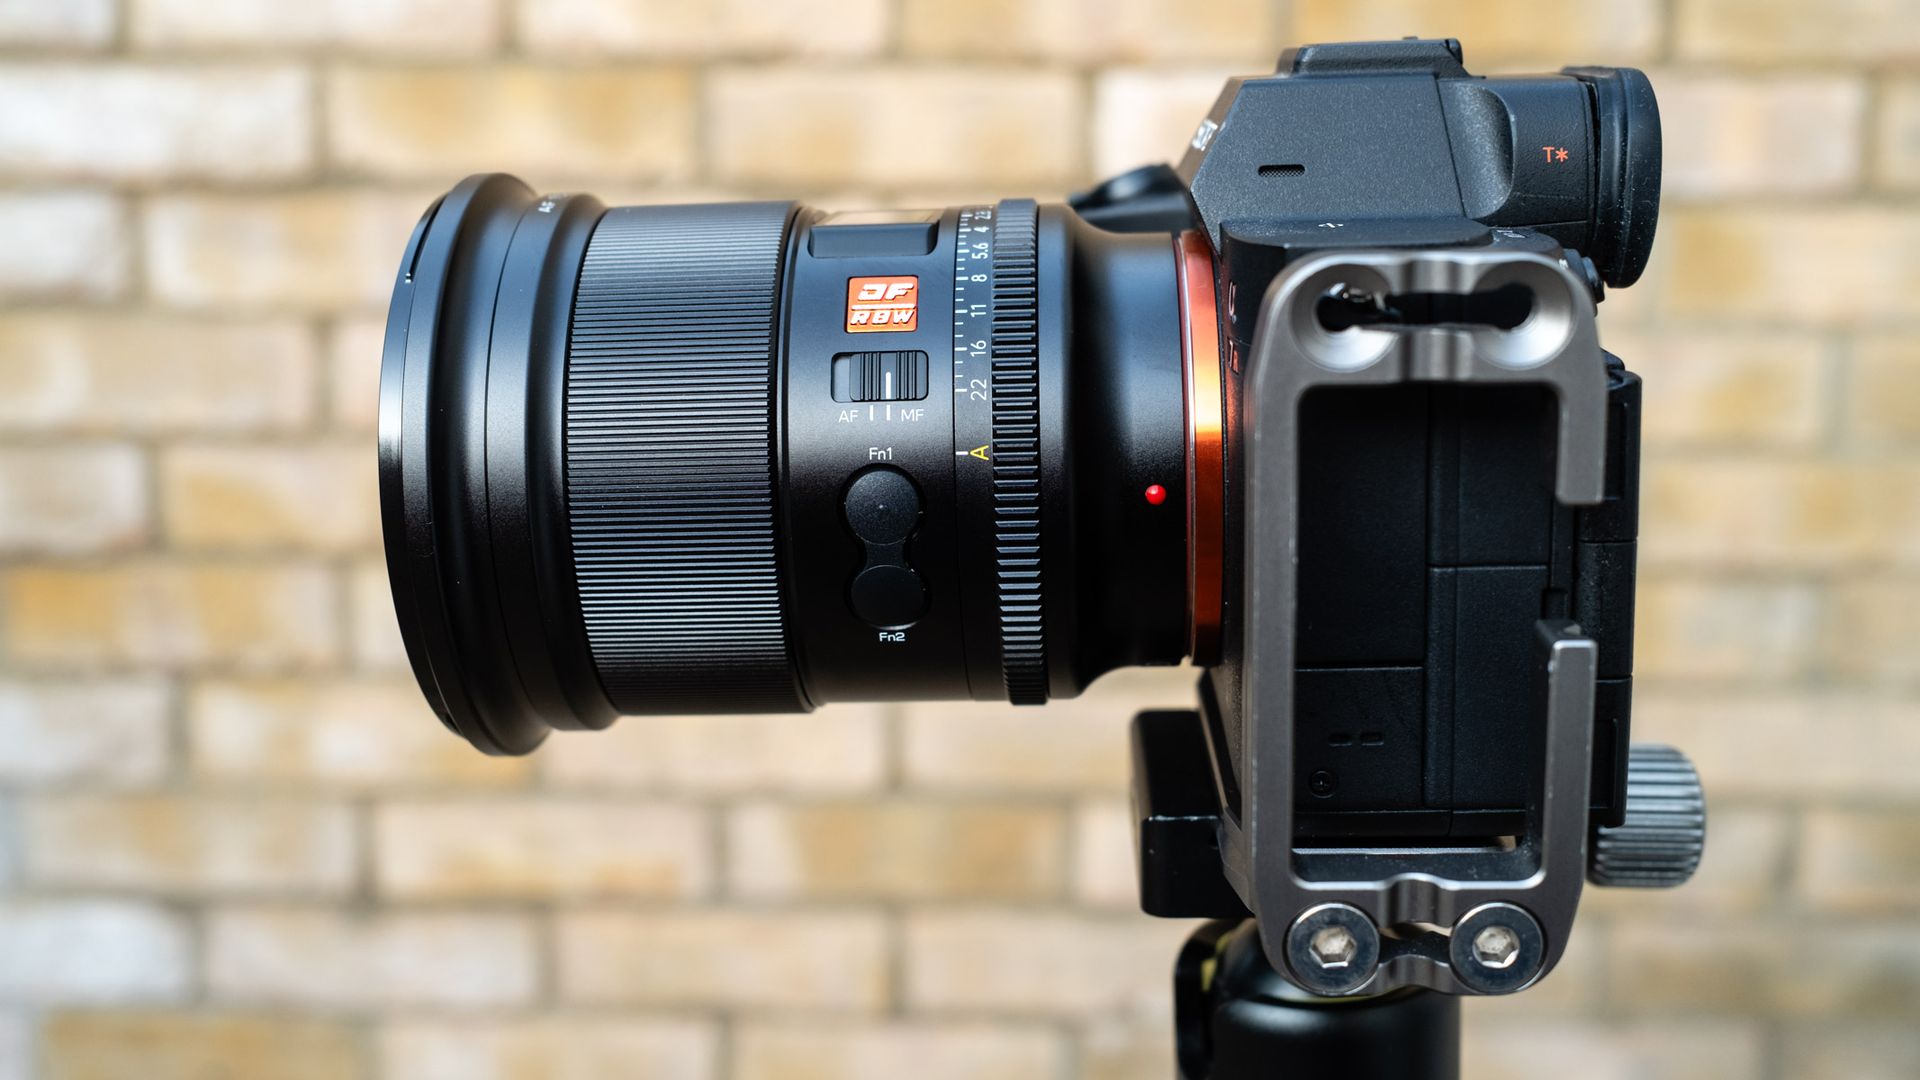
Viltrox AF 16mm f/1.8 FE side view

The Viltrox AF 16mm f/1.8 FE is excellent for astrophotography. (Image credit: James Abbott)
  • Small color digital screen
  • Customizable Fn buttons
  • 105.6-degree field of view

The Viltrox AF 16mm f/1.8 FE is a full-frame lens offering a generous 105.6-degree field of view, allowing you to capture more of the night sky. This lens naturally works with all Sony FE bodies, and if you shoot APS-C, it will give you an equivalent focal length of 24mm. This means if you currently own an APS-C camera but plan to upgrade to full-frame, this lens could comfortably join you on that journey.

As prime lenses go, this one has a few more bells and whistles than most, so there are a few more things to talk about than usual. Focusing is internal, so the front element doesn’t rotate or extend outwards, which is great when using filters.

For astrophotography, manual focus is the only way to go, but this lens also has autofocus for when you’re shooting other subjects. The autofocus isn't the fastest we’ve seen, taking about 0.25 seconds to lock onto subjects when the lens is wide open, or 0.5 seconds when stopped down. This is driven by an SMT stepping motor, which is quiet but audible.

One feature that you don’t see on many lenses is a small color digital screen on the top of the lens. This shows the focus distance, aperture setting and the active Fn control. Is it a gimmick? A bit. Is it useful? Yes. For astrophotography, the screen is definitely useful because it’s illuminated.

As with most Viltrox lenses, there’s also a USB-C port on the lens mount so it can be powered. This allows you to connect the lens to the Viltrox Lens app via Bluetooth to update firmware and customize the Fn buttons and the digital screen’s welcome screen. This makes firmware updates incredibly easy, which is a great feature to have.

Viltrox AF 16mm f/1.8 FE: User reviews

In online reviews, users consistently highlight the lens's value and image quality. Build quality comes up time and time again, thanks to the all-metal build.

Many users report that overall, the lens offers much more than you’d expect for the price and even more than some more expensive lenses.

How we tested the Viltrox AF 16mm f/1.8 FE

The Viltrox AF 16mm f/1.8 FE was tested in combination with the Sony A7R V, which offers an unforgivingly high resolution. The lens was tested at night with a focus on astrophotography, and in daylight to assess sharpness, distortion and general functionality for an all-round approach to testing.

Should you buy the Viltrox AF 16mm f/1.8 FE?

Buy it if:

βœ… You’re on a budget: The Viltrox AF 16mm f/1.8 FE is less expensive than alternative lenses offering the same focal length and maximum aperture.

βœ… You want a wide-angle prime: Thanks to its wide field of view, you can capture more of the night sky, while the fast maximum aperture is ideal for astrophotography.

Don't buy it if:

❌ You would like flexibility: If you would like the flexibility of a variable focal length, a zoom lens is the only way to go. They are typically slower than primes, though.

❌ You'd like a wider view: This is a lovely wide lens, but you can get wider options as both primes and zooms.

Since there are only a few alternatives to the Viltrox AF 16mm f/1.8 FE, and given that it offers excellent value for money, this is absolutely a lens worth considering if you need a wide-angle prime.

Furthermore, you’ll struggle to find a similar alternative with the same balance of overall build quality and price. Image quality is excellent, even in the corners and edges of the frame when shooting wide open with minimal distortion.

The two customizable Fn buttons and the illuminated color screen that provides useful lens information are extremely helpful when shooting in the dark.

With a price of $464 (Β£533) and given its build quality, image quality and overall handling, this lens represents excellent value for money. And while it may be a full-frame lens, APS-C users can still enjoy a 24mm equivalent focal length, so it’s a useful lens for astrophotography whichever format you shoot with.

This is a professional-quality lens with a mid-range price tag, and like other Viltrox lenses, you get the lens, a lens hood, front and rear lens caps and a soft lens case in the box.

If this lens isn't for you

The Viltrox AF 35mm f/1.2 LAB FE is a slightly less wide Viltrox lens with a much faster aperture and is part of the company’s flagship LAB series.

The Sony FE 20mm f/1.8 G is a fantastic wide-angle prime offering excellent image quality in a compact and lightweight form factor.

The Sigma 14mm f/1.4 DG DN Art is something of a beast, both in terms of specs and its size. With a 14mm focal length and f/1.4 maximum aperture, it’s perfect for astrophotography.
  •  

Orionid meteor shower peaks tonight: Here's the best time to spot shooting stars

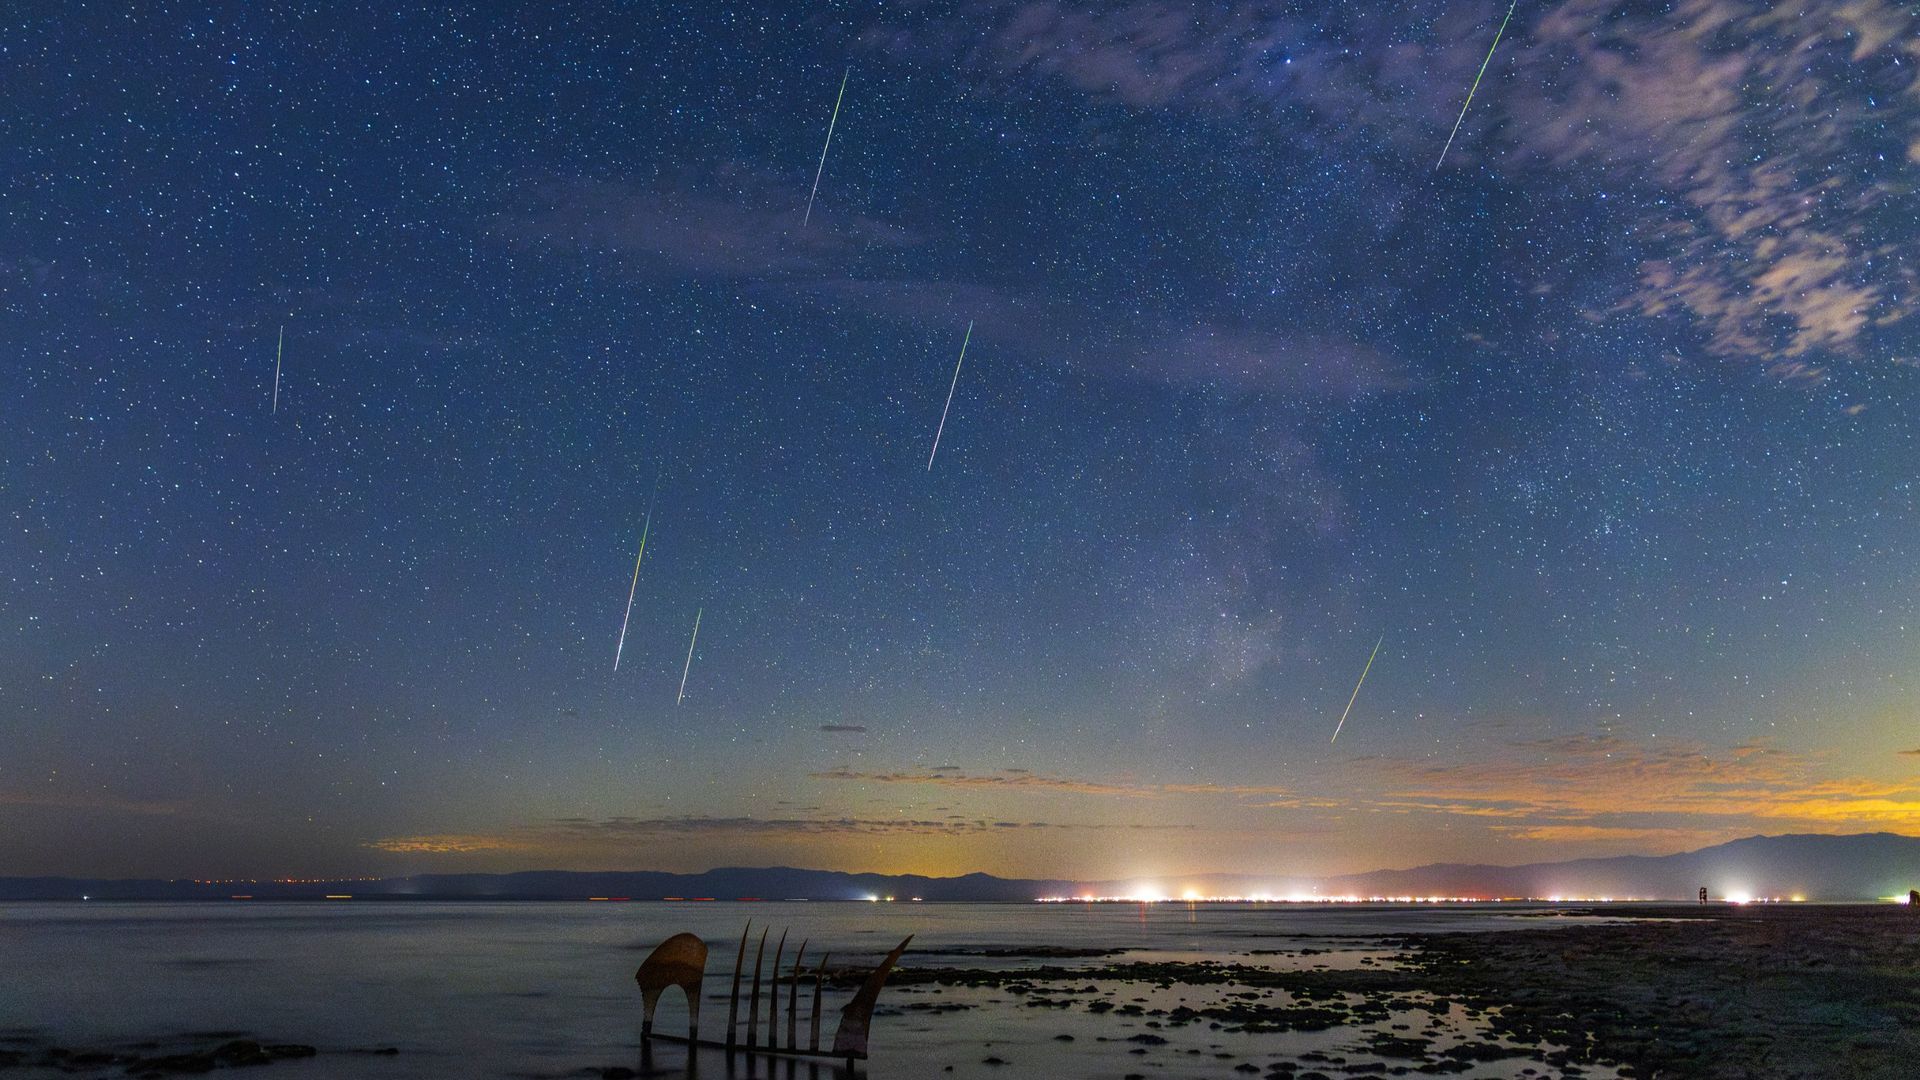
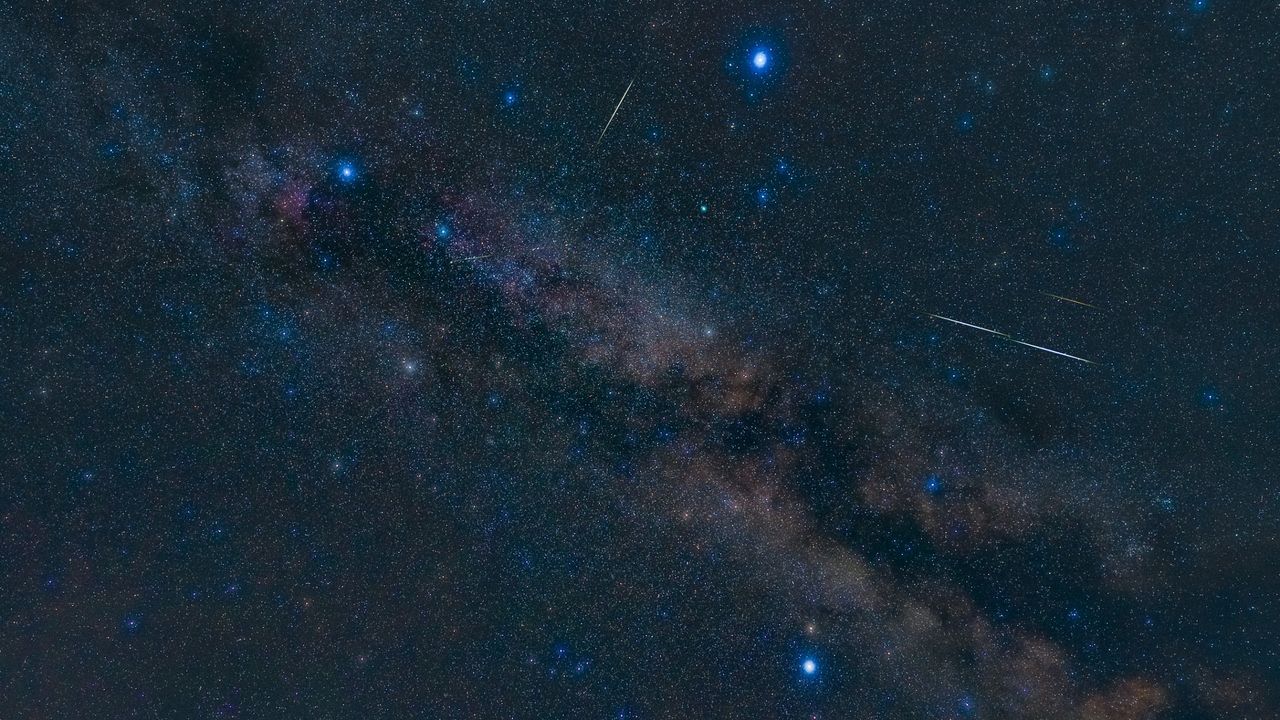
Don't miss the Orionid meteor shower peak tonight (Oct. 21-22) as tiny shards of Halley's Comet collide with Earth's atmosphere to carve fiery streaks through the Autumn sky! But will the light cast by the waxing gibbous moon spoil the show?

The Orionid meteor shower activity peaks when Earth travels through the densest section of the debris trail left by Comet 1P/Halley. The comet is currently racing back towards the sun ahead of its next visit to the inner solar system in 2061.

Under perfect dark sky conditions 10 to 20 shooting stars could brighten the night sky each hour as the peak unfolds, according to NASA. However, the light cast by the waxing moon β€” just four days from being full β€” will likely reduce the number of visible meteors by hiding fainter Orionids from sight.

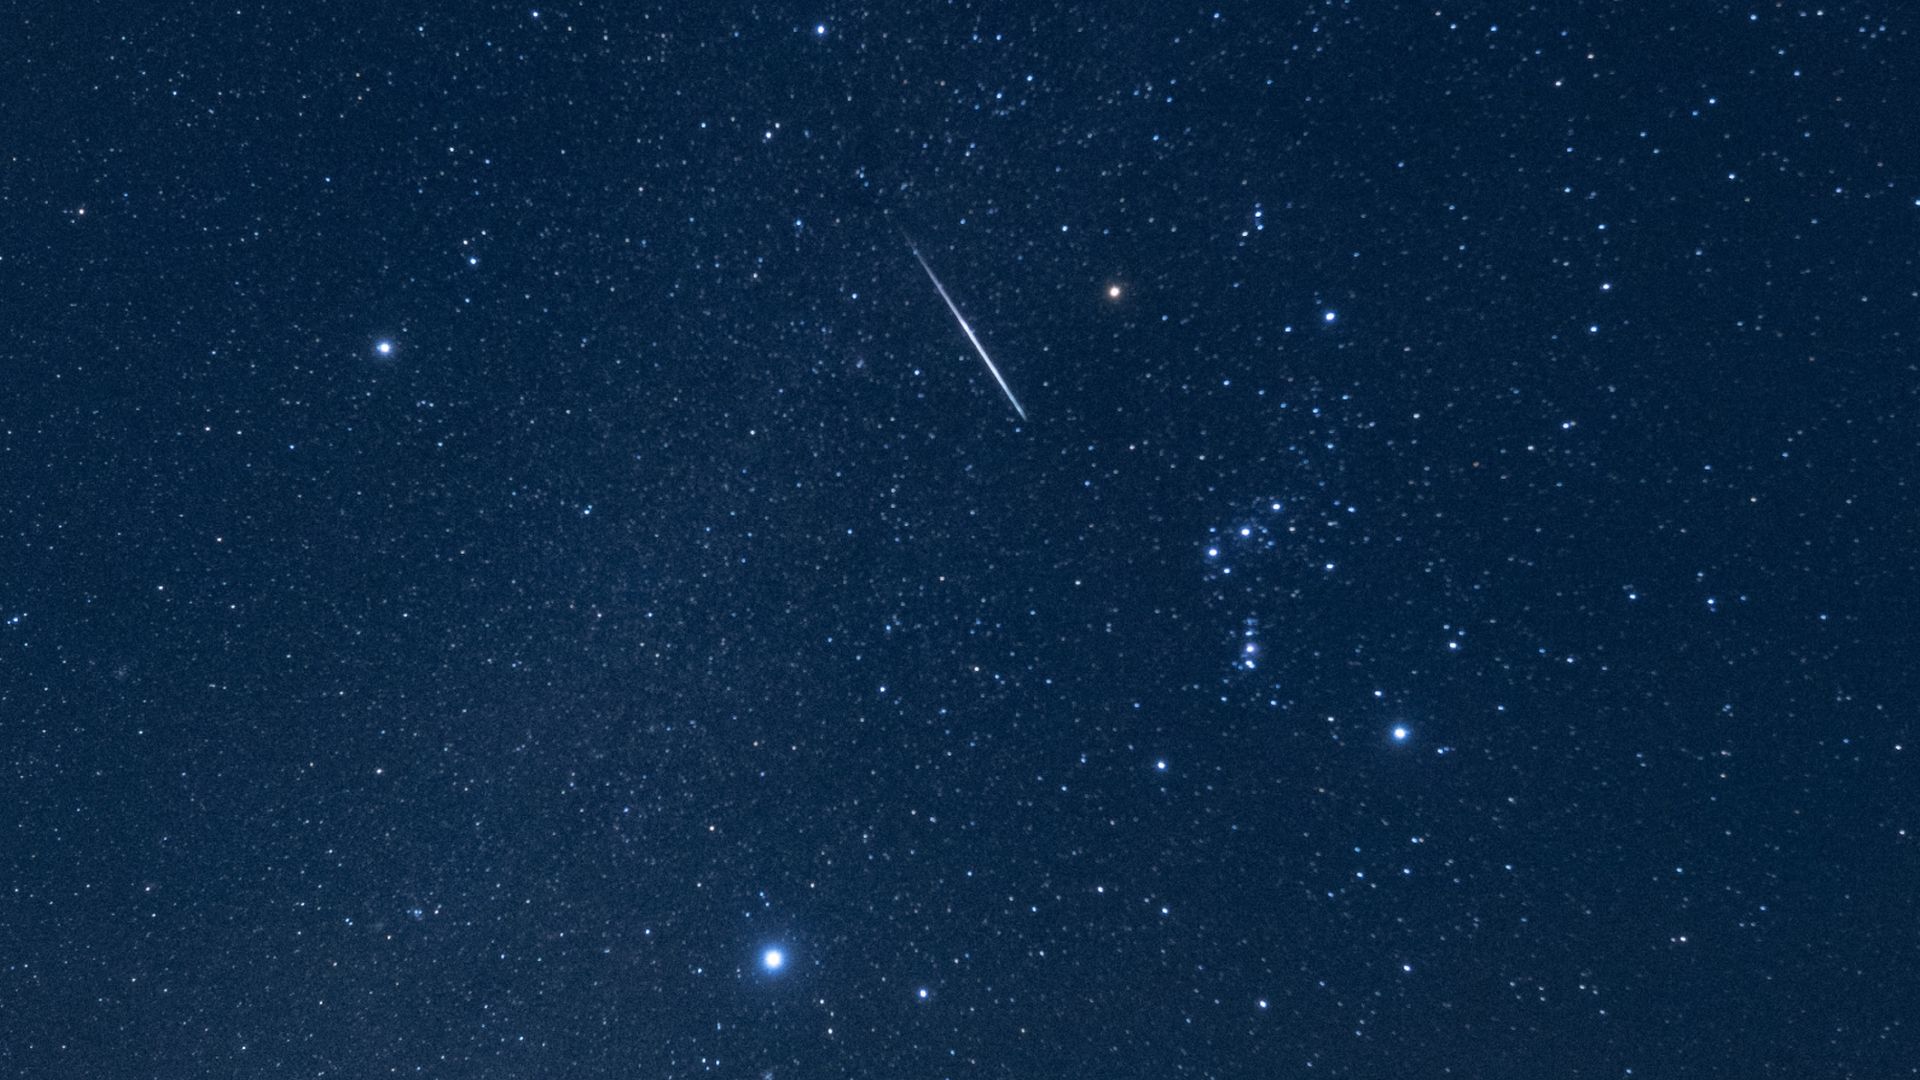
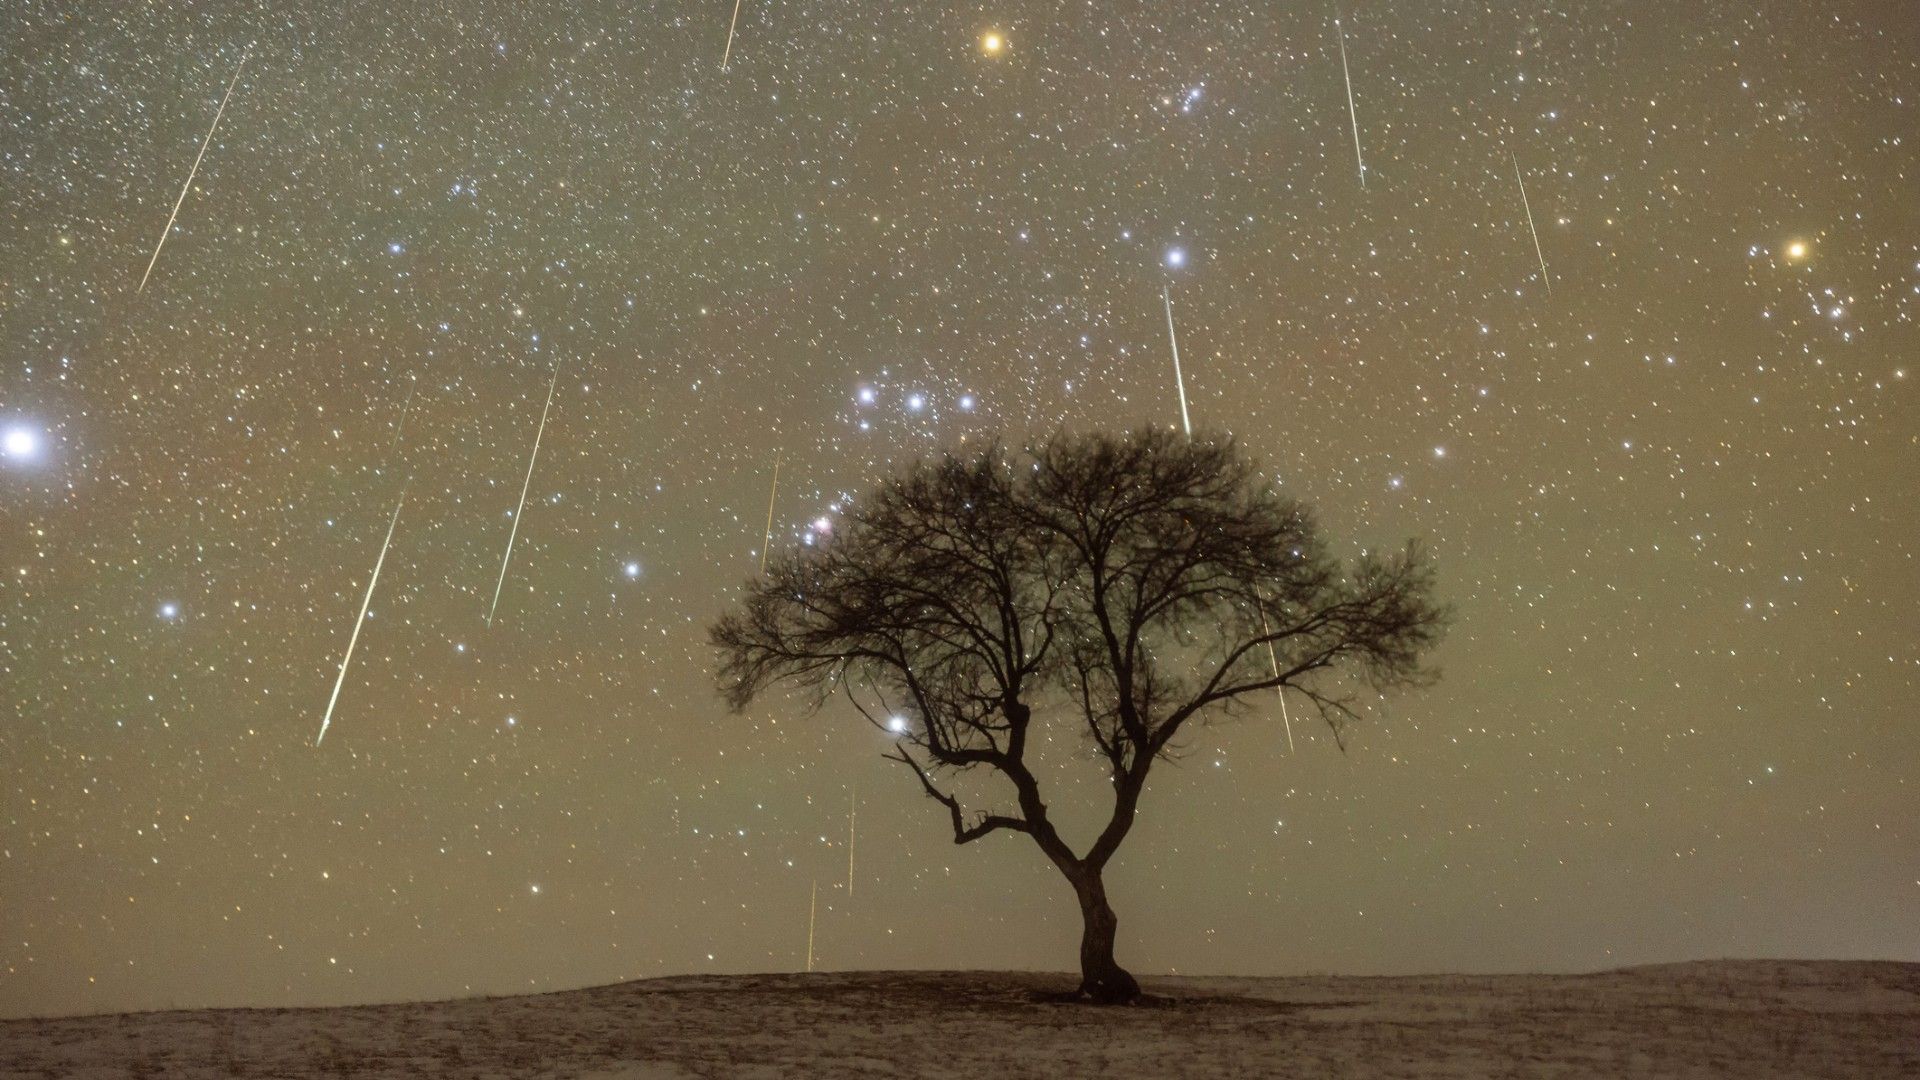
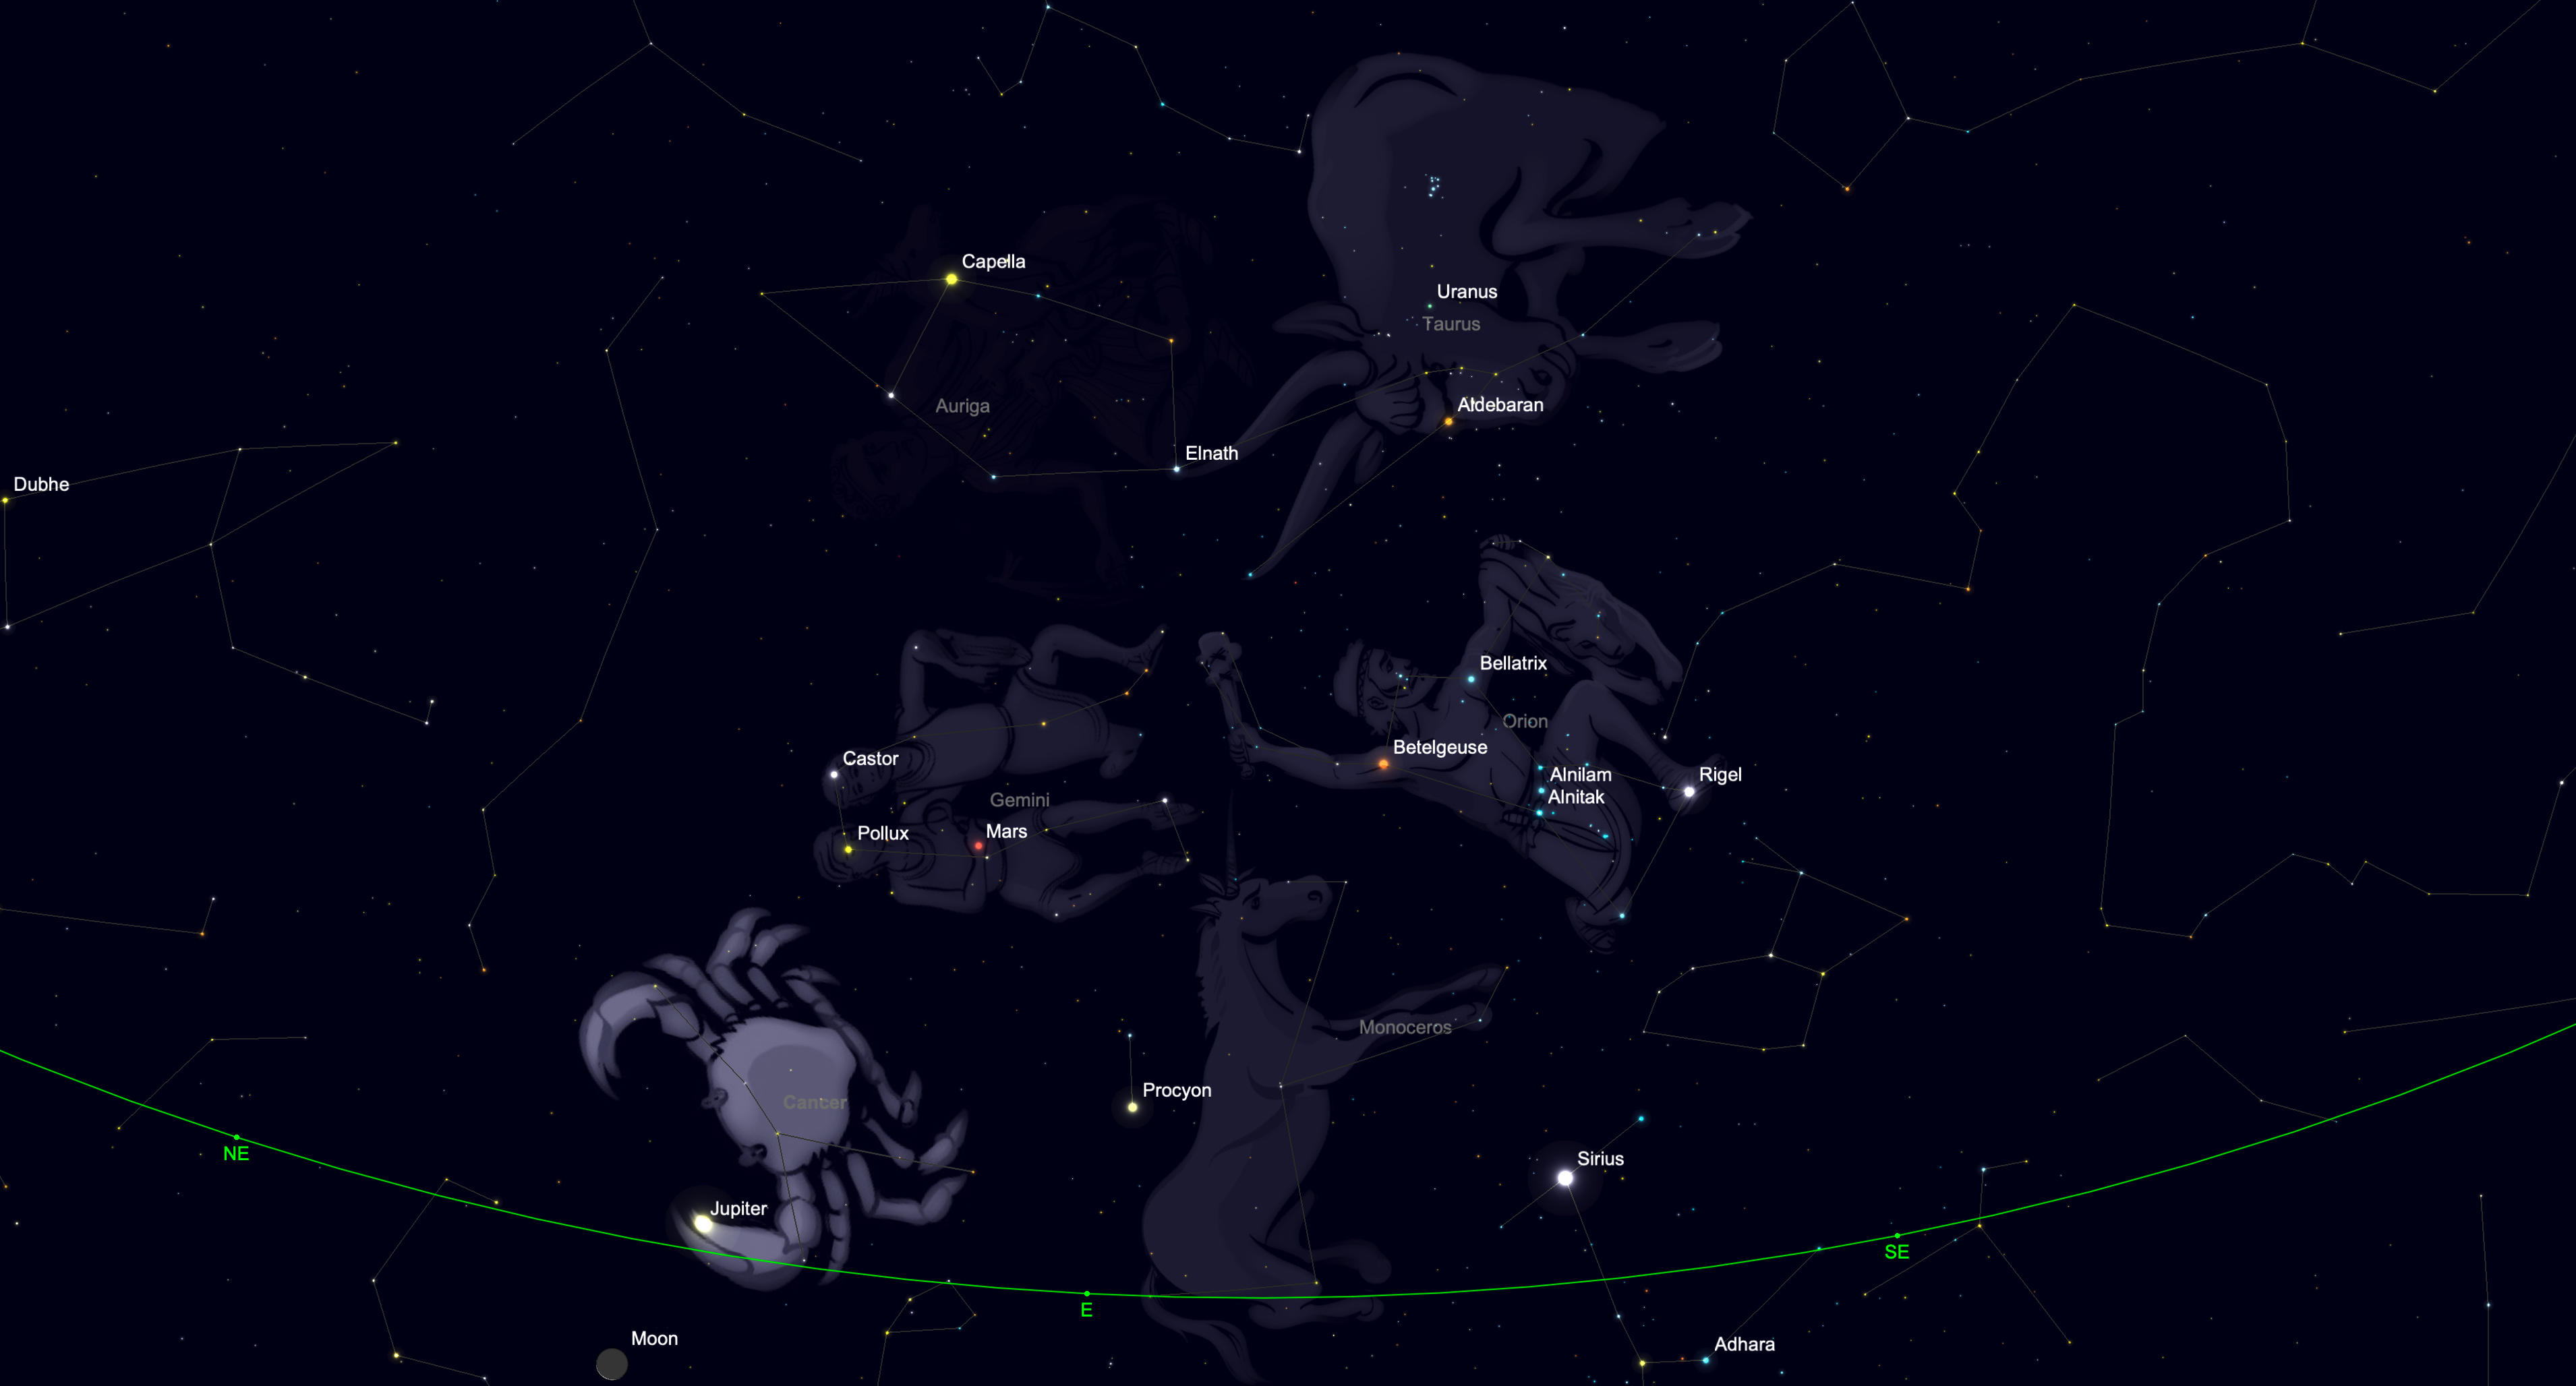
Orionid shooting stars will appear to travel away from a point of origin, close to the red star Betelgeuse in the constellation Orion, rising above the eastern horizon an hour before midnight for viewers in the U.S.

When and where to see Orionid shooting stars this October

Your best chance at spotting the fast-moving meteors will come in the hours before dawn on Oct. 22, after the moon has set and the radiant approaches its highest point in the night sky. It's best not to stare directly at the radiant, where the glowing meteor trails will be relatively short compared to those left by shooting stars that appear 45-90 degrees away from the bright star Betelgeuse, thanks to an effect known as foreshortening.

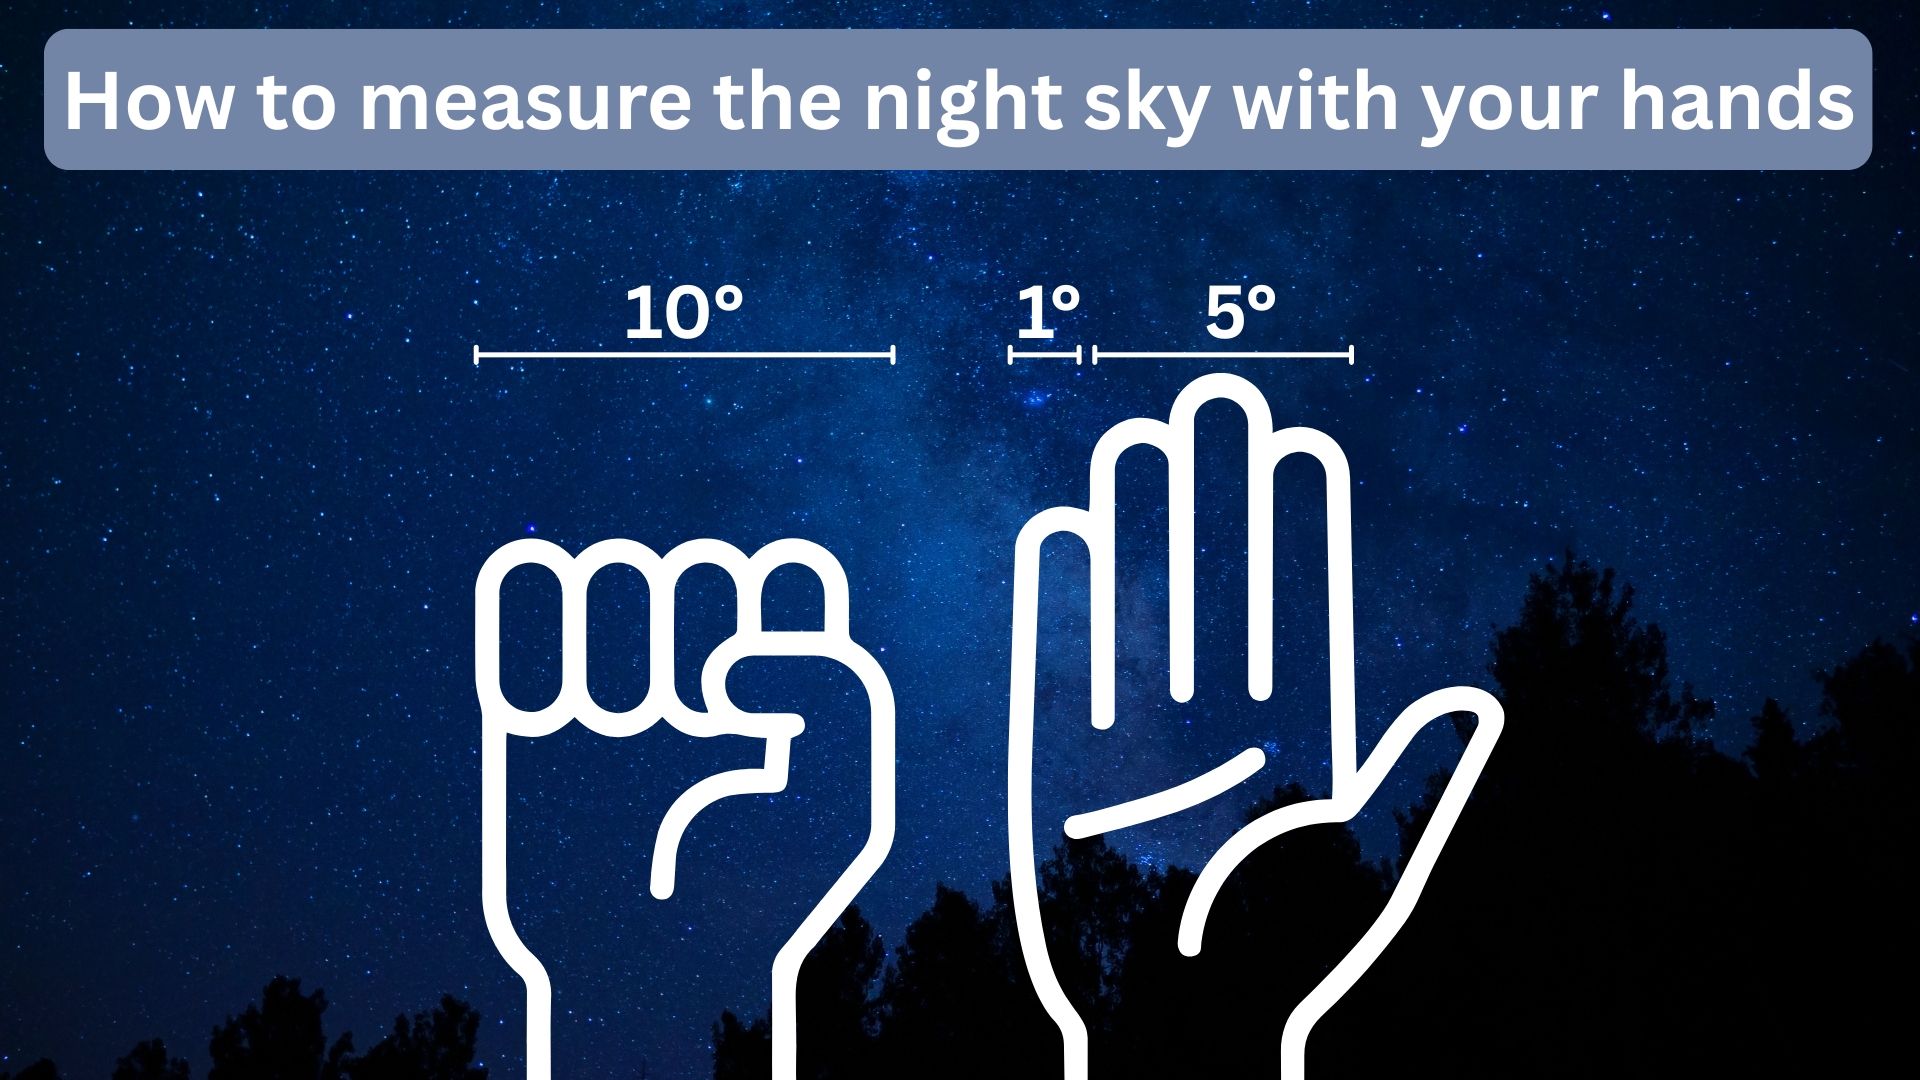
graphic showing how to measure the night sky with your hands showing a clenched fist showing about 10 degrees of sky, a finger is 1 degree and middle three fingers are 5 degrees.

How to measure distances in the night sky using nothing but your hand. (Image credit: Created in Canva Pro)

Try to travel away from city lights and allow 20-30 minutes for your eyes to adapt to the dark. Always make sure someone knows where you're going if you head somewhere remote to catch the shower and be sure to take a red light to ensure that you can find your way while also preserving your night vision!

Editor's Note: If you would like to share your Orionid shooting star photos with Space.com's readers, then please send your image(s), along with your name, location and comments to spacephotos@space.com.

  •  

Red light, white light: How to preserve your night vision while using stargazing apps

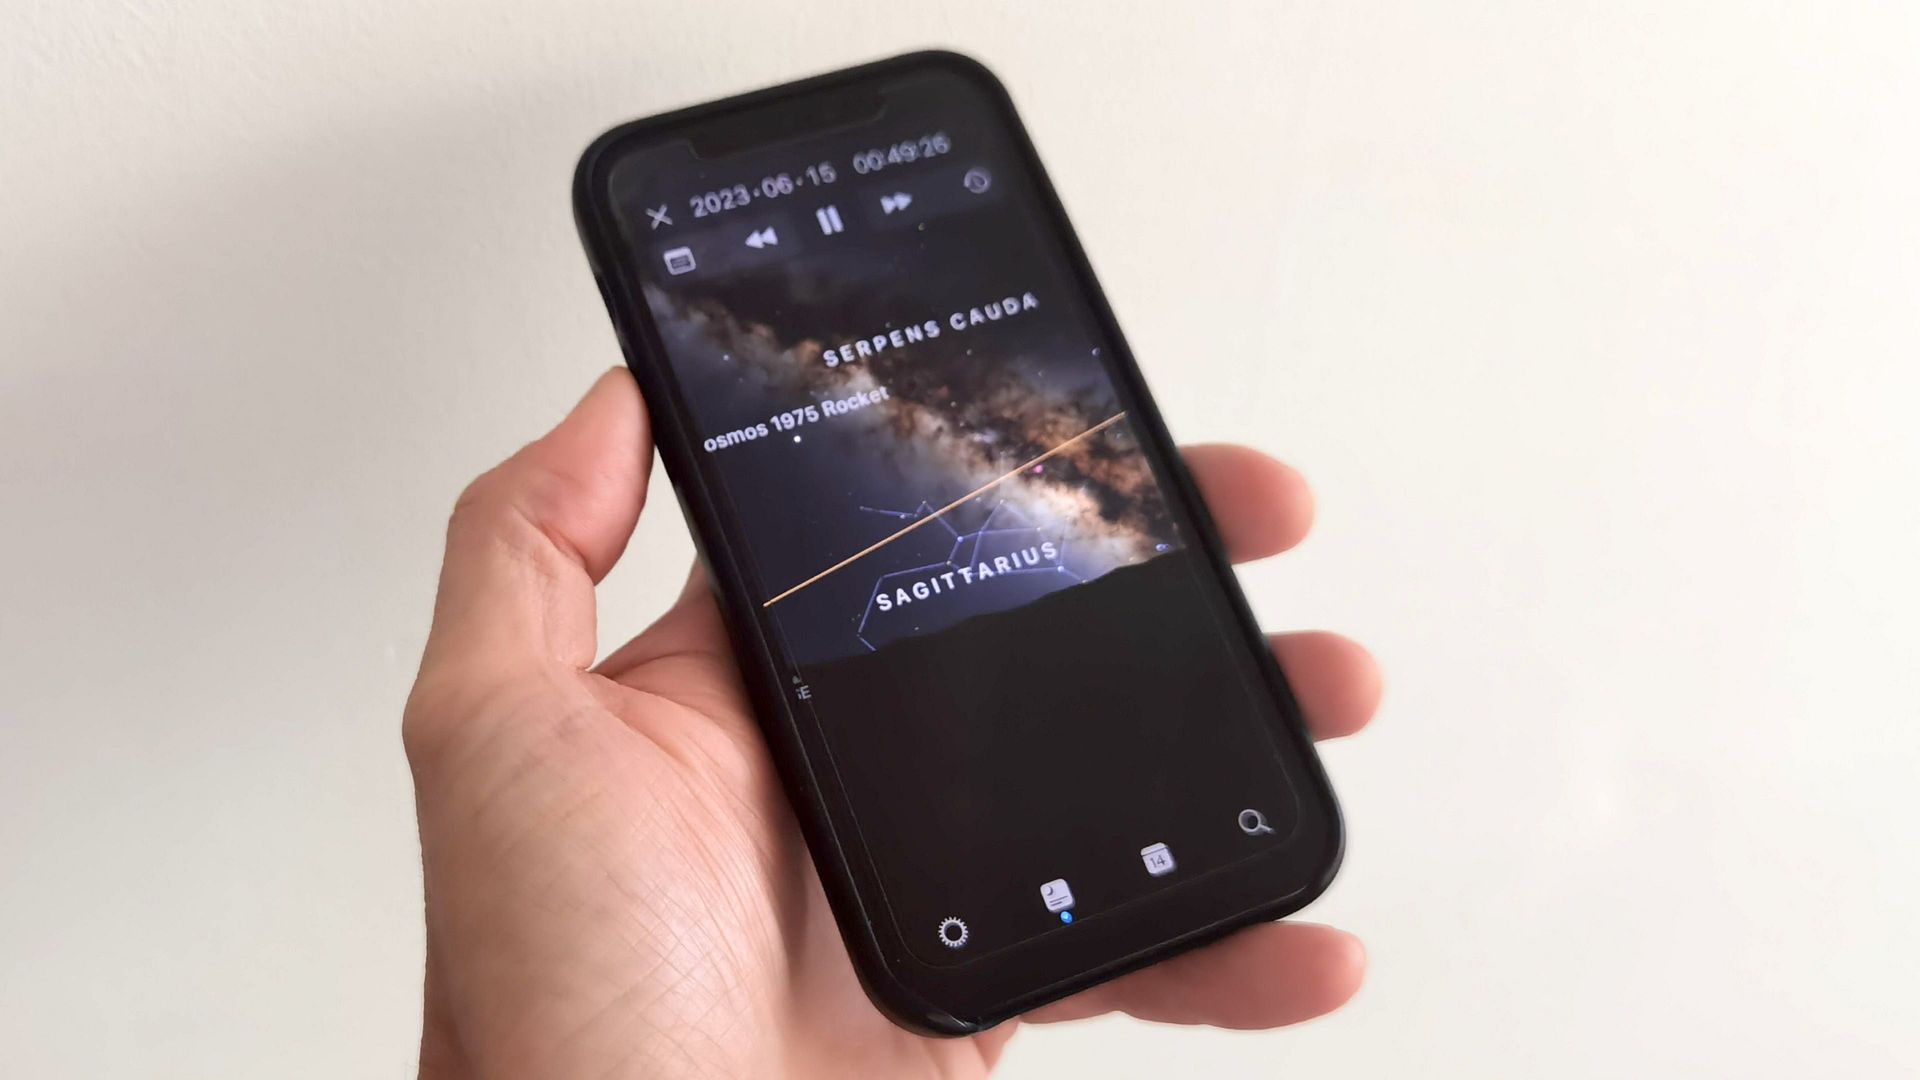
The best stargazing apps can take your observation of the night sky to the next level, whether that's using augmented reality (AR mode) to identify stars or looking up the next lunar eclipse.

However, the bright light emitted by smartphone screens can prevent your eyes from adjusting to the dark. If you're using one of the best telescopes, you'll want to preserve your night vision even more. Fortunately, there are ways to all but eliminate this problem.

Why are bright screens bad for stargazing?

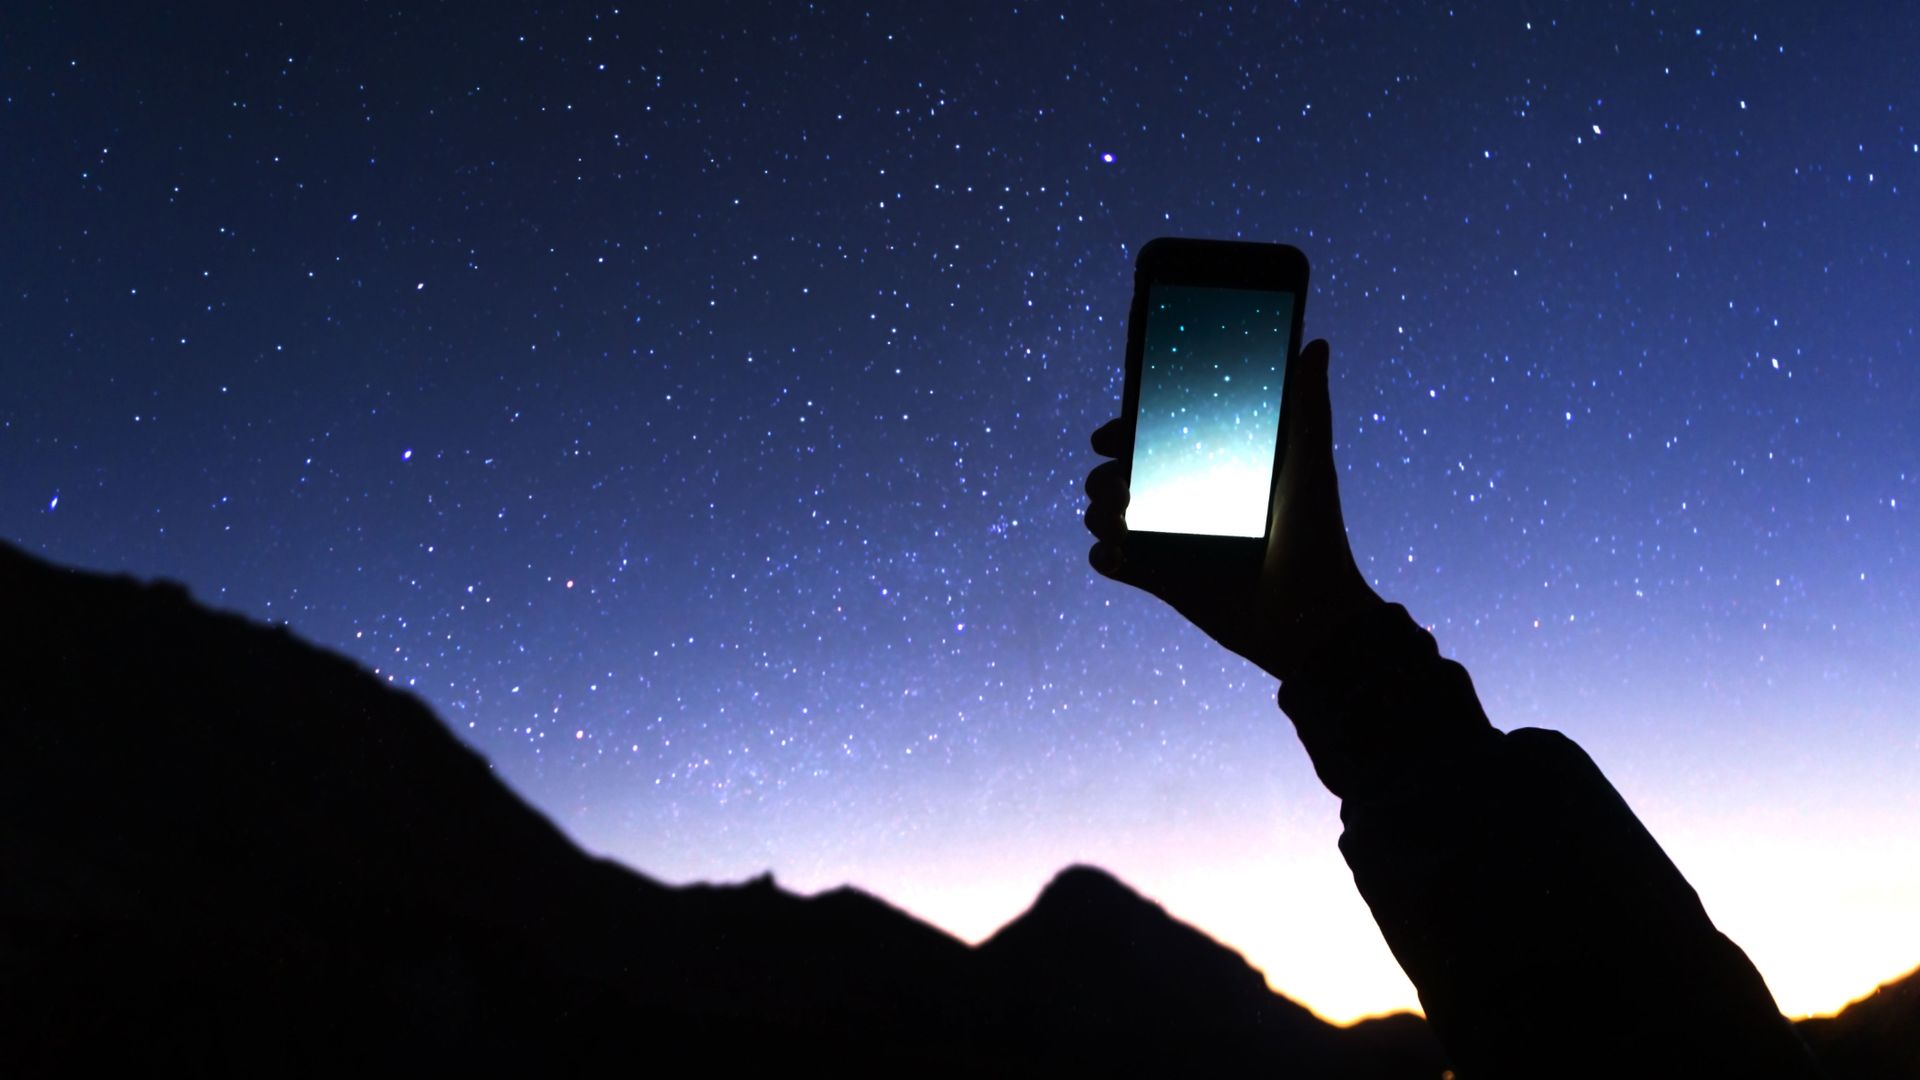
Image shows person holding mobile up to starry night sky

The brighter your screen, the harder you'll find it to spot distant objects in the night sky. (Image credit: Getty Images)

When you step out into the dark, it can take up to 20-30 minutes for your vision to adjust. The rod cells in your eyes build up a chemical known as rhodopsin, which gives you night vision.

However, bright light bleaches that chemical, negatively impacting your night vision. So when you look through a telescope, binoculars or just turn your eyes to the night sky after peering at a bright phone screen, it'll be harder for you to pick out fainter objects such as galaxies and nebulas.

One way of fixing this problem is simply to put your phone away and wait another 20-30 minutes. But if you're using a stargazing app to help you navigate the night skies, that's not really an option.

The good news is that, between individual stargazing apps and your phone's own built-in features, you can minimize the impact of your smartphone's screen light.

How to block white light in stargazing apps

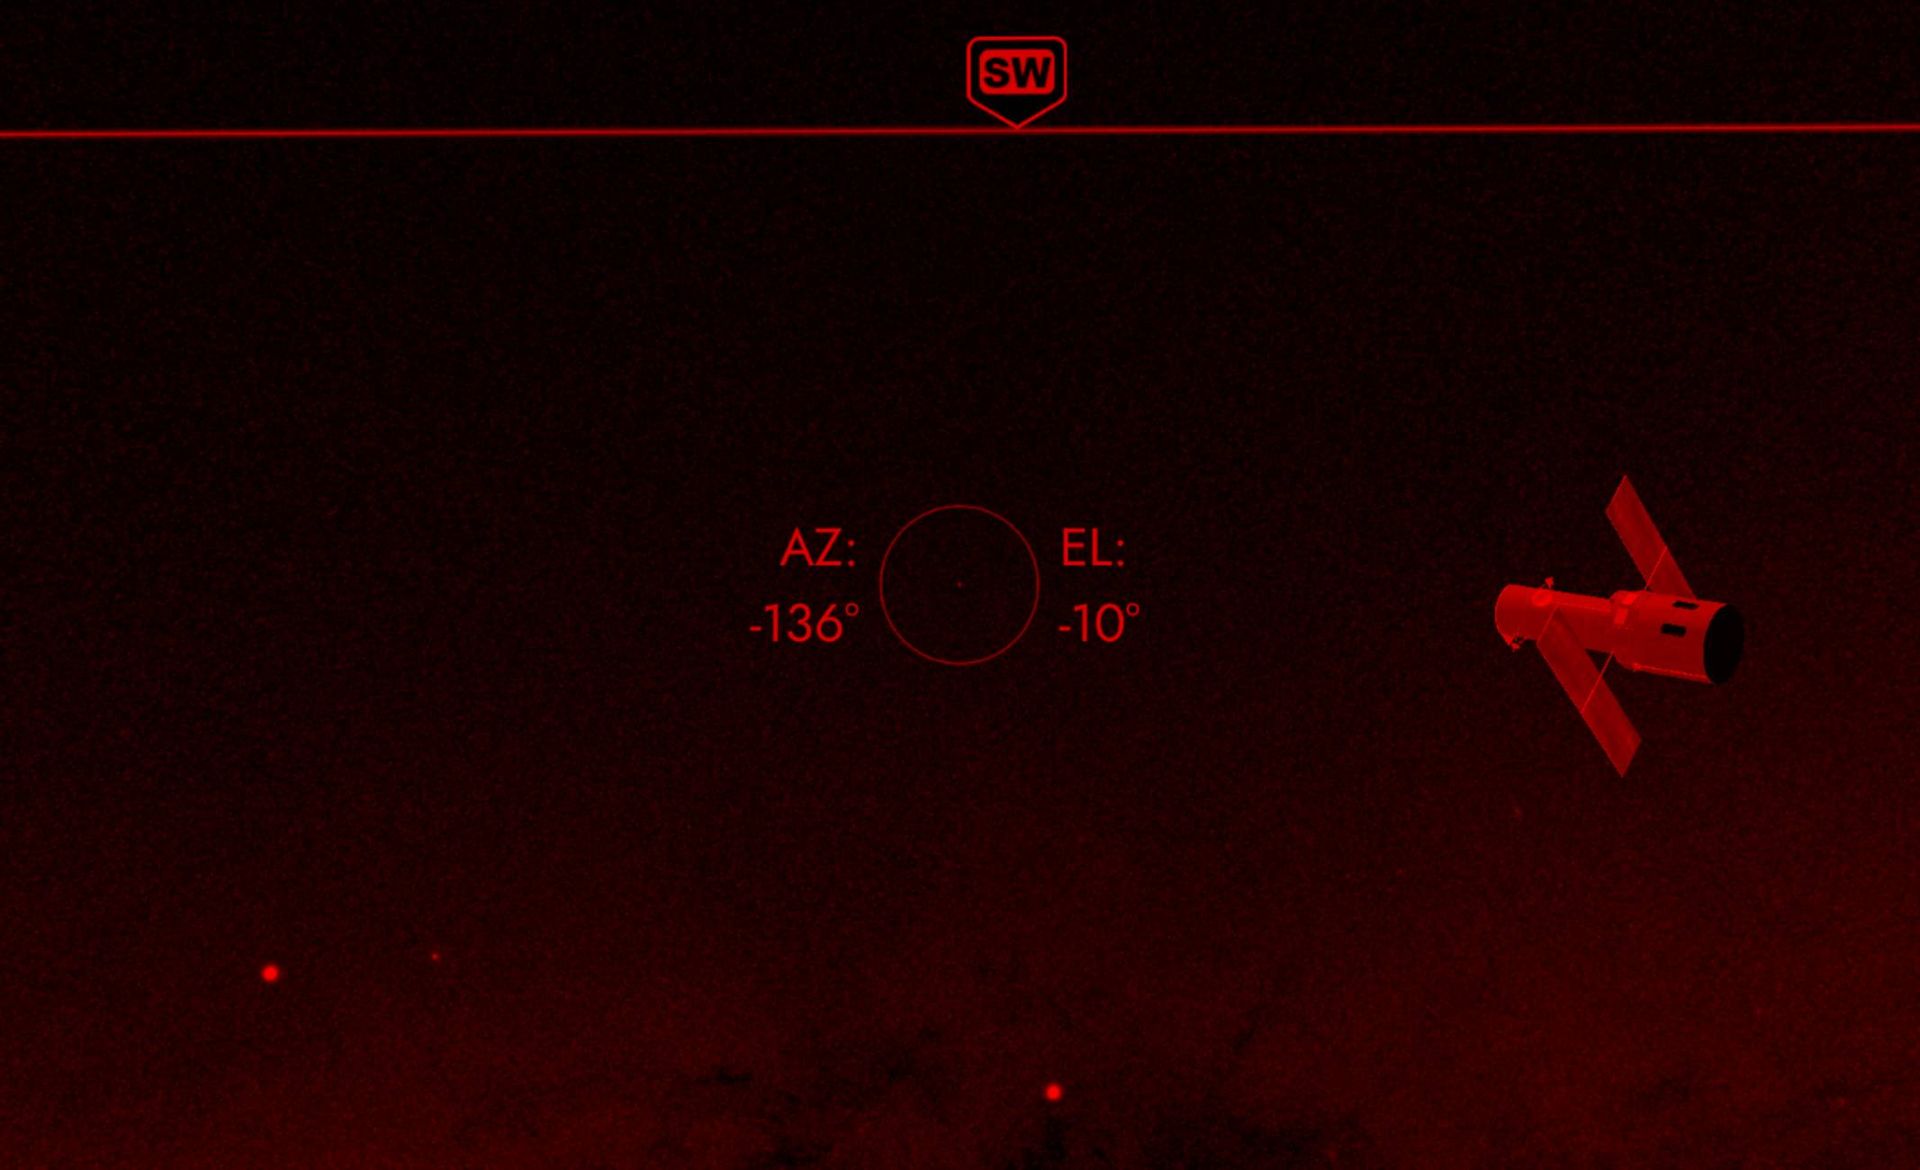
SkyView app on a mobile phone with a red filter.

SkyView and several other stargazing apps let you apply a red filter. (Image credit: Skyview)

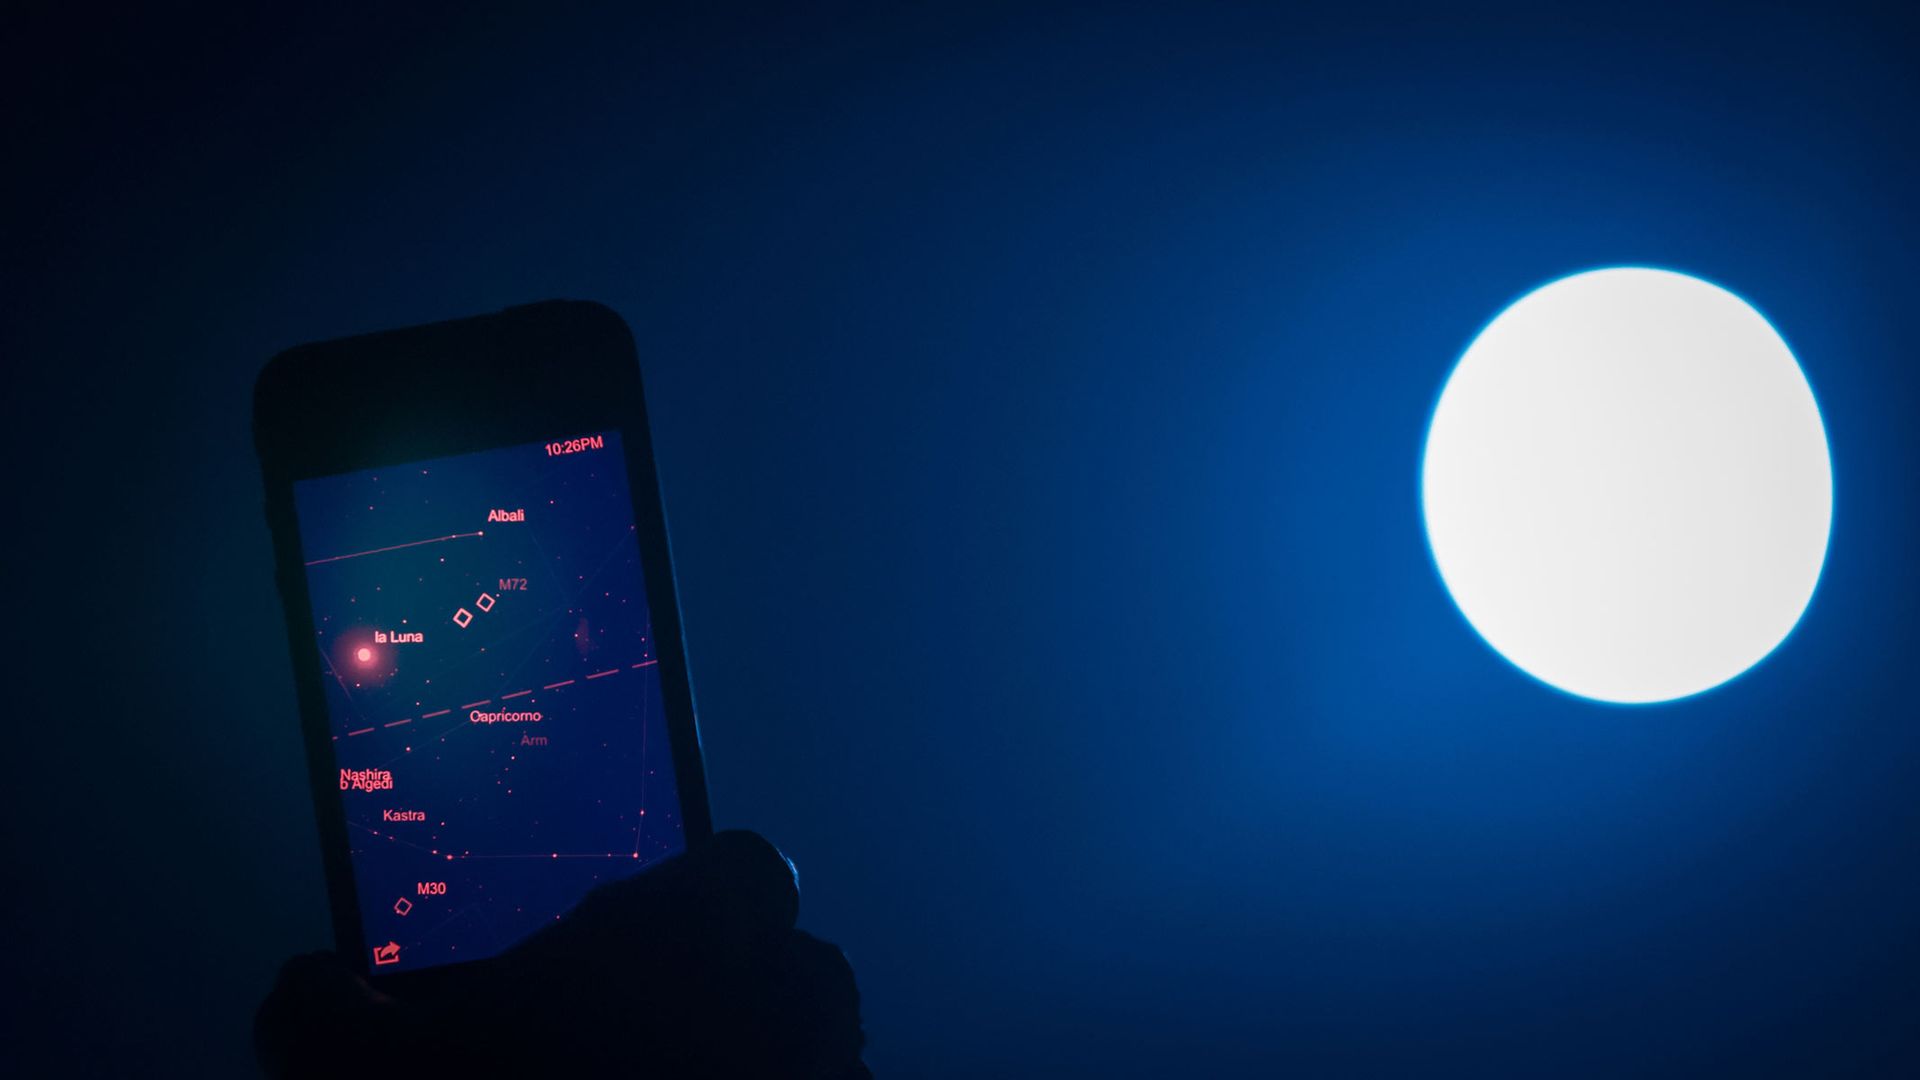
Many of the best stargazing apps will let you enable a red light filter or similar, though this option may not always be present in the free version. Here's how to do that in three of our favorite stargazing apps:

SkyView: Tap the screen, tap the horizontal lines, tap on Settings, then Display, then Night Mode and Red.

Star Walk 2: Tap the horizontal lines, tap on Settings, then tap the button next to Night Mode.

Sky Tonight: Tap the horizontal lines, tap on Settings, then Tools, then Night Mode.

All these modes will minimize the amount of white light coming from the app. However, be aware that this is only within the app. Once you go back to your phone's main menu, it will be at full color. With the red screen naturally looking darker, you may have turned up the brightness on your phone, so making the switch away from the app will be quite the shock.

If you want to dim your whole phone or put it into red light mode, here's how to do that on Android or iPhone.

How to block white light on Android phones

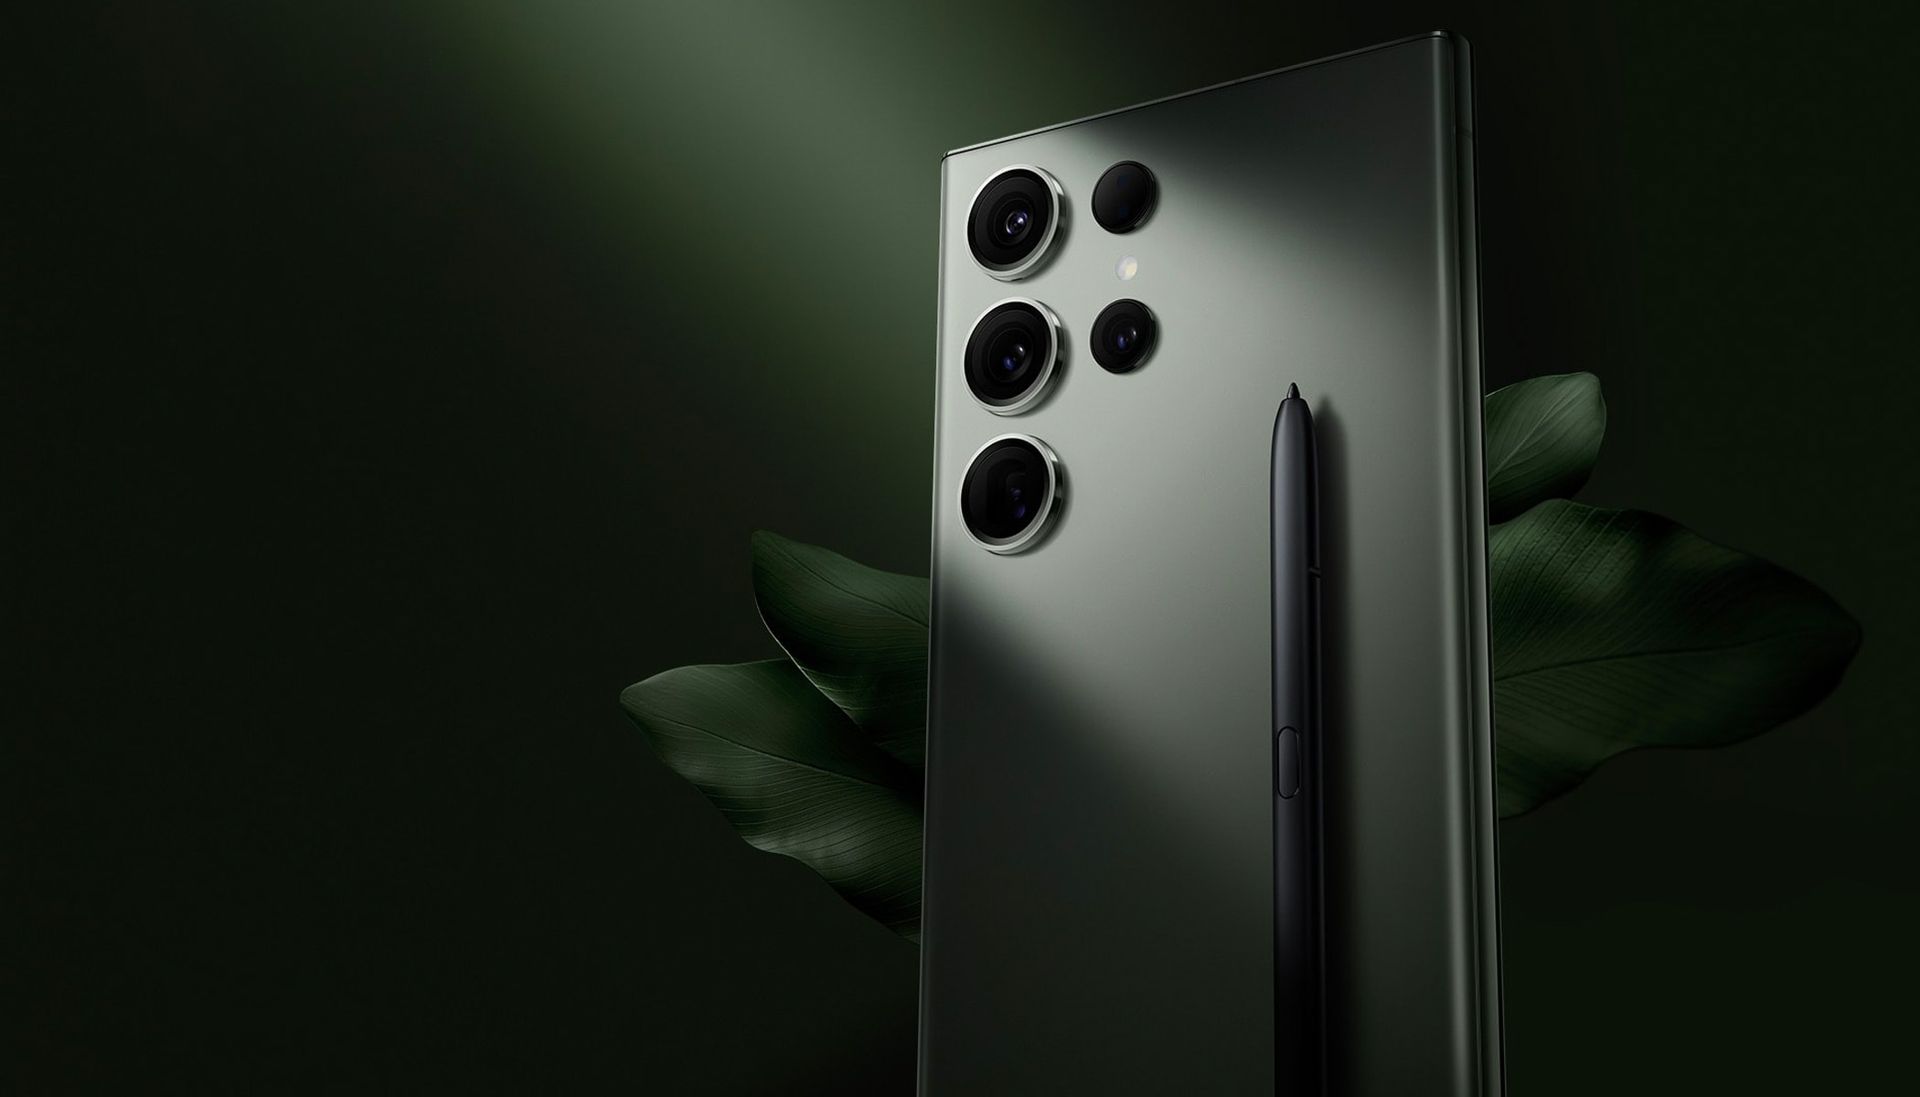
Samsung Galaxy S23 Ultra

Many Android phones, including recent Pixel and Samsung models, include the equivalent of a red filter. (Image credit: Samsung)

On Android, there are several ways to minimize the impact of bright light, depending on the model and make of phone you have.

One near-universal option is to dim your smartphone. Swipe down the notification panel from the top of the screen and you'll see a brightness slider. Slide this to the left to dim your phone.

We'd also recommend disabling adaptive brightness in the Display section of your phone's settings. You may also have an Extra Dim option in the Accessibility menu β€” just don't dim the screen to the point of not being able to see it at all!

Some Android phones, such as recent Samsung and Google Pixel models, also offer a Red Filter. On some, you'll find this in Accessibility, then Vision Enhancements, then Color Filter. You can then choose the color you want and also tweak the opacity.

All the above options will let you continue to use your smartphone for stargazing, while minimizing its negative impact on your night vision.

How to block white light on Apple iPhones

Four iPhone 16 Pro Maxes.

Apple's iPhones also offer an option to minimize the effect of white light. (Image credit: Apple)

As with Android phones, iPhones have a built-in option to dim the screen brightness. In this case, you swipe down from the top of the screen and look for the vertical brightness slider, represented by a sun icon. Reduce the slider as much as you're comfortable with, dimming the screen while still keeping it visible.

Beyond that, recent iPhones also offer the ability to apply a color filter, again via their Accessibility options. Here's how to do that.

First, tap on the Settings icon, then pick Accessibility. Select Display & Text Size and go to Color Filters. Tap the Color Filter button. Then, pick Color Tint and move the Hue and Intensity sliders all the way to the right.

  •  

10 best places to see the 2027 total solar eclipse in Spain

Spain is one of the easiest places in the world to experience the total solar eclipse on Aug. 2, 2027. The so-called "eclipse of the century" first makes landfall in AndalucΓ­a, where totality will last up to 4 minutes and 40 seconds during mid-morning, with the sun comfortably high at around 38-42 degrees above the horizon in the eastern sky. Excellent roads, plentiful accommodation and MΓ‘laga's international airport make this an obvious alternative to North Africa and the Middle East.

However, choosing where to watch requires some thought. Southern Spain's narrowing shape funnels the path toward the Strait of Gibraltar, potentially concentrating huge numbers of eclipse chasers around Tarifa, the Costa del Sol and the British Overseas Territory of Gibraltar during the peak summer holiday season.

From busy Mediterranean beaches to mountain villages, here's where to see the total solar eclipse on Aug. 2, 2027 in southern Spain. All times, totality durations and historical cloud cover data come from Time and Date.

1. Tarifa

A sandy beach with lots of colorful kitesurfing kites under blue sunny sky.

At the southernmost tip of mainland Europe, Tarifa will experience almost four minutes and 40 seconds of totality on Aug. 2, 2027. (Image credit: MEDITERRANEAN via Getty Images)

Location: CΓ‘diz province

Start of totality and duration: 10:45 a.m. CEST; 4 minutes, 40 seconds

Historical August cloud cover: 13%

Altitude of the sun: 38 degrees above east

At the southernmost tip of mainland Europe, where the Atlantic Ocean meets the Mediterranean Sea, Tarifa is likely to be one of the country's busiest eclipse-watching locations because it will experience the longest totality in mainland Spain. Just 9 miles (14 km) across the Strait of Gibraltar from Morocco, the historic port town is known for its whitewashed old town, the medieval Castle of GuzmΓ‘n el Bueno and its long, sandy beaches. Los Lances and Valdevaqueros offer wide horizons and plenty of open space.

2. GaucΓ­n

A green, forested mountain range is dotted with white housing.

The whitewashed mountain village of GaucΓ­n will experience more than three minutes of totality on Aug. 2, 2027. (Image credit: japatino via Getty Images)

Location: MΓ‘laga province, AndalucΓ­a, Spain

Start of totality and duration: 10:46 a.m. CEST; 3 minutes, 13 seconds

Historical August cloud cover: 5%

Altitude of the sun: 38 degrees above east

For eclipse chasers who would rather head into the mountains than join the crowds on the Costa del Sol, Gaucín is an intriguing alternative. One of Andalucía's classic pueblos blancos, the whitewashed village occupies a spectacular position in the mountains above the coast, crowned by the ruins of Castillo del Águila. Its elevated setting offers sweeping views across the surrounding countryside towards Gibraltar and, on clear days, the mountains of North Africa. Crucially, heading inland doesn't sacrifice too much totality.

3. Gibraltar

Breathtaking aerial view of Gibraltar, showcasing the iconic Rock, the city nestled below, the vast expanse of the sea, and the distant African coast under a picturesque cloudy sky.

The Rock of Gibraltar will be plunged into darkness for almost four and a half minutes during the total solar eclipse on Aug. 2, 2027. (Image credit: Eloi_Omella via Getty Images)

Location: Gibraltar

Start of totality and duration: 10:45 a.m. CEST; 4 minutes, 29 seconds

Historical August cloud cover: 17%

Altitude of the sun: 38 degrees above east

Few places in Europe could provide a more dramatic setting for totality than Gibraltar, the tiny British Overseas Territory dominated by its famous 1,398-foot (426-meter) limestone Rock. However, eclipse chasers will need to view either from The Rock or its east coast, where elevated viewpoints and beaches face the Mediterranean and the eclipsed sun. However, Gibraltar has a potential complication β€” the easterly Levanter wind can create a distinctive cap of cloud over the Rock even when surrounding skies are clear. Another issue is accommodation, which is already at a premium. See Gibraltar Eclipse 2027.

4. La LΓ­nea de la ConcepciΓ³n

The giant Rock of Gibraltar towers over the night-time lit city.

La LΓ­nea de la ConcepciΓ³n offers the chance to watch more than four minutes of totality with the Rock of Gibraltar dominating the horizon. (Image credit: fhm via Getty Images)

Location: CΓ‘diz province

Start of totality and duration: 10:45 a.m. CEST; 4 minutes, 24 seconds

Historical August cloud cover: 17%

Altitude of the sun: 38 degrees above east

Immediately north of Gibraltar, La LΓ­nea de la ConcepciΓ³n occupies the sandy isthmus between the Bay of Gibraltar and the Mediterranean Sea. Its location creates one of Spain's most distinctive possibilities for eclipse photography. On the Mediterranean side, Playa de Santa BΓ‘rbara is a wide sandy beach north of the border, with the immense Rock of Gibraltar rising to the south β€” a potentially spectacular foreground. The city has around 9 miles (14 kilometers) of coastline, providing plenty of alternatives for eclipse viewing.

5. Estepona

On the left is a paved path lined with palm trees. On the right is a flat sandy beach. In the foreground there is a small boat on the sand, surrounded by 3 palm trees.

Estepona on the Costa del Sol will experience more than three and a half minutes of totality on Aug. 2, 2027. (Image credit: John Harper via Getty Images)

Location: Costa del Sol, MΓ‘laga province

Start of totality and duration: 10:46 a.m. CEST; 3 minutes, 41 seconds

Historical August cloud cover: 7%

Altitude of the sun: 38 degrees above east

About an hour's drive southwest of MΓ‘laga Airport, Estepona is one of the Costa del Sol's most attractive resort towns, with a pedestrianized old quarter of whitewashed streets, colorful flowerpots and squares centered on Plaza de las Flores. For eclipse day, the mile-long Playa de la Rada is the obvious gathering place, with its broad Mediterranean horizon and proximity to the town center. Other attractions include Estepona Marina and the Sierra Bermeja mountains rising behind the coast.

6. CΓ‘diz

Colorful sunset over a historic city center. There are white and yellow buildings, with several tall towers.

The ancient Atlantic port of CΓ‘diz will experience almost three minutes of totality on Aug. 2, 2027. (Image credit: Flottmynd via Getty Images)

Location: CΓ‘diz province

Start of totality and duration: 10:45 a.m. CEST; 2 minutes, 56 seconds

Historical August cloud cover: 13%

Altitude of the sun: 37 degrees above east

Historic CΓ‘diz occupies a narrow peninsula jutting into the Atlantic and is packed with reminders of its long maritime past, including the CΓ‘diz Cathedral, the Roman Theatre and Torre Tavira, one of more than 100 watchtowers once used to spot approaching ships. For eclipse day, the long, sandy Playa de la Victoria offers plenty of open space, while La Caleta provides a more historic setting between two coastal castles.

7. MΓ‘laga

Aerial view of the giant MΓ‘laga Cathedral and historic dense city center at sunset. In the distance you can see the palm tree-lined harbour.

MΓ‘laga, capital of the Costa del Sol, will experience almost two minutes of totality on Aug. 2, 2027. (Image credit: Guven Ozdemir via Getty Images)

Location: MΓ‘laga province

Start of totality and duration: 10:48 a.m. CEST; 2 minutes

Historical August cloud cover: 9%

Altitude of the sun: 39 degrees above east

MΓ‘laga may lose some duration compared with locations farther west, but it makes up for it with excellent transport links, plentiful accommodation and all the attractions of a major Mediterranean city. It combines the hilltop Gibralfaro Castle and Moorish Alcazaba with a Roman theatre, cathedral, museums and a lively historic center. For eclipse day, the obvious option is the coast. La Malagueta beach is within walking distance of the city center, while numerous beaches extend east and west along the Costa del Sol.

8. Torremolinos

Aerial view of the Mediterranean coast. There are large hills in the background, looming over the city below. Above is a blue sky, dotted with large clouds.

The beaches of Torremolinos on the Costa del Sol will experience almost three minutes of totality on Aug. 2, 2027. (Image credit: By LTCE via Getty Images)

Location: MΓ‘laga province

Start of totality and duration: 10:47 a.m. CEST; 2 minutes, 46 seconds

Historical August cloud cover: 11%

Altitude of the sun: 39 degrees above east

One of the best-known resorts on Spain's Costa del Sol, Torremolinos combines a long Mediterranean beachfront with easy access to MΓ‘laga and its international airport. Its 4-mile (6-kilometer) promenade links broad sandy beaches, including Playa del Bajondillo and Playa de la Carihuela, offering plenty of potential eclipse-watching spots with views toward the eastern sky. For a higher vantage point, nearby Mount Calamorro rises almost 2,600 feet (800 meters) above BenalmΓ‘dena, with panoramic views across the Costa del Sol and, on clear days, towards Gibraltar and North Africa.

9. Marbella

Aerial view of a large marina at sunrise.

Marbella's Mediterranean beaches will experience more than three minutes of totality on Aug. 2, 2027. (Image credit: Tu xa Ha Noi via Getty Images)

Location: Costa del Sol, MΓ‘laga province

Start of totality and duration: 10:46 a.m. CEST; 3 minutes, 21 seconds

Historical August cloud cover: 7%

Altitude of the sun: 38 degrees above east

Marbella has around 17 miles (27 kilometers) of Mediterranean coastline, so eclipse chasers will have dozens of beaches to choose from, from San Pedro de AlcΓ‘ntara in the west to Cabopino in the east. Options include the sandy beaches and dunes around Cabopino, Las Chapas, Puerto BanΓΊs and San Pedro de AlcΓ‘ntara, all with open views across the Mediterranean. Away from the beach, Marbella offers a whitewashed old town centered on Plaza de los Naranjos, while the Sierra Blanca mountains provide a dramatic backdrop to the resort.

10. Motril

Three lonely palm trees on a large white beach.

Motril on Spain's Costa Tropical lies close to the northern edge of the path of totality on Aug. 2, 2027. (Image credit: Getty Images)

Location: Costa Tropical, Granada province

Start of totality and duration: 10:49 a.m. CEST; 1 minute, 57 seconds

Historical August cloud cover: 10%

Altitude of the sun: 39 degrees above east

Close to the northern edge of the path of totality, Motril gets a shorter eclipse than destinations farther west, but could be among the quieter places on Spain's Mediterranean coast from which to experience it. The largest town on Granada's Costa Tropical sits between the Mediterranean and the foothills of the Sierra de LΓΊjar, with the Sierra Nevada rising beyond. Nearby Playa Granada and Playa Poniente offer broad coastal views.

  •  

6 scientifically accurate star projectors to turn any room into a home planetarium

Want to educate young children about the wonders of the cosmos? Depending on the time of year, your location and the weather, your hopes to see the night sky in real life might not be as easy as heading into the backyard and peering up. That's why one of the best star projectors might be the solution.

That's why we've picked out six star projectors that actually deliver scientifically accurate images, from projections of the northern hemisphere to breathtaking pictures from the Hubble Space Telescope.

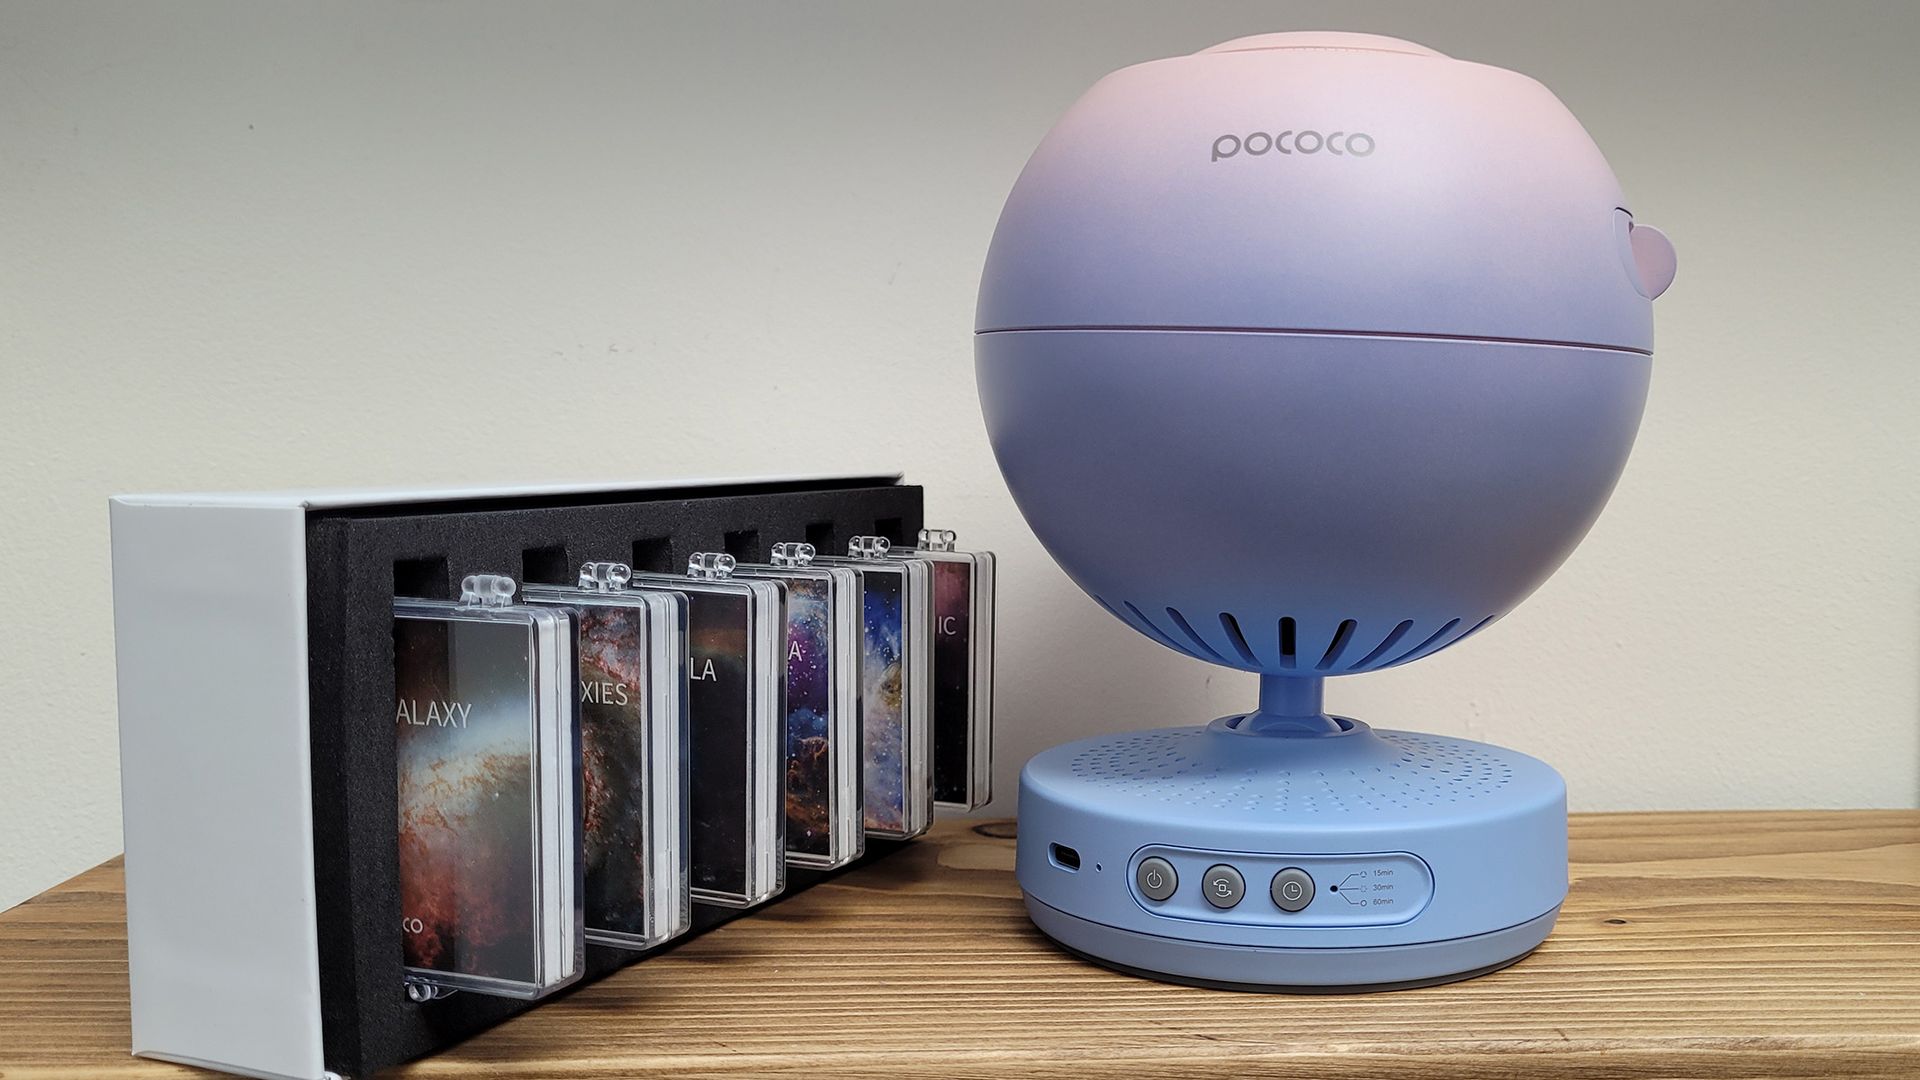
Any one of these will turn your home into a private planetarium. Each comes with several swappable images, and you can purchase additional slides/discs for the Homestar and Pococo models. If you're seeking to stimulate a child's interest in space and STEM or just take your friends on a journey through space, these are the scientifically accurate projectors to purchase.

Homestar Classic

Sega Toys
Homestar Classic

Bresser Junior Astroplanetarium Deluxe

Bresser
Junior Astroplanetarium Deluxe

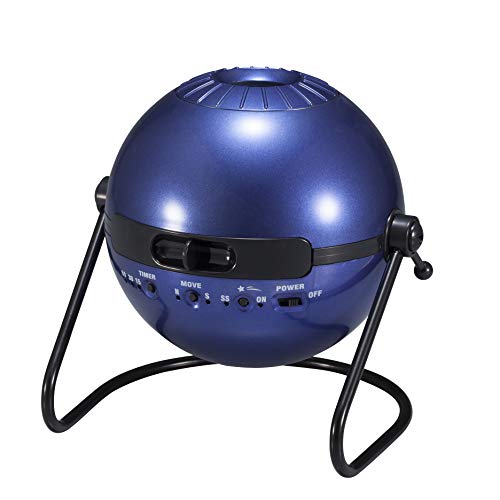
Sega Homestar Matataki (navy) Home Planetarium Star Projector

Sega Toys
Homestar Matataki

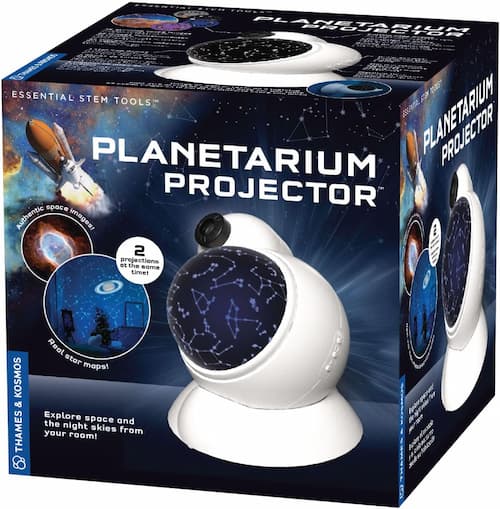
A Thames and Kosmos in its box.

Thames and Kosmos
Planetarium Projector

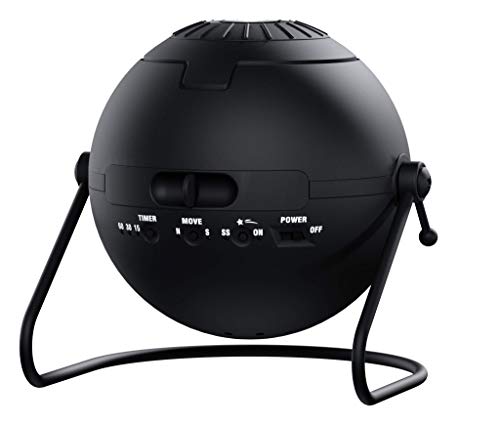
Sega Toys Homestar Flux (satin Black) Home Planetarium Star Projector

Sega Toys
Homestar Flux

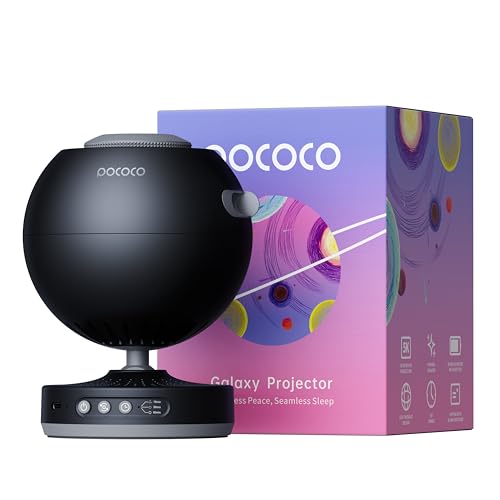
Pococo Galaxy Star Projector, Rechargeable, With 5k Discs, 2 Megapixel Lens

Pococo
Galaxy Star Projector

  •  

The Orionid meteor shower peaks next week! Here's what to expect

The Orionid meteor shower peaks overnight on Oct. 21-22, triggering a spectacular display of shooting stars as Earth plunges through the densest part of the debris trail shed by Halley's Comet. Here's what you need to know.

When is the best time to see Orionid shooting stars?

Orionid meteors are best spotted between the hours of midnight and dawn on Oct. 22, when 10-20 shooting stars may be seen brightening the night sky each hour under ideal dark-sky.

The glare cast by the 74%-lit waxing gibbous moon will hide fainter shooting stars for much of the night. Thankfully, the lunar disk will set a few hours after midnight, leaving a window of beautifully dark sky before dawn in which to enjoy the full majesty of the annual meteor shower. Remember to use a trusted website like Time and Date to discover the exact moment of moonset for your location.

Where should I look to see Orionid meteors?

Orionid shooting stars will appear to originate from a patch of sky, or radiant, located close to the red giant star Betelgeuse in the constellation Orion, which glistens above the southeastern horizon for stargazers in the U.S. during the early hours of Oct. 22.

For the best views look 40-90 degrees away from the radiant, where the glowing trains left in the wake of the fast-moving meteors will be at their longest. Be sure to head away from artificial lights and allow 20-30 minutes for your eyes to fully adapt to the dark for the best

What causes the Orionid meteor shower?

The Orionid meteor shower is active each year as Earth passes through the stream of debris left behind by Comet 1P/Halley, which was observed by a fleet of spacecraft when it last visited the inner solar system in 1986.

Shooting stars become visible when particles of the ancient comet collide with our planet's atmosphere at 147,600 miles per hour (237,539 kilometers per hour), vaporizing in a spectacular display of natural fireworks.

Hoping to catch a shooting star for yourself? Then be sure to read our guide to photographing meteor showers, along with our picks of the best cameras and lenses for astrophotography.

Editor's Note: If you would like to share your Orionid photos with Space.com's readers, then please send your photo(s), comments, and your name and location to spacephotos@space.com.

  •  

When not to watch a meteor shower β€” why I'm not staying up for the Orionids

I used to think being interested in the night sky meant I had to try every meteor shower. If a calendar said "peak," I interpreted that as an instruction. I'd set an alarm, find several layers of clothing and go outside at around 2:00 a.m. when even the neighborhood cats seemed surprised to see me. Then I'd spend an increasingly resentful 45 minutes staring upward, occasionally see one meteor and wonder whether I was somehow doing it all wrong. As I've grown into stargazing, I've become much more selective.

The Orionids peak next week, and normally I'd be tempted. These fast meteors come from debris from Halley's Comet, which is enough of a connection to make almost anyone want to go outside. However, another object is in the sky this year β€” a big, bright waxing gibbous moon that will brighten the night sky and make "shooting stars" very hard to see.

That doesn't make the Orionids unobservable. In fact, there is a narrow window when the night sky will be free from moonlight. But it does make me far less inclined to sacrifice an entire night for them, and I certainly won't be trying to spend the night camping under a dark sky in a remote rural location far from light pollution. I've discovered that knowing when not to observe is an underrated stargazing skill.

What's happening and when to look

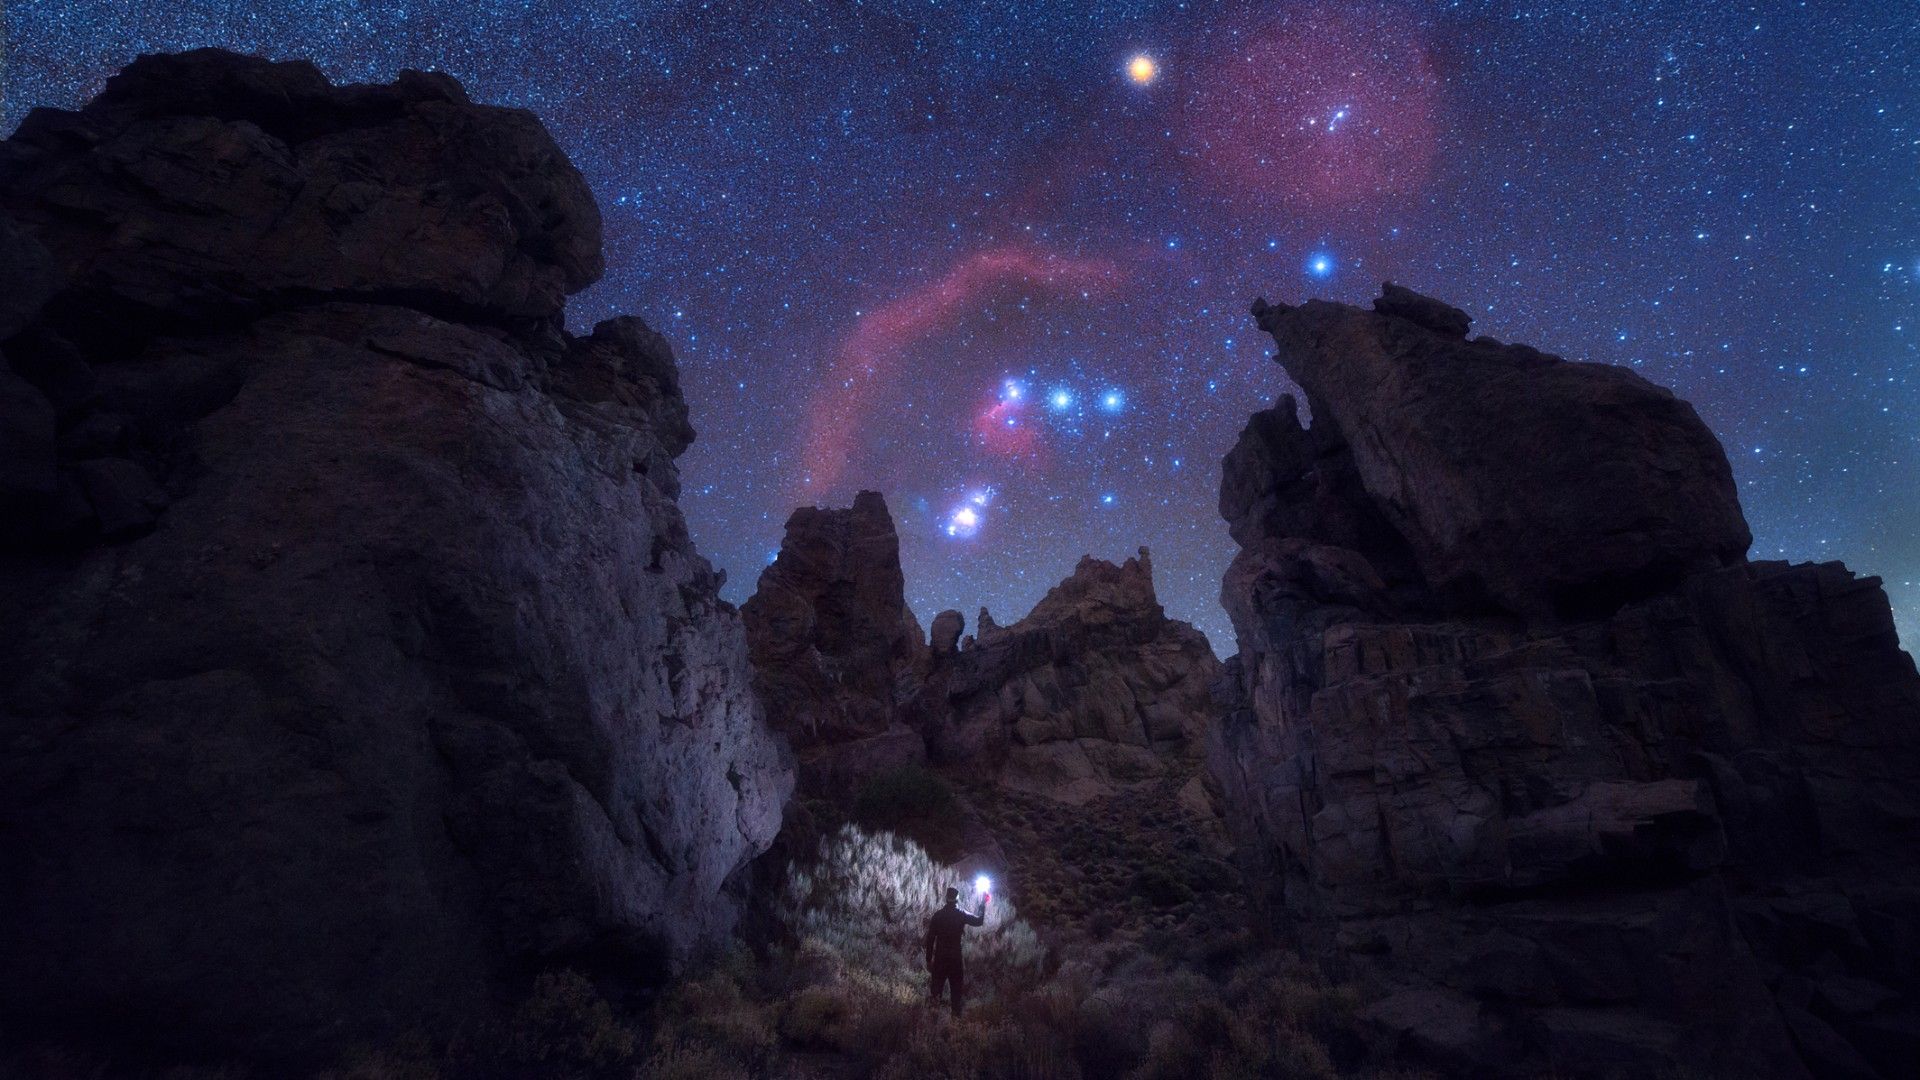
A night sky showing the constellation Orion peaking between large craggy rocks. At the bottom is a human holding up a light.

The Orionid meteor shower's radiant is the constellation Orion. (Image credit: Inigo Cia via Getty Images)

The Orionids are active from Oct. 2 through Nov. 7, with their 2026 maximum expected overnight on Oct. 21-22. They appear to radiate from a point near Orion, although the meteors themselves can streak across almost any part of the sky.

The shower happens because Earth crosses a stream of debris left behind by Halley's Comet, which was last in the inner solar system in 1986 and will return in 2061. Those tiny particles hit our atmosphere at roughly 41 miles (66 kilometers) per second, making Orionids particularly fast meteors.

Under ideal conditions, the International Meteor Organization gives the shower a zenithal hourly rate of 20 or more around maximum. But "zenithal hourly rate" is not the same as promising that I will personally see 20 meteors while standing in my backyard for an hour. It assumes an excellent dark sky, a well-placed radiant and unobstructed viewing. In reality, that's impossible β€” at the very least you'd have to have eyes in the back of your head. And on each side.

This year adds another complication. The moon reaches first quarter on Oct. 18 and continues waxing toward full on Oct. 26. On the peak night of the Orionids, an 80%-illuminated waxing gibbous moon will be in the night sky as it gets dark on Oct. 21 and sets around 03:00 a.m. local time across Europe and North America on Oct. 22. You can probably see the workaround. Sunrise is roughly 06:30 a.m. local time, which means astronomical darkness β€” when the sun is more than 18 degrees below the horizon, meaning complete darkness β€” lasts until around 05:00 a.m. local time (these times work as a ballpark, but you can (check the exact times of moonset and sunrise for your location on Time and Date).

So there is a dark window before dawn, and that is when I would try to see the shower if I were determined to see it. The Orionid radiant is also much better placed after midnight than it is in the evening.

Knowing exactly what's going to happen in the sky turns a casual meteor watch into a rather more calculated exercise.

How and when I'm watching it

My plan for the Orionids this year is the same as usual β€” after checking the moon phase and the moonset and sunrise times, there's one more variable. The weather forecast first.

If the forecast is excellent and I'm feeling enthusiastic, I'll target the period after moonset and before morning twilight on Oct. 22. If it's due to be cloudy, I'm staying in bed.

This sounds obvious, but I think beginners are sometimes given the impression that successful stargazing requires heroic commitment. It doesn't. A meteor shower is not a performance that disappears the moment the advertised "peak" passes. The Orionids have a relatively broad period of activity, so meteors can appear on nights either side of maximum, too.

If I do go outside at 3:00 a.m., I'll do so without two hugely valuable resources for meteor showers β€” a lawn chair and bags of patience.

Stargazer's corner: October 16-22, 2026

Close up of the moon. The surface of the moon has many craters.

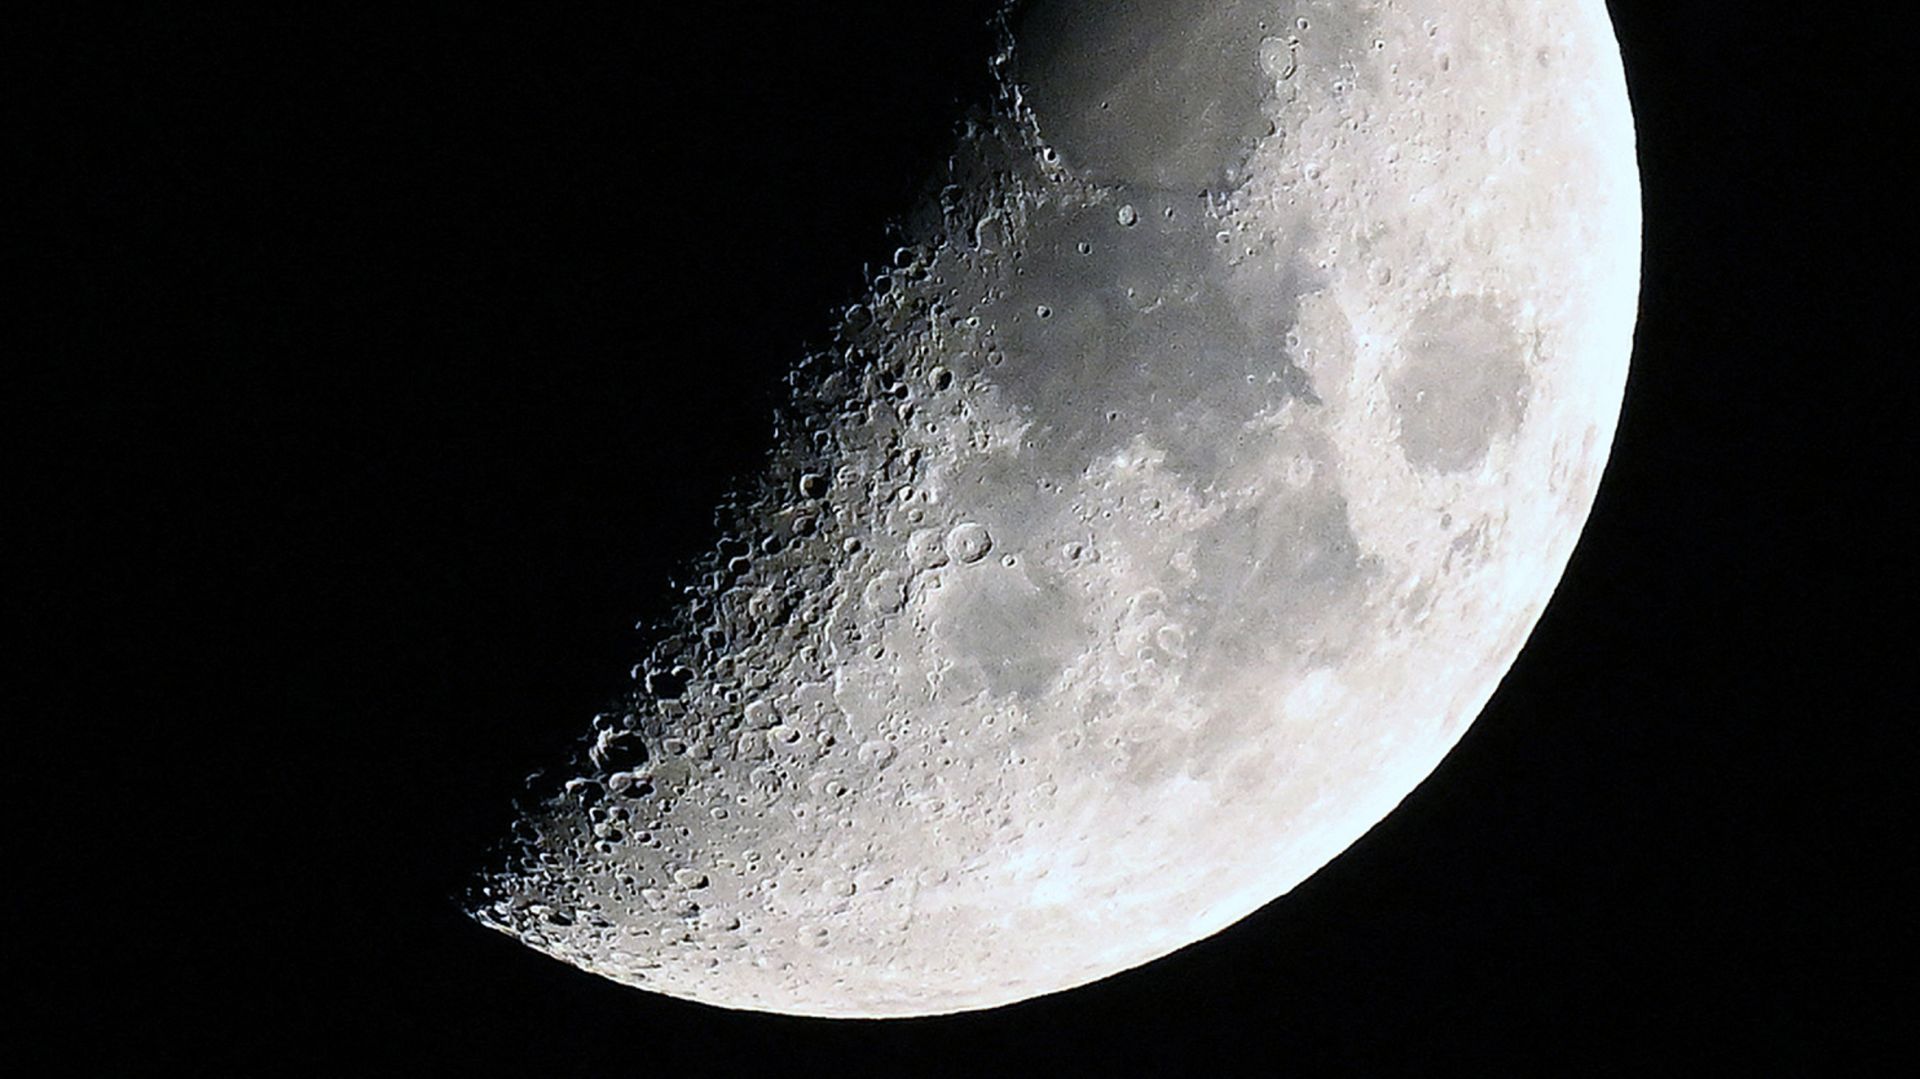
A first quarter moon is ideal for a pair of binoculars. (Image credit: Darwin Fan via Getty Images)

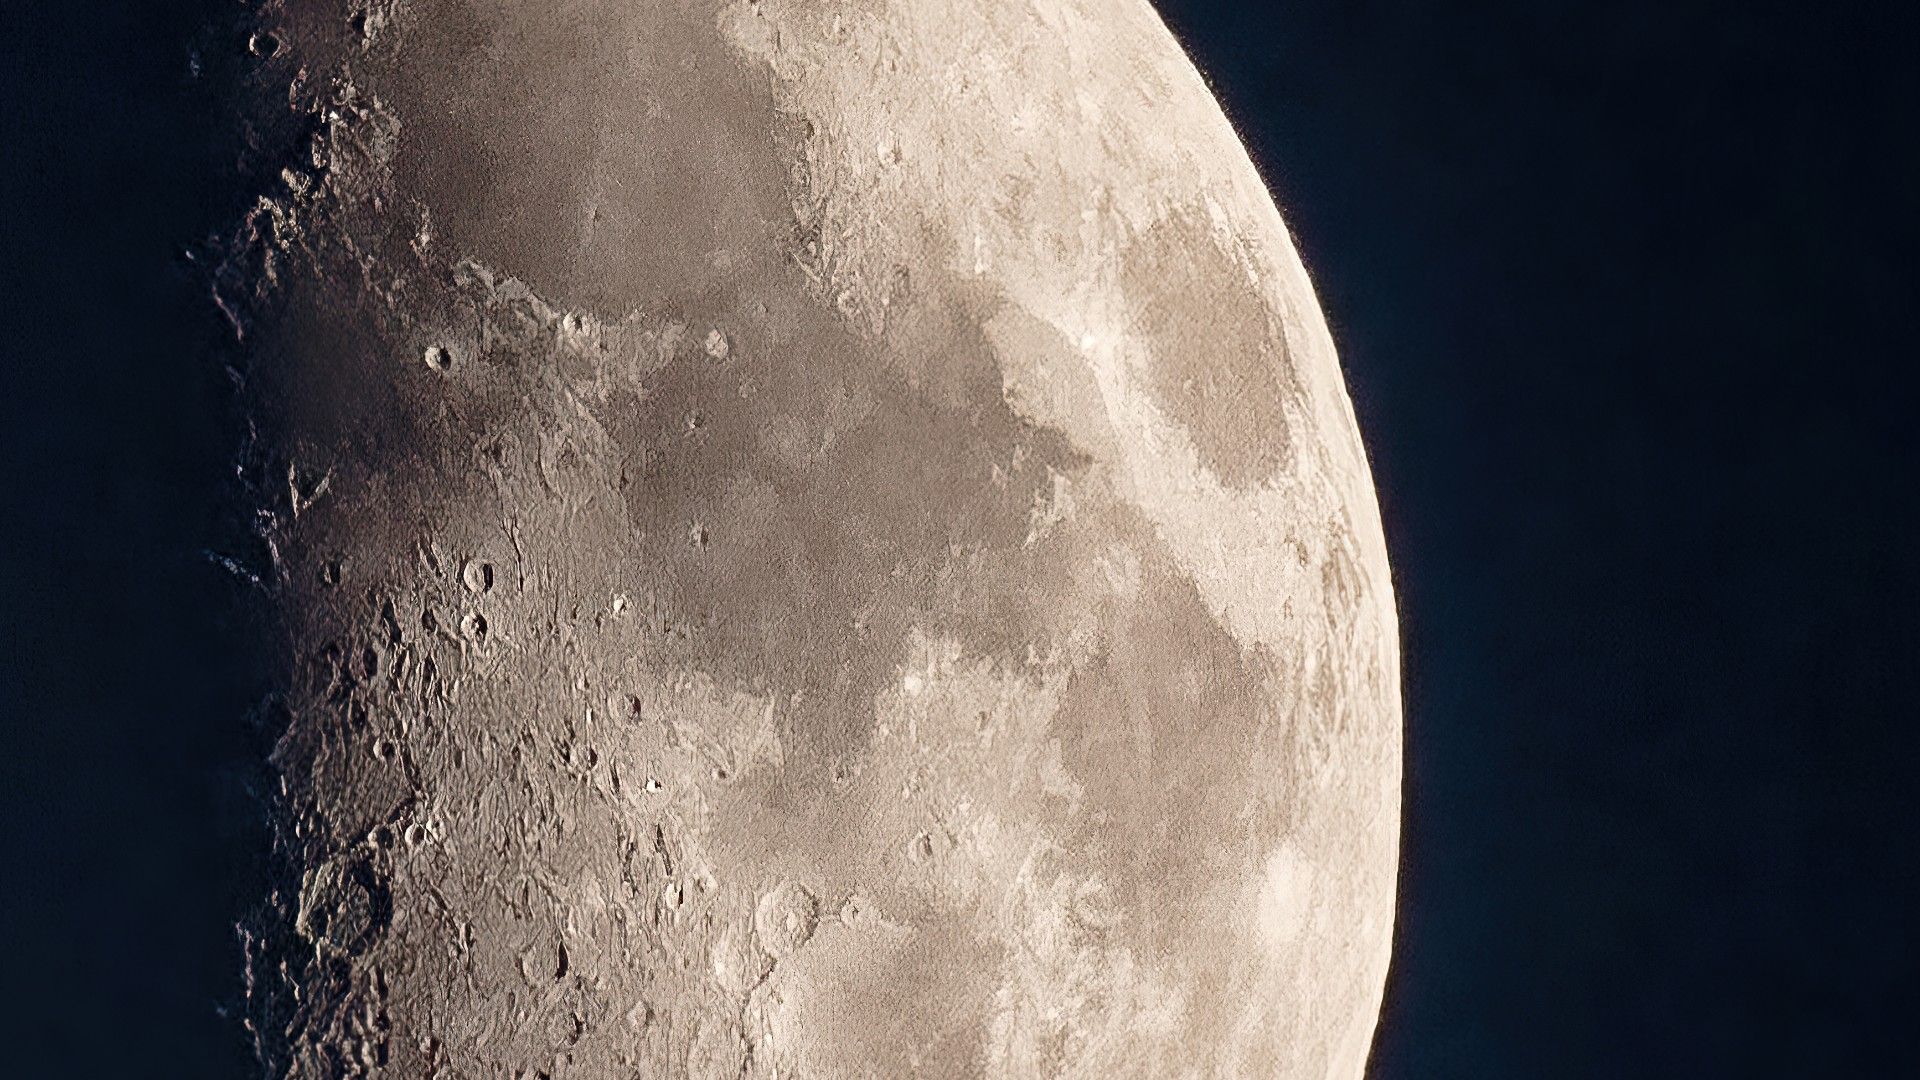
The moon reaches first quarter on Oct. 18, making stargazing tricky this week. That means I'm changing what I observe rather than declaring the week a write-off. The moon itself becomes an excellent target in early evening around first quarter. Sunlight strikes the lunar landscape along the terminator β€” the boundary between lunar day and night β€” throwing mountains and crater rims into strong relief. A cheap pair of binoculars can reveal a surprising amount. With a telescope, you can spend hours getting lost in the Montes Apenninus mountain range and three nearby craters β€” Eratosthenes and Archimedes on either side, and Plato above. Saturn remains another easy evening target after its Oct. 4 opposition. Look toward the eastern and southeastern sky after dark for its steady yellowish light. Even a modest telescope pointed at Saturn's rings will astound.

Constellation of the week: Cassiopeia

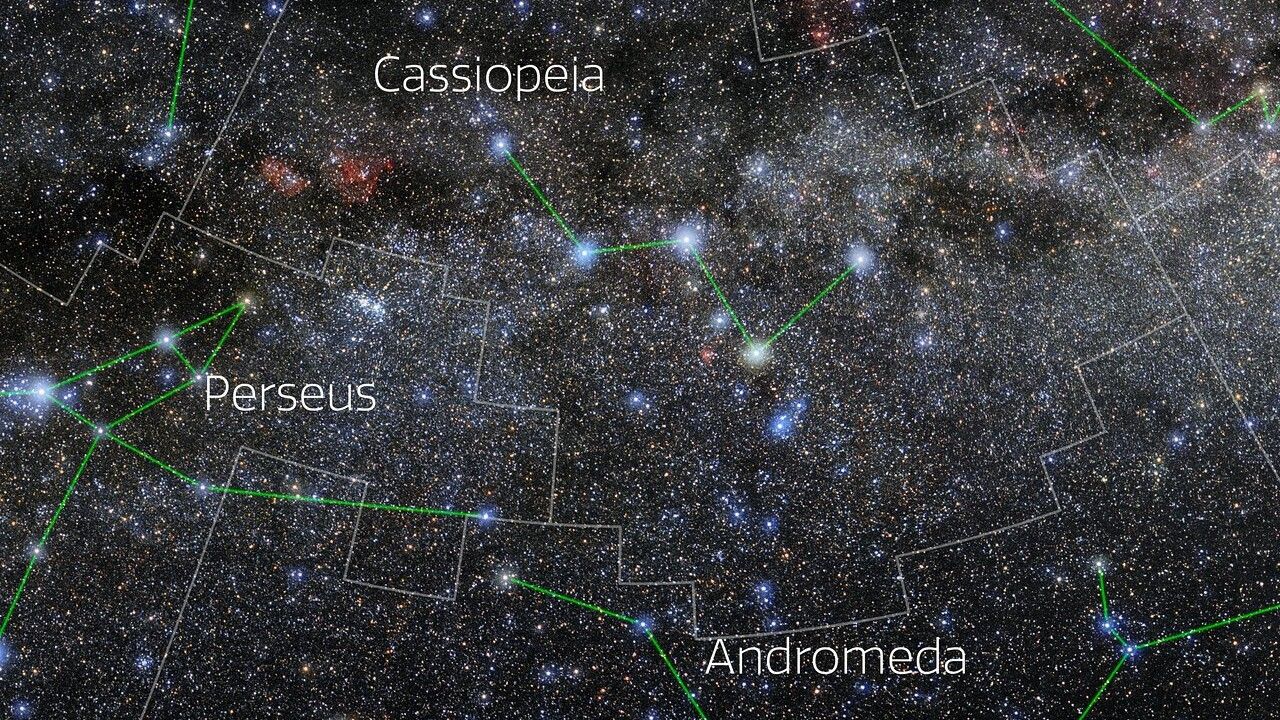
Star map showing the constellations Cassiopeia and Perseus.

The Milky Way runs directly through Cassiopeia, "The Queen." (Image credit: E. Slawik/NOIRLab/NSF/AURA/M. Zamani)

Cassiopeia is one of the easiest constellations I know to find because its five main stars form a conspicuous W β€” or, right now, something that looks suspiciously more like an M. Look toward the northern sky in the evening. From mid-northern latitudes, Cassiopeia is high and prominent during autumn, on the opposite side of Polaris from the Big Dipper. That relationship is more useful to me than memorizing exactly which way the W should point. Cassiopeia circles Polaris as Earth rotates, so its orientation changes through the night. From sufficiently northerly locations, it's circumpolar, meaning it never sets below the horizon.

  •  

How to see the Orionid meteor shower 2026 peak this week β€” and when to look

If you love watching meteors, 2026 has given you plenty to enjoy. This summer, the annual Perseid meteor shower peaked on the day of a new moon β€” and a solar eclipse β€” so moonlight stayed out of the way. And there's more to look forward to: in December, the Geminids, the year's most prolific shower, will peak after a waxing crescent moon sets early in the evening, opening the door to excellent viewing.

Right between those two headline showers, the dependable Orionids take their turn, reaching peak activity around Oct. 21-22.

So, when and where can you catch the show?

When and where to watch

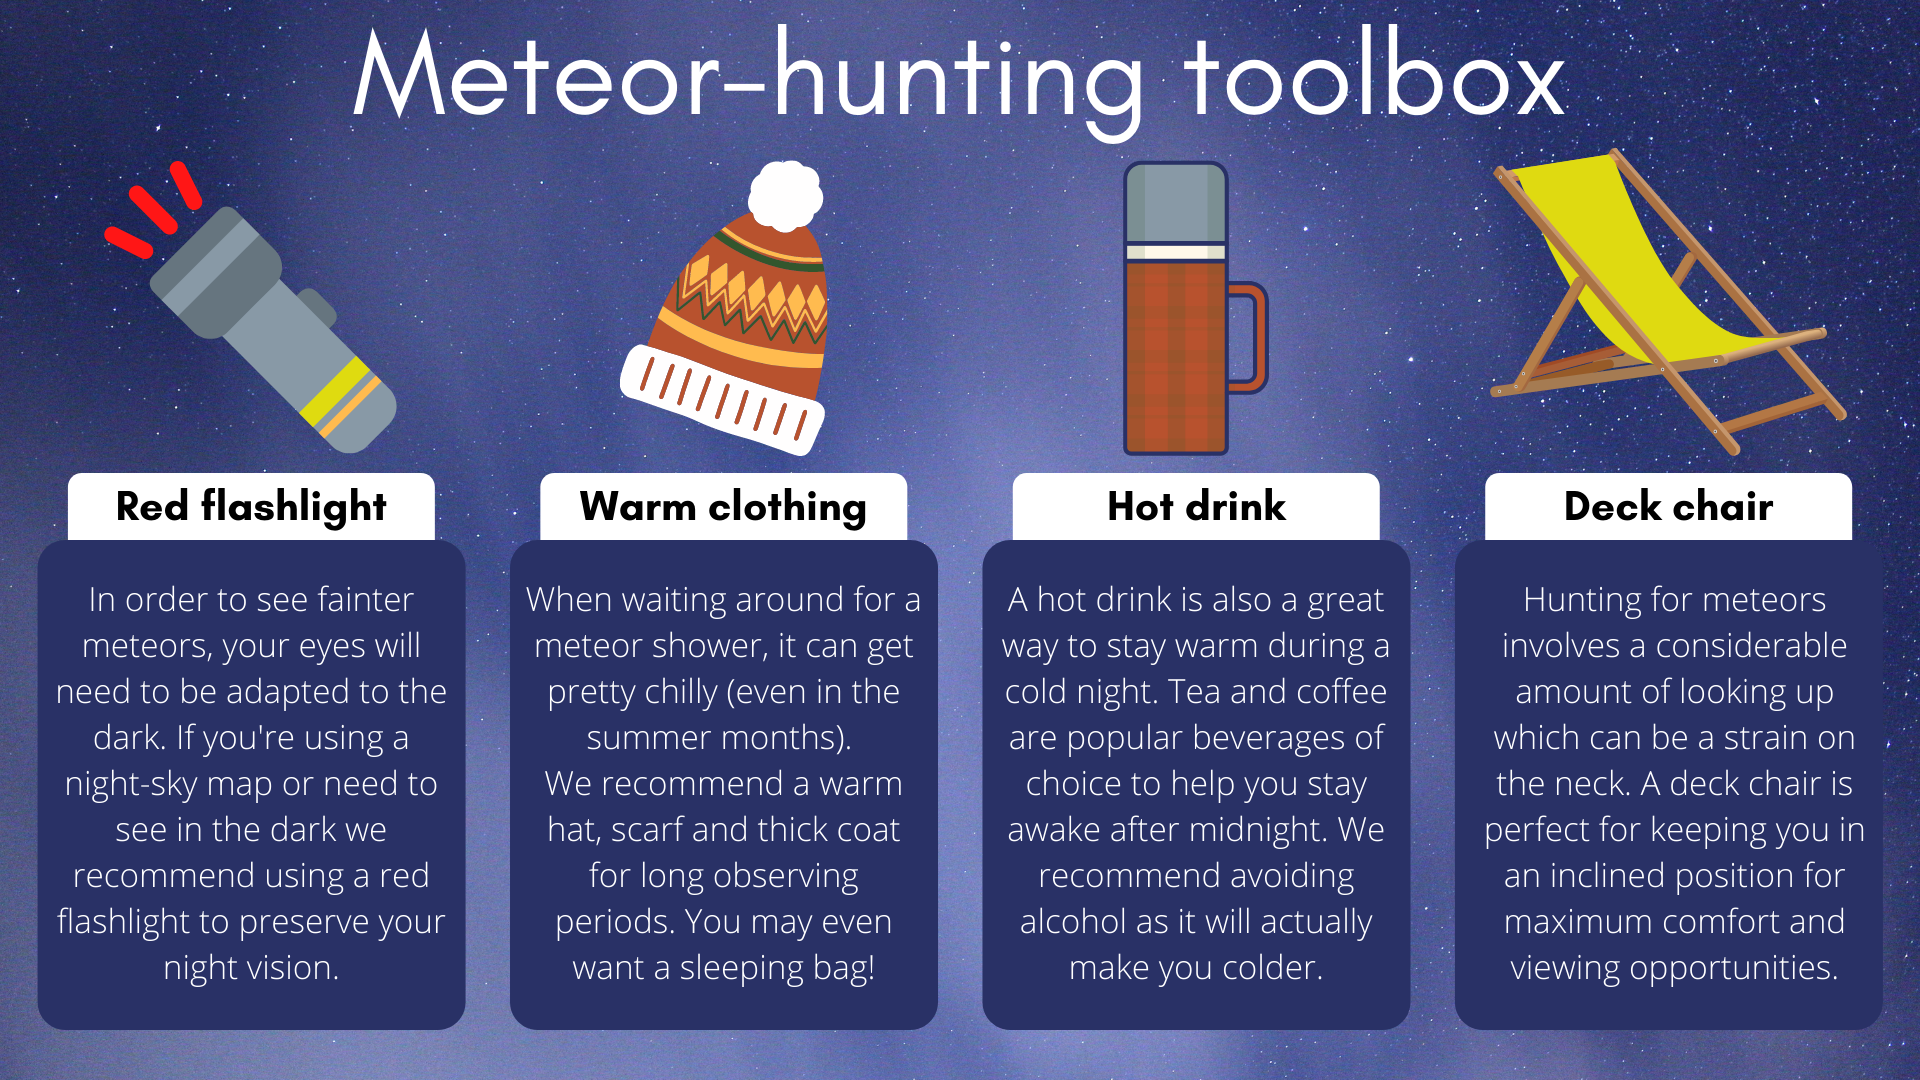
Infographic with a red flashlight, woolly hat, flask and a deck chair.

Make sure you wrap up warm for a night of Orionid hunting. (Image credit: Created in Canva by Daisy Dobrijevic)

The Orionids take their name from the spot where they seem to fan out: Orion's raised club, just above and to the left of the reddish star Betelgeuse. Orion is usually a winter favorite, so in early autumn the mighty hunter doesn't fully clear the eastern horizon until after 11 p.m. local daylight time. Don't rush outside just yet though. Wait until around 2 a.m., when Orion is well above the horizon. By about 5 a.m., just before dawn, Orion reaches its highest point in the southern sky β€” and the view should be at its best.

Orionid meteors tend to be faint, so city lights can easily wash them out. If you can, head to a safe, dark rural spot. Get comfortable in a reclining lawn chair or sleeping bag, give your eyes time to adjust, and enjoy the view overhead and toward the southern sky.

Why the moon won't spoil the show

And what about the moon? A full moon arrives October 25-26, but there's still a welcome stretch of dark sky for several mornings before Wednesday.

By Oct. 21-22, the waxing gibbous moon will be resting among the dim stars of Capricornus, reaching its highest point around 8:45 p.m. local daylight time. Here's the good news: it will set shortly after 2 a.m., leaving roughly 3Β½ hours of dark sky before dawn. In that window, one observer may spot as many as 15 to 20 Orionids per hour. Because those hours line up with the shower's peak, the moon shouldn't steal the show this year.

Halley's Comet: the source of the Orionids

So, where do the Orionids come from? Their story begins with Halley's Cometβ€”the same famous visitor behind May's Eta Aquarids.

Meteoroids are tiny leftovers from a comet's nucleus. As a comet nears the sun, frozen material on its surface turns directly into gas, a process known as sublimation. The comet becomes a kind of cosmic litterbug, sprinkling dust and debris along its orbit. Those pieces are tiny and brittle, with the consistency of cigar ash, and every swing past the sun leaves more behind.

Comets are among the solar system's oldest and most fascinating objects. They formed alongside the sun and planets about 4.6 billion years ago, yet they have changed remarkably little. Think of them as time capsules from the solar system's childhood. Far beyond the outer planets, they spend most of their time in a deep freeze, where temperatures hover just above absolute zero, -459.67Β°F (-273.15Β°C). In that extreme cold, chemical reactions largely stop, helping comets preserve material from those earliest days.

Over the past 100,000 years, Halley's Comet has probably circled the sun well over a thousand times, leaving a fresh trail of debris on every visit. Each October and May, Earth brushes close to Halley's orbit. Some of that dust meets our atmosphere at a breathtaking 41 miles (66 km) per second, lighting up as the streaks we call "shooting stars."

The Orionids have another lovely feature: about half of these meteors leave glowing trails that linger longer than those of equally bright meteors. Halley's composition may be the reason. The particles begin burning up about 80 miles (130 km) above Earth, perhaps because they're made of lightweight material from the comet's diffuse surface rather than its core.

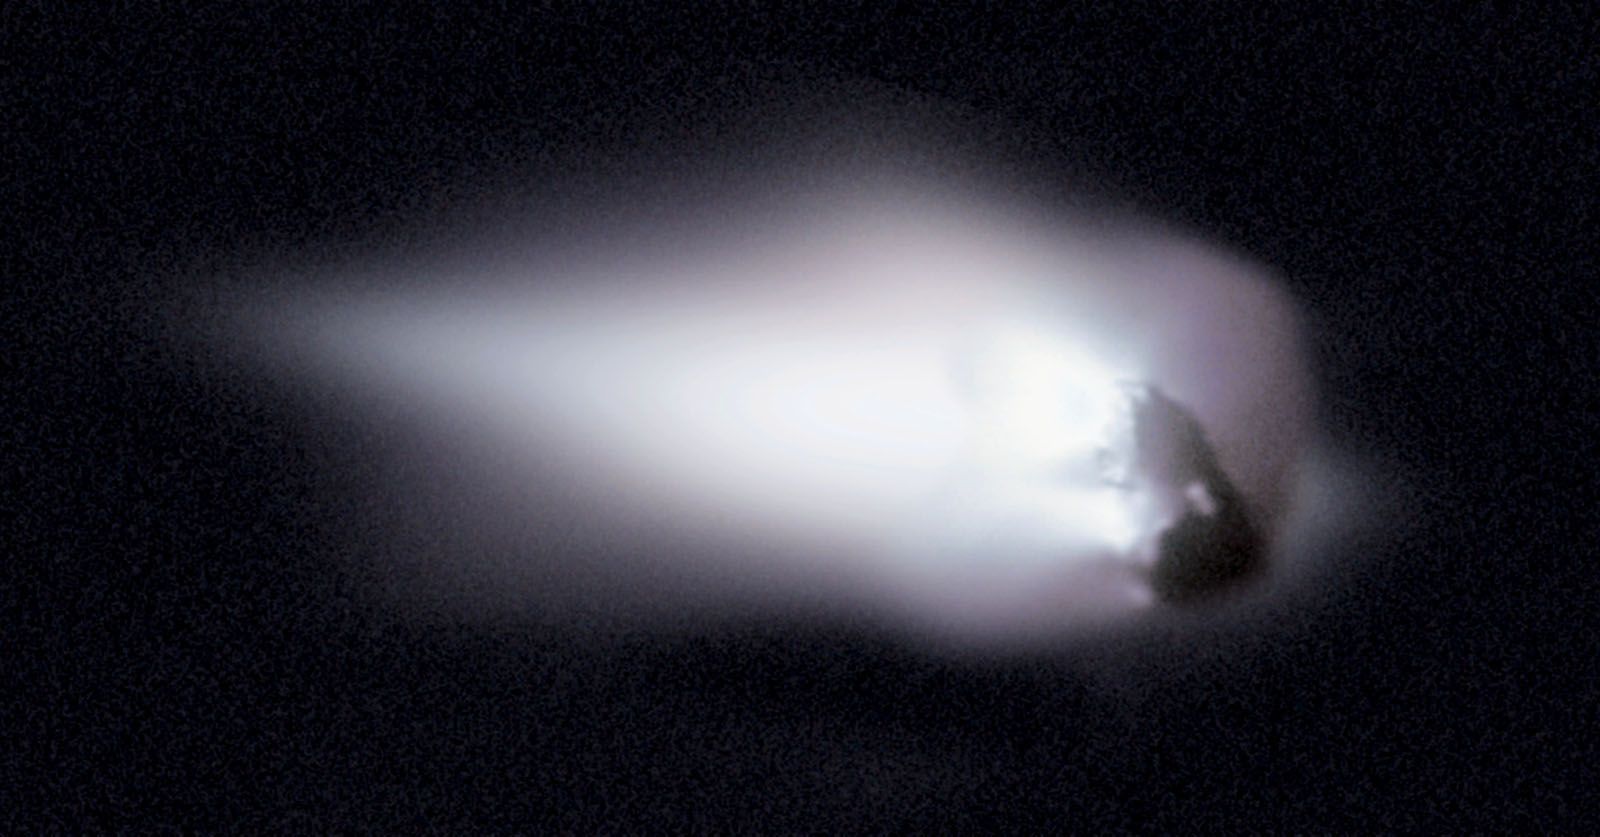
This view of comet Halley's nucleus was obtained by the Halley Multicolour Camera (HMC) on board the Giotto spacecraft, as it passed within 600 km of the comet nucleus on March 13, 1986. a large white coma is visible around a peanut shaped rock.

Close-up view of Halley's Comet captured by the Giotto spacecraft in 1986. (Image credit: ESA. Courtesy of MPAe, Lindau)

Looking backward . . . and forward

Perhaps you remember seeing Halley's Comet when it last swept through the inner solar system in late winter and early spring of 1986. With an orbital period of 75.4 years, this celebrated visitor is due back in late July or early August 2061.

For a little perspective, average life expectancy is 79.5 years in the United States, 82.2 years in the United Kingdom, and 83.4 years in Canada. So, if you were born after 1980, there's a fair chance you'll be here to welcome the "mother of all Orionids" home in 2061.

As for me, I saw Halley in 1986 at the "advanced age" of 30. The odds of another reunion are pretty long β€” you can do the math.

Until then, I'll be more than happy to step outside early on Wednesday morning and greet a few of "Halley's children." I hope you'll join me.

Joe Rao serves as an instructor and guest lecturer at New York's Hayden Planetarium. He writes about astronomy for Natural History magazine, Sky and Telescope, The Old Farmer's Almanac and other publications.

  •  

Why can you see the moon during the day? This week is the perfect time to find out

I know perfectly well that the moon comes out during the day. I have known this for decades. Yet whenever I spot it in a blue afternoon sky, some primitive part of my brain still thinks it has turned up early.

I'm certainly not the only one. Many people don't understand how it could be visible in daylight. In their eyes, the moon is a nighttime object. Why? Because that's when they notice it β€” it appears brighter.

We tend to think of the sun as belonging to the day and the moon to the night because that's how they're usually presented to us as children. Astronomically, it makes little sense. The moon spends plenty of time above our horizon while the sun is also up β€” it spends half its time in the daytime sky, in fact.

If the moon, pale but unmistakable, looks slightly out of place against a blue sky, it's not β€” you are. This week is a great time to get used to seeing it there. Just past first quarter, the moon will spend each afternoon hanging in the daytime sky, becoming easier to spot as the sun sinks towards the horizon.

What's happening and when to look

The moon reached first quarter on Sunday, Oct. 18, and is now waxing toward full moon, which occurs early on Monday, Oct. 26 (Oct. 25 in some time zones). That puts it in the right part of its orbit to be conspicuous during the late afternoon this weekend.

Here's the useful bit to remember. Around first quarter, the moon rises roughly around midday. As it waxes towards full, it rises progressively later in the afternoon. By full moon, it rises around sunset.

a half illuminated moon in a daytime sky.

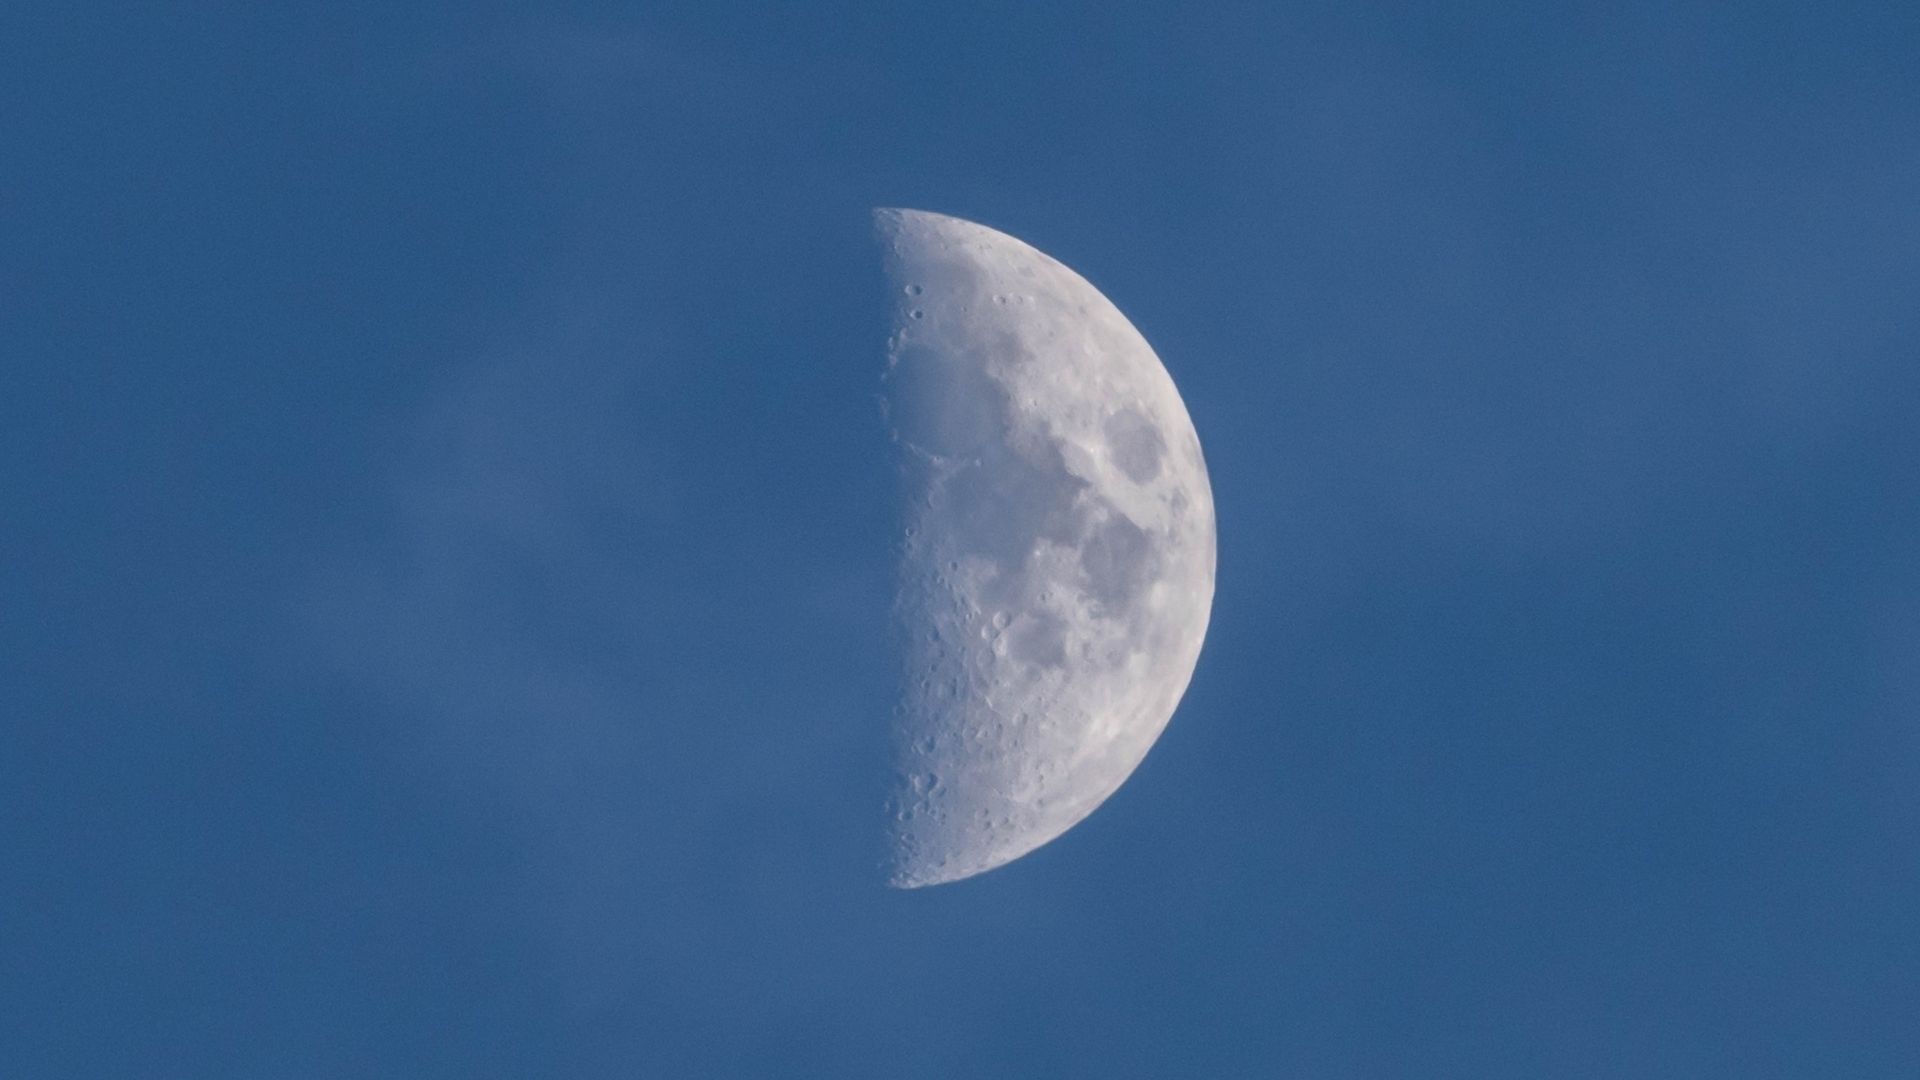
The moon reached first quarter on Oct. 18.Β  (Image credit: Taro Hama @ e-kamakura via Getty Images)

That makes the days immediately after first quarter an excellent time to get into the habit of finding the moon before sunset. On Monday, Oct. 19, look southeast in the afternoon for a moon just over half-lit. Each afternoon this week, it will become a little more illuminated, move farther east against the background stars, and appear progressively later in the day.

You don't need to wait until dusk. In fact, that's the point. Start looking during the afternoon, when the sun is still well above the horizon. Once you find the moon, it can be surprisingly conspicuous against the blue sky.

How and when I'm watching it

an almost fully illuminated moon, the bottom portion is obscured. Against a deep blue daytime sky.

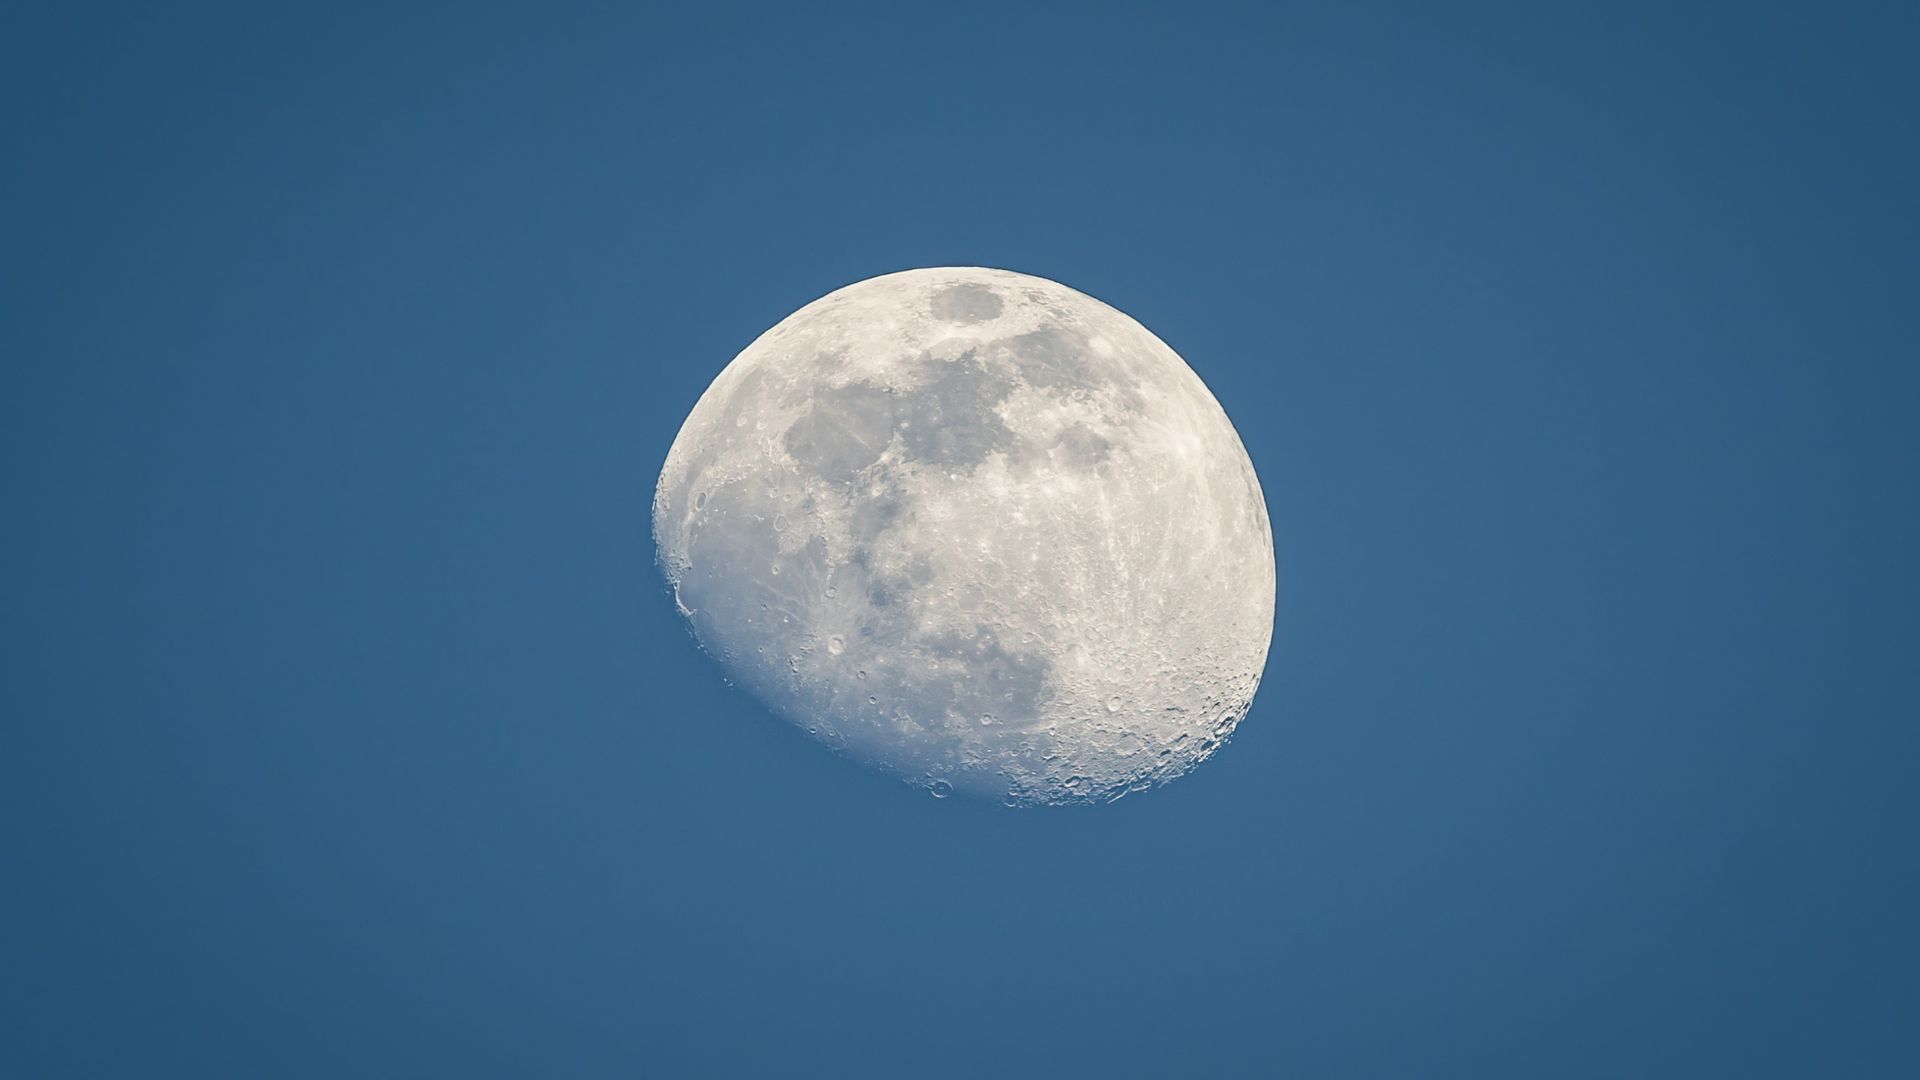
The moon is now waxing towards being full, so it's already in the sky by dusk. (Image credit: 5c5q2cnvmg / 500px via Getty Images)

I'll start looking in the mid-to-late afternoon this week, when the waxing moon should already be high enough to find easily. You can check the exact moonrise time where you are, but there's no need to catch it as it rises. Look towards the east or southeast and scan the blue sky.

Once you've found the moon in daylight, keep checking on it as sunset approaches. The moon doesn't suddenly become brighter, of course. Instead, the surrounding sky darkens, increasing the contrast until the pale daytime moon seems to switch on at dusk and grow increasingly brilliant.

Binoculars will give you a superb view at dusk, particularly along the terminator β€” the boundary between lunar day and night. That's where low-angle sunlight throws mountains and crater rims into sharp relief. As the moon waxes this week, the terminator will move steadily across its surface, revealing a different landscape each afternoon.

That's another reason not to wait for the full moon. The full moon gets most of the attention, but the week beforehand is arguably a much better time to get to know our nearest celestial neighbor β€” and you don't even have to wait until dark.

Stargazer's corner: October 23-29, 2026

a large full moon in the sky, a man riding a horse holds up an eagle to the sky.

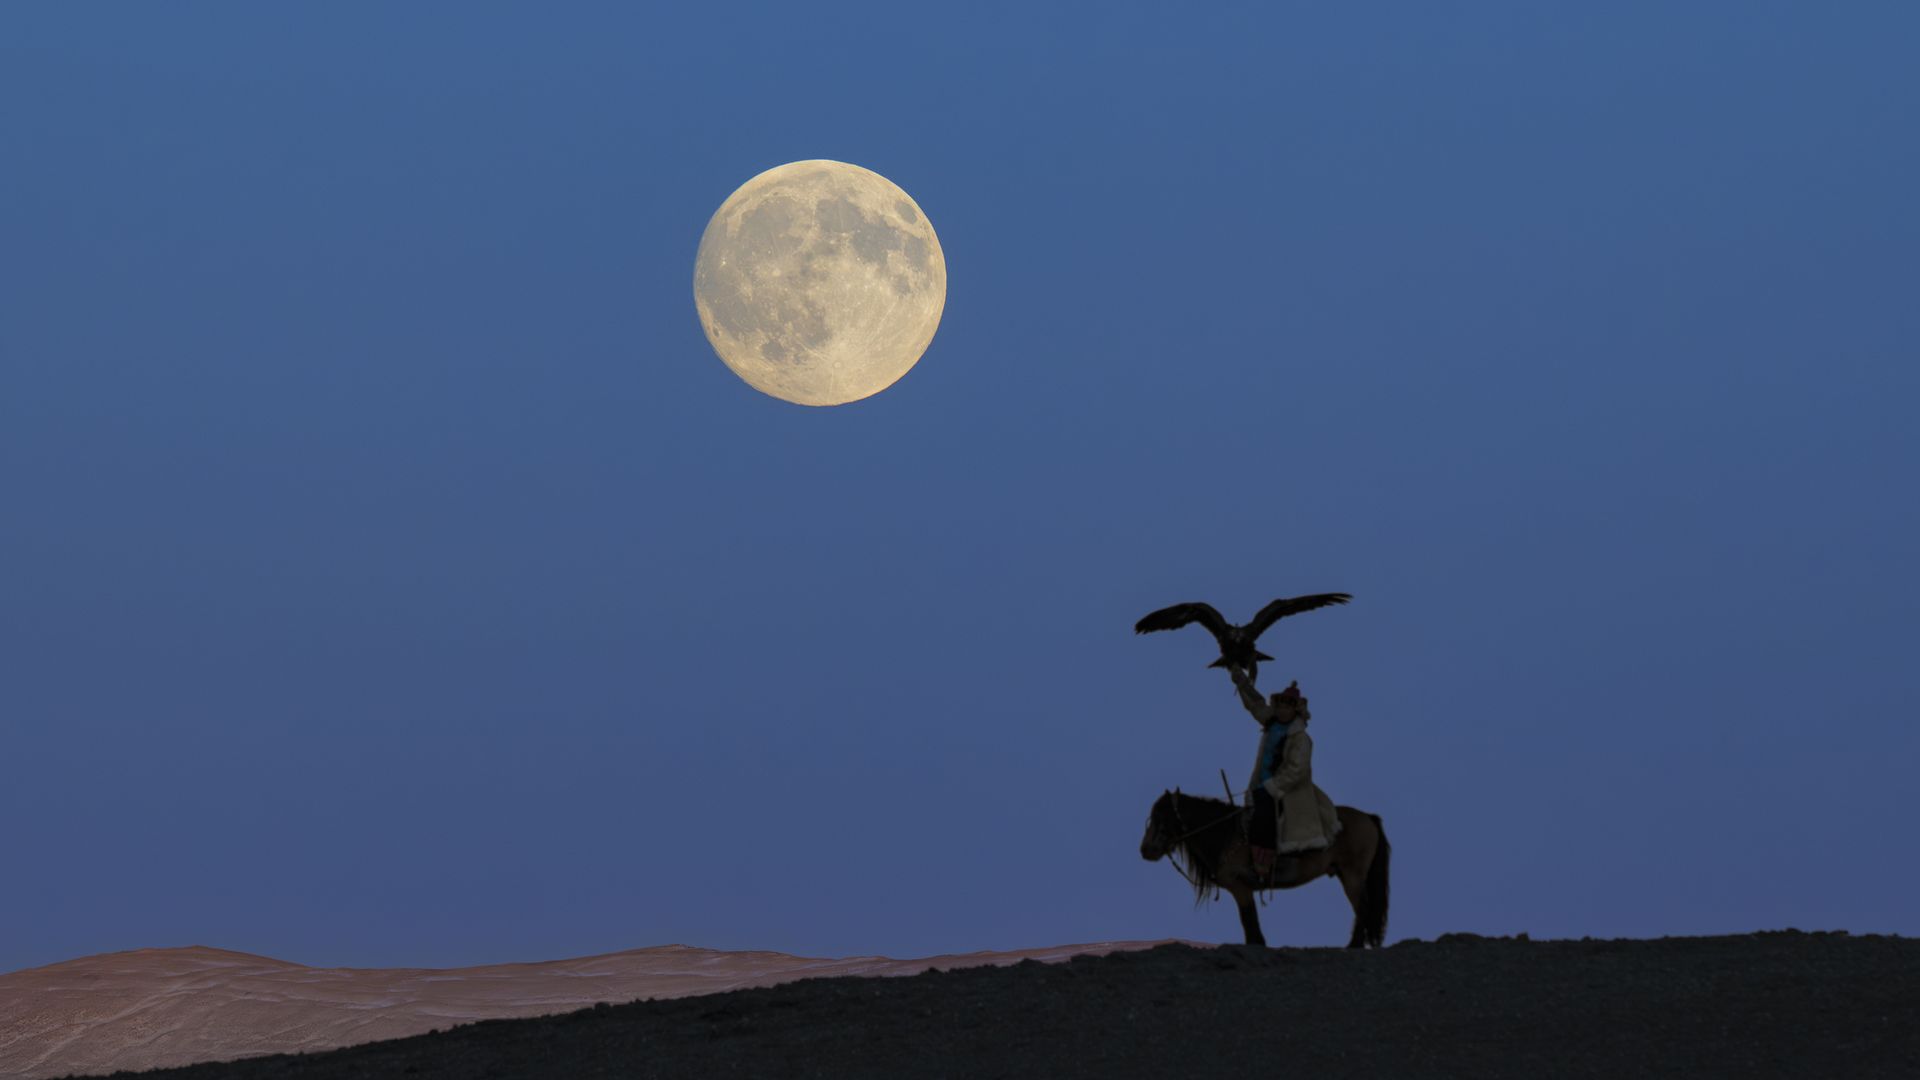
Β The full moon arrives on Monday, Oct. 26. (Image credit: Westend61 via Getty Images)

This is a bright-moon week. Full moon arrives early on Monday, Oct. 26, so moonlight will wash out faint stars and make galaxies and nebulas much harder to see. So go for Saturn instead. It reached opposition earlier this month and remains very well placed in the evening sky. Better still, the nearly full moon passes near Saturn around Oct. 23-24, giving beginners a convenient landmark for locating the planet. The moon's glare will hide faint nearby stars, but Saturn itself is easily bright enough to cope. A good example will be Oct. 27, when the Pleiades is passed closely by a bright moon. The Seven Sisters therefore won't be at their best, so you'll need to use binoculars β€” if you do, you'll see them easily enough.

Constellation of the week: Auriga

night sky chart showing the constellation auriga

Auriga is one of the easiest constellations to find in the Northern Hemisphere's winter night sky. (Image credit: E. Slawik/NOIRLab/NSF/AURA/M. Zamani)

Auriga, "the Charioteer," is climbing in the northeastern and eastern sky during late October evenings. It's easiest to find if you start at Capella, one of the brightest stars in the entire night sky. It's just 43 light-years from the sun. From there, I look for the other stars that form Auriga's rough pentagon, including Menkalinan, Mahasim and Almaaz. The fifth corner is Elnath, although it officially belongs to neighboring Taurus.

Auriga gets even better with binoculars. The Milky Way runs straight through it, bringing with it three bright open star clusters β€” M36, M37 and M38. All three show up in binoculars under a reasonably dark sky, while a small telescope starts to resolve them into individual stars. There's always another layer to find in the night sky.

My latest stargazing obsession

There's something special about stargazing during the blue hour β€” that brief transition when daylight drains from the sky and night's window begins to open. It's particularly beautiful a few days before full moon, when the near-full orb is already rising in the east as the sun sets in the west. Look below it, and you may also see the Belt of Venus, a pinkish band above the eastern horizon caused by reddened sunlight shining through Earth's atmosphere, with our planet's dark blue-gray shadow beneath. As the sky fades through ever-deeper shades of blue, the moon brightens, and the first stars emerge around it.

  •  

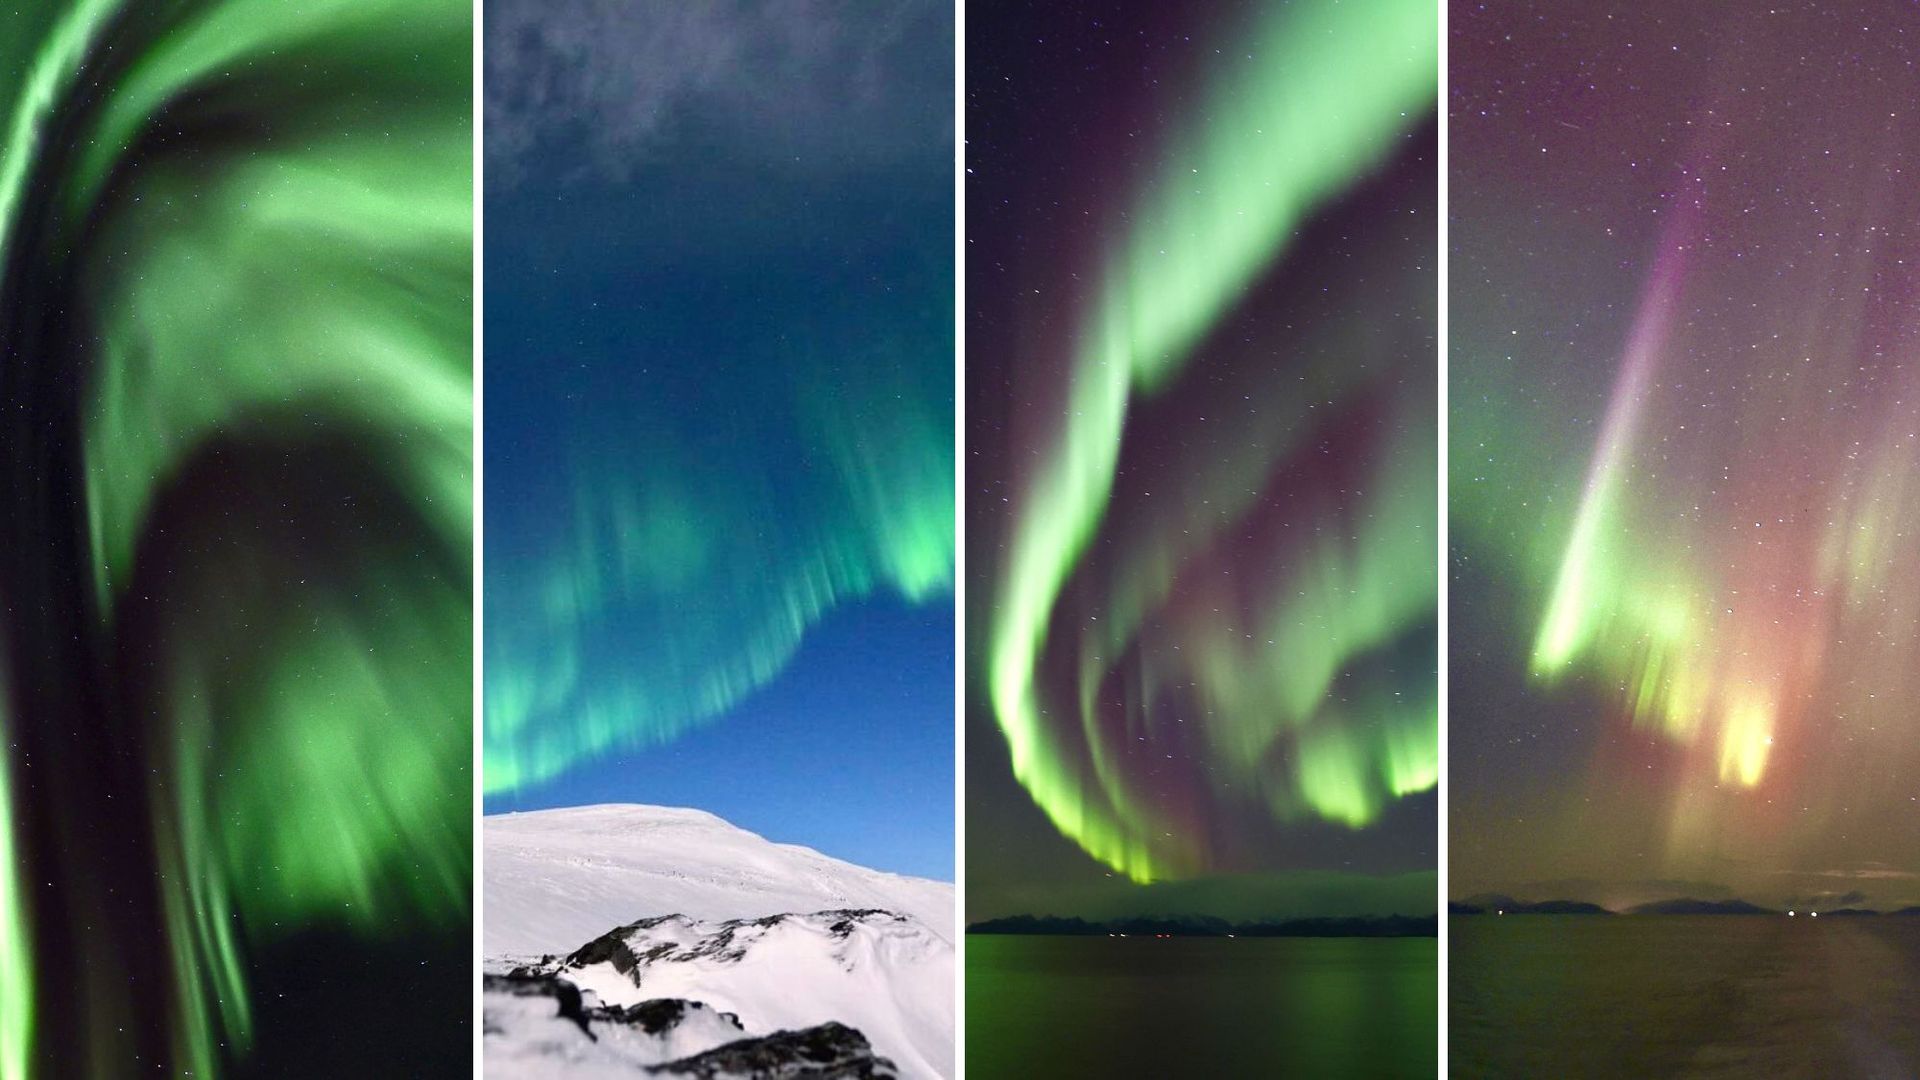
7 best places to see the northern lights, according to an aurora chaser

I've spent years chasing the northern lights across the Arctic, from the mountains of Swedish Lapland to the dramatic Norwegian fjords.

If there's one thing I've learned, it's that choosing where to see the northern lights is about much more than simply heading as far north as possible. Whether you're on the hunt for somewhere that offers the best chance of clear skies, the most dramatic scenery or a plethora of winter activities to keep you warm, choosing the right destination can make a big difference, especially as auroras are never guaranteed.

My biggest piece of advice? Choose somewhere you've always wanted to visit regardless of whether the northern lights might appear. That way, the auroras become the icing on the cake rather than the sole measure of a successful trip.

From my personal favorites in Scandinavia to some of North America's most established aurora hotspots, here are seven of the best places to see the northern lights this 2026/27 season.

Best places to see the northern lights at a glance

Best places to see the northern lights at a glance

Location

Best for

Kiruna and Abisko, Sweden

Best for a short northern lights trip

TromsΓΈ, Norway

Best for a city break

Norwegian coast

Best for a scenic Arctic voyage

Finnish Lapland

Best for a winter wonderland getaway

Iceland

Best for volcanoes, glaciers and natural wonders

Fairbanks, Alaska

Best for a U.S. aurora getaway

Yellowknife, Canada

Best for a Canadian aurora getaway

Abisko and Kiruna, Sweden: Best for a short northern lights trip

aurora hunting trip in Abisko National Park

Northern lights from Mount Nuolja, Abisko, Sweden. (Image credit: Daisy Dobrijevic)

Best time to visit: September to early April

Swedish Lapland holds a particularly special place in my heart. It's where I saw the northern lights for the very first time, during a trip to Kiruna in February 2023.

I'd only booked two nights in Kiruna, one of which included a northern lights tour with Anders from Outdoor North 67ΒΊ. Talk about putting all your eggs in one basket! But the gamble paid off, and I was treated to a spellbinding display of auroras dancing across the Arctic sky. I've been hooked ever since.

Kiruna offers a wide range of accommodation, restaurants and activities, making it a convenient base for exploring the region. From here, you can join guided aurora tours, visit the famous Icehotel in JukkasjΓ€rvi or head into the wilderness for dog sledding and snowmobiling adventures.

One of the region's biggest draws is Abisko National Park, around 60 miles (100 kilometers) northwest of Kiruna. Abisko is famous for its so-called "Blue Hole", a local weather phenomenon in which the skies above the national park can be clear, even if the surrounding region (and weather forecast) is cloudy. This is partly thanks to the surrounding mountains, which create a rain shadow effect, reducing the precipitation in the area.

aurora hunting trip in Abisko National Park

Glacial-carved valley Lapporten, in Abisko National Park. (Image credit: Daisy Dobrijevic)

And if you're visiting Abisko, I'd highly recommend taking the chairlift up Mount Nuolja to the Aurora Sky Station. The views across Abisko National Park and the surrounding mountains are spectacular. Just be sure to check the chairlift's operating dates and times before visiting, as it doesn't run throughout the entire season.

My tip: Although my two-night gamble paid off, I wouldn't recommend relying on such a short window if seeing the northern lights is your main goal. If possible, give yourself at least three or four nights to improve your chances of clear skies and aurora activity.

TromsΓΈ, Norway: Best for a city break

tromso city light shine below a vibrant green aurora and full moon in the upper left.

TromsΓΈ is the perfect destination for an aurora city break. (Image credit: Juan Maria Coy Vergara via Getty Images)

Best time to visit: September to early April

If you want to experience the northern lights without giving up the comforts of city life, TromsΓΈ is hard to beat.

Located high above the Arctic Circle in northern Norway, TromsΓΈ sits beneath the auroral oval, the region surrounding Earth's magnetic poles where auroras occur most frequently.

What I particularly like about TromsΓΈ is that it offers the best of both worlds. You have a lively city with excellent restaurants, cafes, shops, museums and accommodation, while spectacular mountains and wilderness are only a short journey away.

There's also a huge range of northern lights tours available, from small-group photography excursions to longer aurora-chasing adventures.

My tip: TromsΓΈ is ideal if you want to combine northern lights hunting with a city break holiday. I'd recommend booking at least one guided aurora tour, particularly if the local weather forecast looks challenging.

The Norwegian coast: Best for a scenic Arctic voyage

northern lights colored green, magenta and slightly yellow stretch through the sky.

Northern lights during a cruise along the Norwegian coast with Hurtigruten. (Image credit: Daisy Dobrijevic)

Best time to visit: September to March

If there's one northern lights experience I'd encourage people to consider, it's sailing along the Norwegian coast.

I've been fortunate enough to travel along this extraordinary coastline on several occasions, and there's something very special about watching the northern lights from the deck of a ship, surrounded by good company, mountains, fjords and the dark Arctic sea.

Operators such as Hurtigruten and HX offer voyages along the Norwegian coast, combining opportunities to see the northern lights with some of the most spectacular scenery in Europe. While Hurtigruten operates coastal voyages calling at towns and communities along the route, HX offers expedition-style experiences with a focus on exploring the natural environment.

Views during the Hurtigruten Astronomy Voyage.

Arctic Norway during the winter months offers truly stunning views. Photo captured during a Hurtigruten voyage. (Image credit: Daisy Dobrijevic)

Rather than staying in one location, you'll travel through different coastal landscapes, with opportunities to experience Arctic wildlife, local culture and winter excursions along the way.

And then, of course, there's the possibility of the northern lights appearing overhead.

Join me on a northern lights voyage!

sweeping green northern lights appear as ribbons in the sky reflected in the water below

(Image credit: Daisy Dobrijevic)

I'll be setting sail on a handful of Hurtigruten's astronomy voyages as a guest lecturer, sharing the science and wonder of the northern lights along the way.

However, there's an important trade-off. Unlike a land-based aurora chase, a ship can't simply drive inland to escape coastal cloud cover. You're largely dependent on the weather along your route, although traveling through different regions over several nights gives you multiple opportunities.

Hurtigruten also offers a Northern Lights Promise on qualifying voyages, providing a complimentary return voyage if the lights aren't officially sighted during your trip. Be sure to check the eligibility requirements and terms before booking.

My tip: Choose a Norwegian coastal voyage because you want to experience the coastline itself. The scenery, communities and Arctic landscapes make it a remarkable journey regardless of auroras.

Finnish Lapland: Best for a winter wonderland getaway

Best time to visit: September to March

If you dream of a northern lights holiday involving snow-covered forests, cozy cabins and perhaps even watching auroras from a glass-roofed igloo, Finnish Lapland could be the perfect choice.

Northern Finland lies beneath the auroral oval, making it a popular destination for aurora chasers. Places such as Inari, SaariselkΓ€ and Ivalo offer excellent access to dark skies and Arctic wilderness.

Rovaniemi, the official hometown of Santa Claus, is another popular option, particularly for families, although it's worth traveling away from the city's lights for the best views.

My tip: For a quieter, more wilderness-focused escape, I'd look at northern Lapland around Inari or SaariselkΓ€. If you're traveling with children or want a more activity-packed holiday, Rovaniemi may be a better fit.

Iceland: Best for volcanoes, glaciers and natural wonders

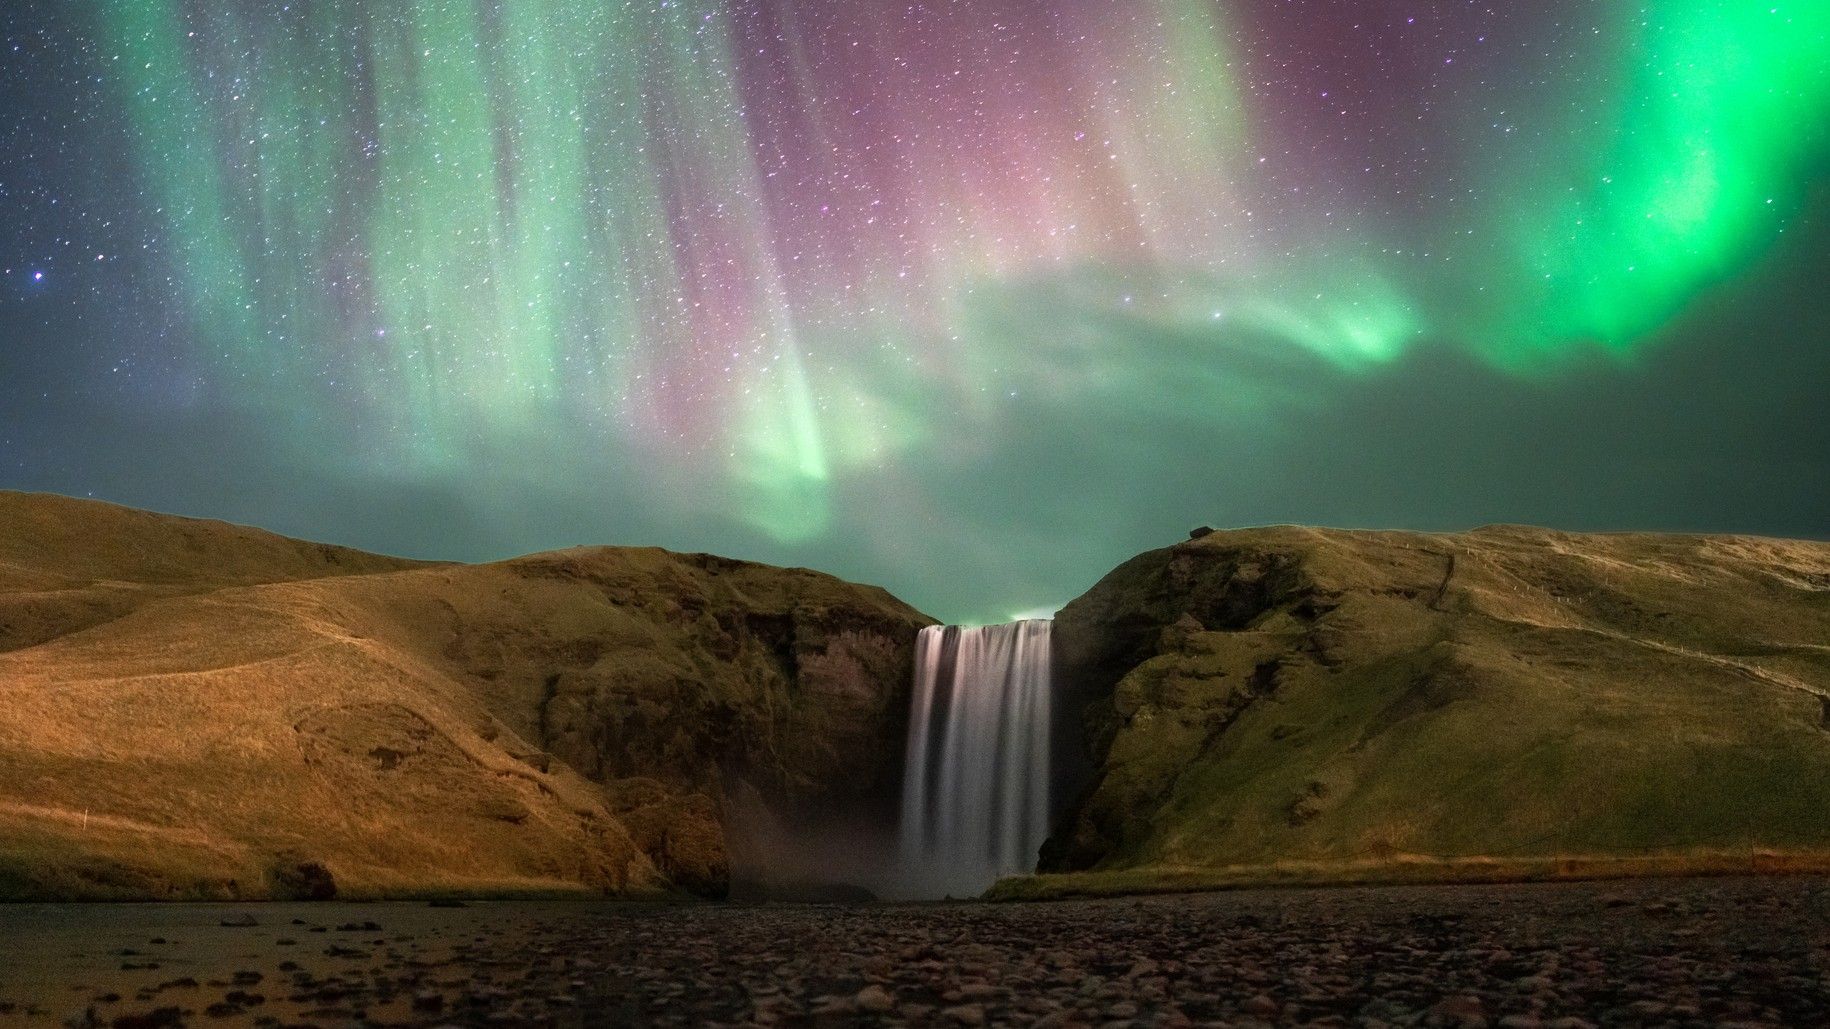
northern lights dance above a large waterfall in Iceland.

Iceland offers beautiful backgrounds for aurora photography if the weather behaves. (Image credit: Xiu Huo via Getty Images)

Iceland is one of the most extraordinary places I've ever visited. What makes it particularly special is the sheer variety of landscapes packed into one country, from towering waterfalls and vast glaciers to active volcanoes, black-sand beaches and steaming geothermal pools. There's an incredible amount to explore between northern lights hunting sessions.

But there's a catch.

Iceland's notoriously changeable weather and frequent cloud cover can make aurora hunting challenging. For that reason, I'd consider Iceland one of the riskier destinations on this list if your main objective is seeing the northern lights.

Iceland's landscapes provide some of the most spectacular backdrops imaginable for aurora photography, and when the skies cooperate, the results can be breathtaking.

The key is flexibility. I'd recommend giving yourself several nights and booking a northern lights tour that can travel in search of clearer skies rather than relying on a single fixed viewing location.

And while I've visited Iceland myself, I haven't been there specifically to chase auroras. What I can say from experience is that the country is absolutely worth visiting regardless of whether the lights appear.

My tip: Visit Iceland because you want to see Iceland, not just the northern lights. Explore its waterfalls, glaciers and volcanic landscapes, and treat any aurora sightings as an extraordinary bonus.

Fairbanks, Alaska: Best for a U.S. aurora getaway

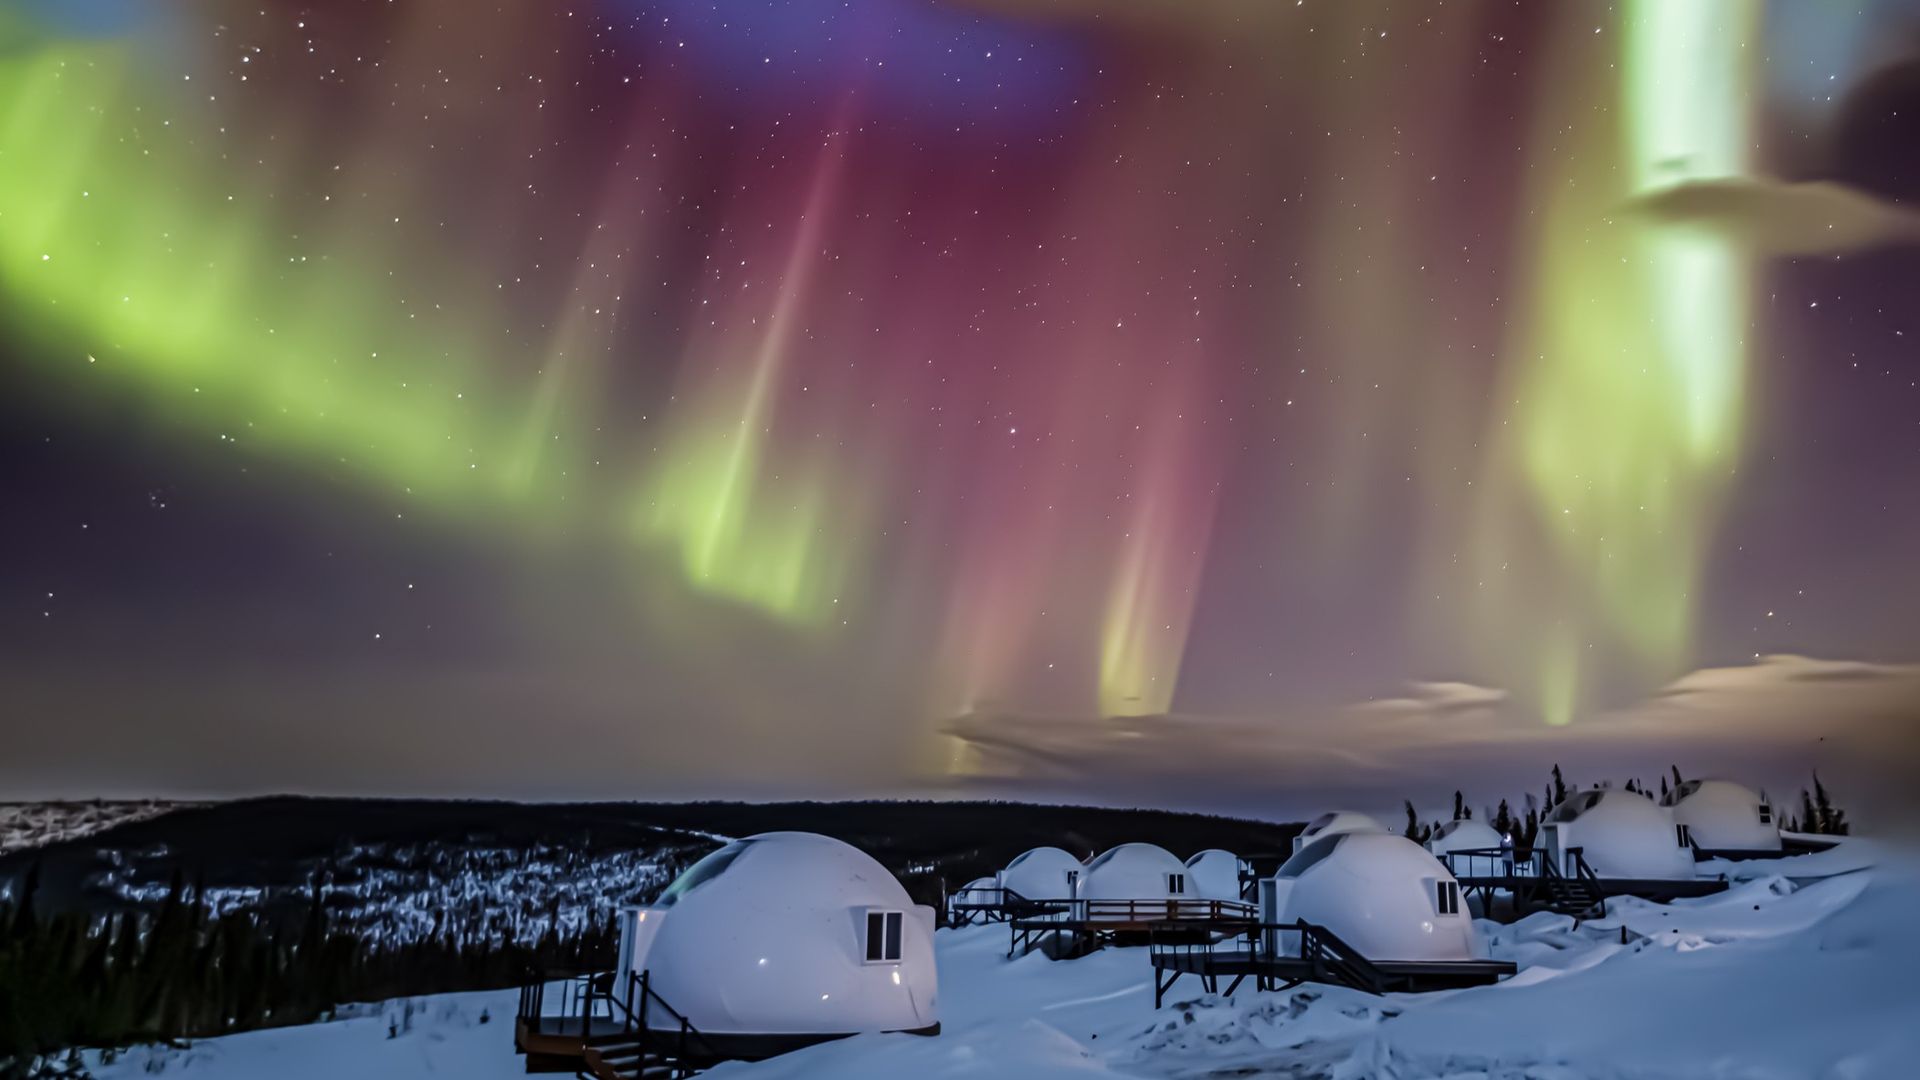
auroras dance in the sky above white spherical

Fairbanks, Alaska offers some great northern lights experiences. (Image credit: Stanley Chen / 500px via Getty Images)

Best time to visit: September to March

For U.S.-based travelers dreaming of seeing the northern lights, Fairbanks is a more convenient travel destination than Scandinavia.

Located in Alaska's interior, Fairbanks sits beneath the auroral oval. Its inland location is a major advantage compared to many coastal Arctic destinations; Fairbanks generally experiences less precipitation and more opportunities for clearer skies.

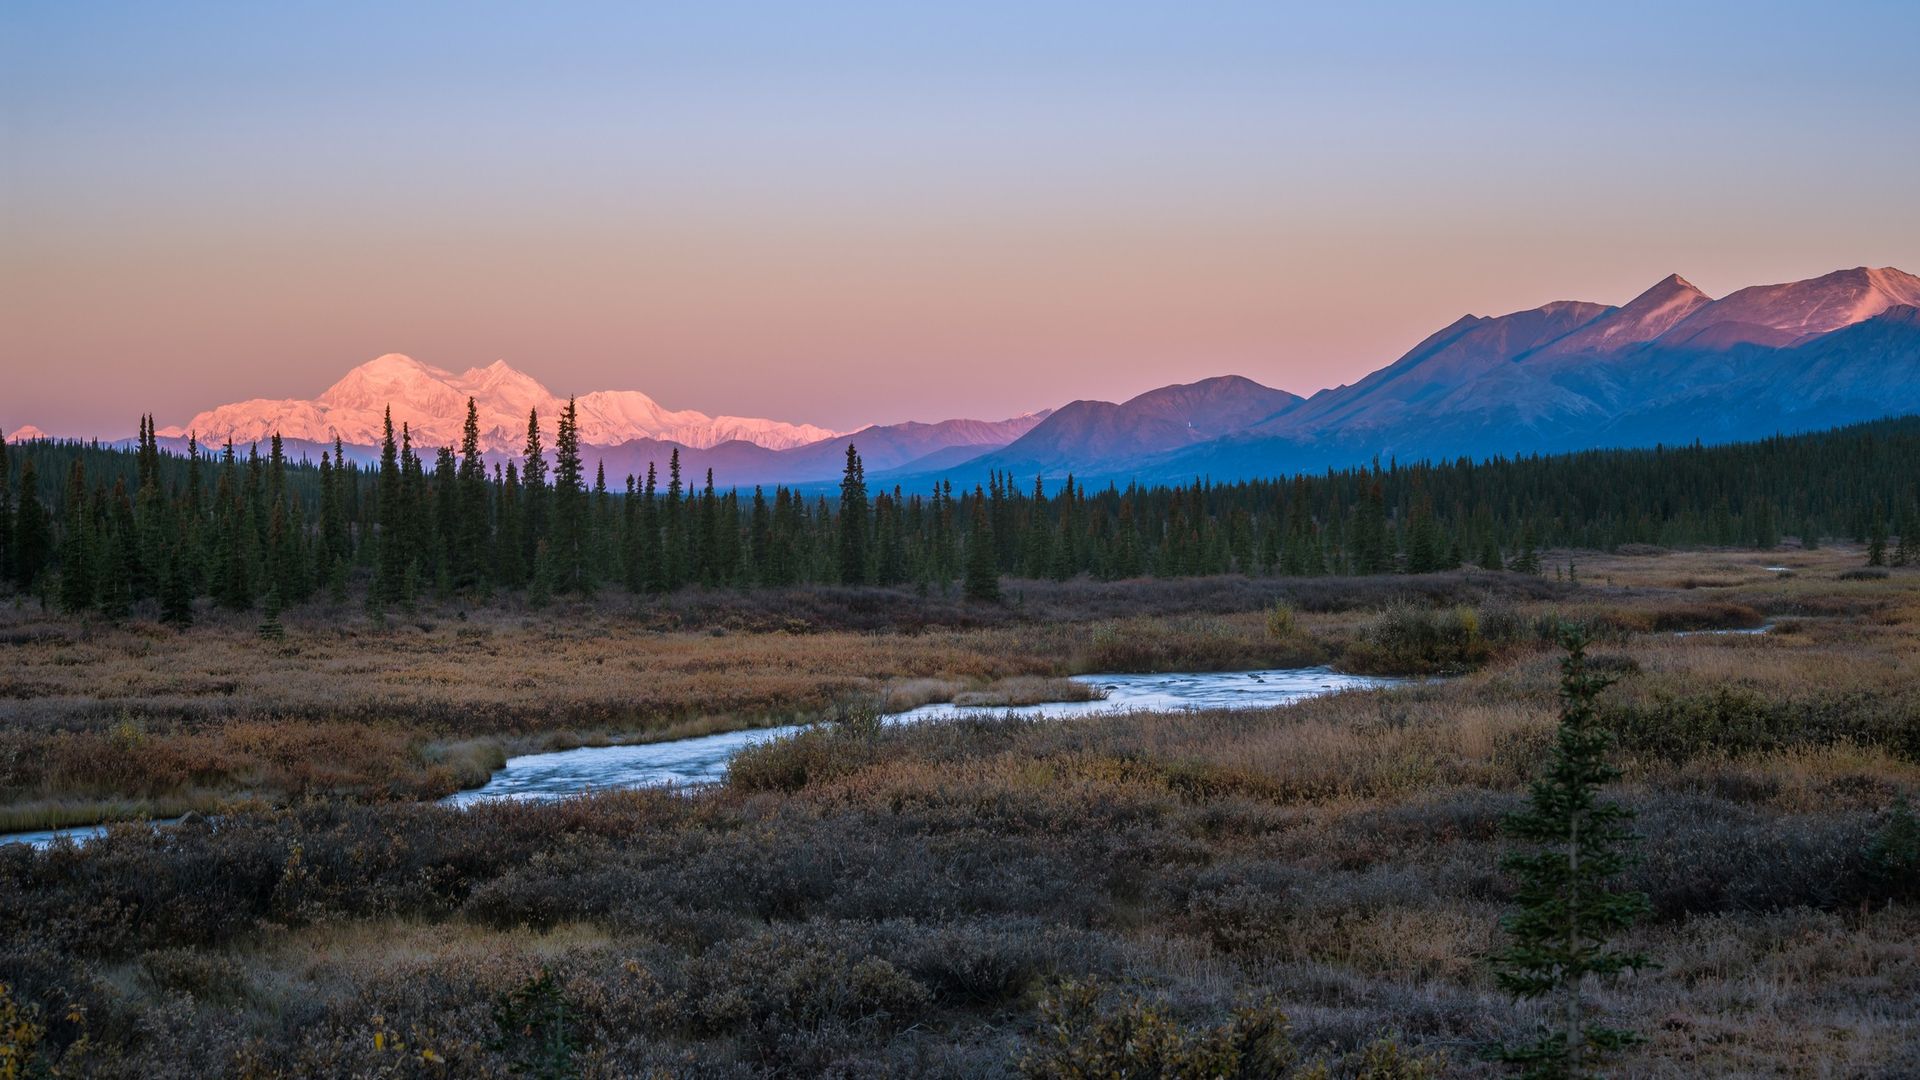
a lake in the foreground with trees in the background and mountains in the background, with a hint of pink.

Alaska is the perfect destination for North American aurora chasers seeking wild landscapes and the northern lights. (Image credit: Haizhan Zheng via Getty Images)

The official aurora-viewing season runs from Aug. 21 to April 21, providing a long window for planning a trip. However, if you're visiting in late August or early September, be prepared for some late nights. With daylight still lingering well into the evening, the sky may not become dark enough for good aurora viewing until around midnight or later.

The advantage of visiting earlier in the season is that temperatures are generally much milder compared to in the depths of winter. But if you would prefer longer nights and more opportunities to spot auroras, consider a trip between late September and March.

Yellowknife, Canada: Best for a Canadian aurora getaway

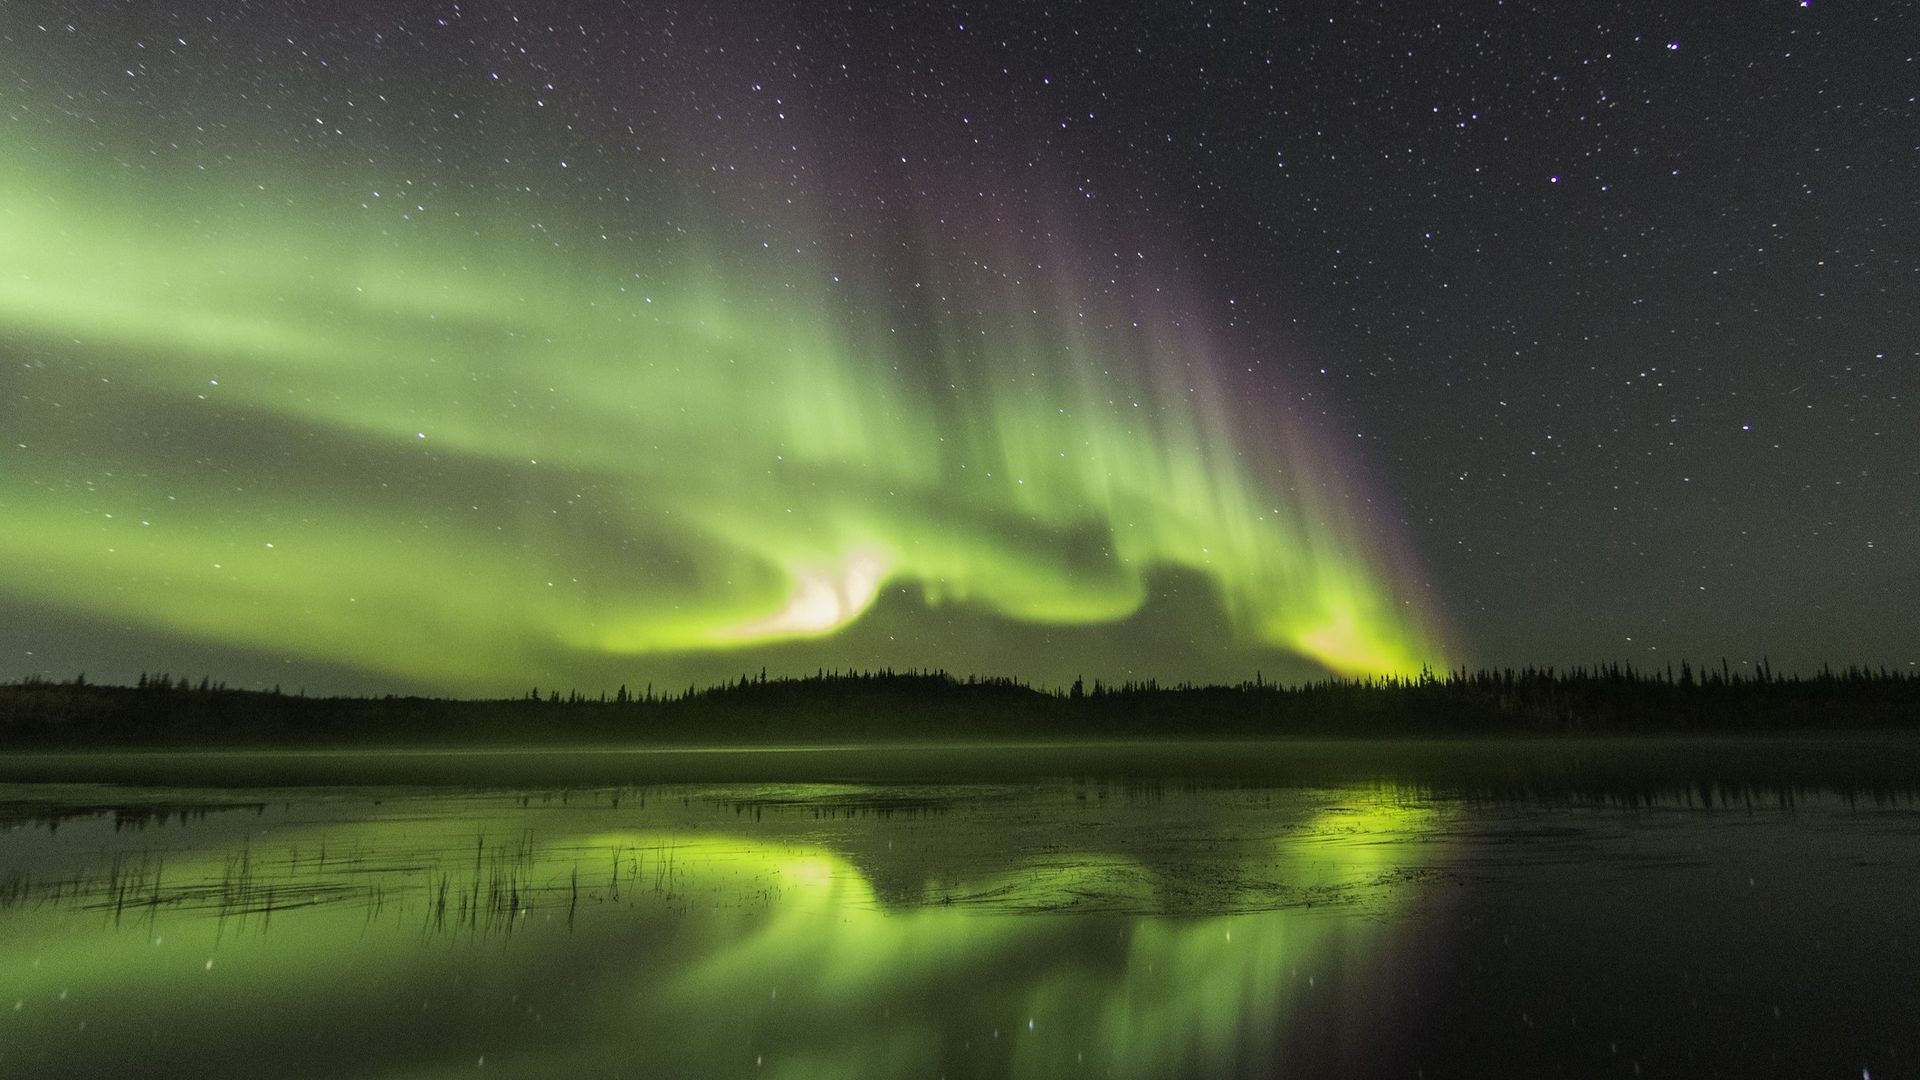
bright green auroras fill the sky and are reflected in the lake below.

Auroras over Prosperous Lake about 20 miles north of Yellowknife. (Image credit: Valerie Ann Pond via Getty Images)

Best time to visit: Mid-August to late September and mid-November to early April

For Canadian travelers hoping to see the northern lights, Yellowknife offers an incredible aurora-viewing destination without the need to travel overseas.

Situated beneath the auroral oval, Yellowknife benefits from a relatively dry continental climate, with plenty of opportunities for clear skies compared with some coastal Arctic locations.

However, timing your visit carefully can make a difference. Although auroras are visible throughout the dark months, late October and early November are generally a less favorable period for a dedicated aurora trip. As temperatures drop, heavy cloud systems move through the area, making sightings more challenging. Indeed, some tour operators temporarily reduce their activities during this period. This is when the region receives most of its snowfall, so shifting your aurora viewing plans before or after this period gives you considerably better visibility.

My tip: Consider booking a multi-night package or several guided outings to give yourself more opportunities if the weather doesn't cooperate.

When is the best time to see the northern lights?

The northern lights occur throughout the year, but you need sufficiently dark skies to see them. That's why the main aurora tourism season across much of the Arctic runs from roughly late August or September through March or early April.

March and September are particularly good months for aurora hunting, thanks to a seasonal boost in geomagnetic activity around the spring and autumn equinoxes. This is partly explained by the Russell-McPherron effect, which describes how the changing orientation of Earth's magnetic field relative to the magnetic field carried by the solar wind makes geomagnetic disturbances more likely around the equinoxes. A 75-year study by retired NASA solar physicist David Hathaway shows that March has more geomagnetically active days than any other month of the year (with October a close second), according to Spaceweather.com.

But personally, I prefer hunting for auroras in the depths of winter, particularly December and January, when the long, dark nights give me plenty of opportunities to look for the lights. Yes, it's much colder, but I love the snowy Arctic landscapes, and I'd much rather be standing in a winter wonderland than battling driving rain!

Frequently asked questions

Where is the best place to see the northern lights for the first time?

For a first northern lights trip, I'd particularly recommend Abisko or Kiruna in Swedish Lapland or TromsΓΈ in northern Norway.

Abisko is appealing for its relatively favorable local weather conditions, while TromsΓΈ offers a great combination of guided aurora tours, accommodation and other Arctic activities.

The best choice depends on what kind of holiday you're looking for.

How many nights should you book to see the northern lights?

I'd recommend at least three or four nights, although a week gives you more flexibility if the weather doesn't cooperate. That said, on my first trip, I stayed for just two nights, with an aurora tour booked for only one of them, and got lucky with a dazzling display. So really, my advice is simple: book as many nights as you can!

Remember, even in the world's most famous aurora destinations, sightings are never guaranteed.

Can you see the northern lights during a full moon?

Absolutely! This is one of the most common northern lights myths.

A bright full moon can wash out faint auroras, but stronger displays remain visible and can look spectacular against a moonlit landscape.

I've personally witnessed beautiful auroras under bright moonlight, and the additional illumination can make the surrounding scenery particularly striking in photographs.

aurora hunting trip in Abisko National Park

Abisko auroras under a full moon. The northern lights were still visible and the moon illuminated the entire landscape. (Image credit: Daisy Dobrijevic)

Can you see the northern lights in summer?

Auroras occur year-round, but in high-latitude destinations such as northern Norway, Sweden and Finland, the summer nights are generally too bright to see them.

As darkness returns in late August and September, the northern lights become visible again.

Is the 2026/27 season a good time to see the northern lights?

Yes. Although Solar Cycle 25 has passed its maximum, the sun remains in an active phase of its approximately 11-year cycle.

Spectacular aurora displays can still occur during the declining phase of the solar cycle, so there's plenty of reason to plan a northern lights adventure over the next year or two.

And remember, at destinations beneath the auroral oval, you don't need a major solar storm to see the northern lights.

Ultimately, the best northern lights trip isn't necessarily the one with the strongest forecast or the highest latitude. It's the one that combines a little planning, a lot of patience and a destination you'll love exploring β€” whether the auroras show up or not.

  •  

Beyond pointing your phone at the night sky, this is how to use stargazing apps effectively

Whether you are a seasoned astronomer or a newcomer to the hobby, the best stargazing apps have the potential to seriously enhance your skywatching experience. But it's easy to overlook just how useful these portable programs can be.

That's why we've put together this guide to getting the best use out of stargazing apps, from identifying stars and constellations through to seeking out dark sky sites and beyond. You will wonder how you ever managed without them.

So read on and get ready to take your stargazing to the next level. And if you're wondering how else technology can take the work out of skywatching, we've also rounded up the best smart telescopes.

Using stargazing apps

Image shows person holding mobile up to starry night sky

Some apps use Augmented Reality (AR) features to allow users to scan the sky in real-time. (Image credit: Getty Images)

Before we explore specific uses, there are a few things you need to know about using the best stargazing apps on your Apple or Android device.

Firstly, while some apps support offline use, you'll typically need a mobile or Wi-Fi signal with data to make the most of these apps.

Also, some apps lock certain features behind a paywall. Pay for Stellarium Plus, for example, and you get an additional 2 million deep sky objects, the ability to connect to certain telescopes and more.

Finally, while many stargazing apps are relatively intuitive, we'd recommend you familiarize yourself with them at home before taking them out into the field.

Identifying stars in the field

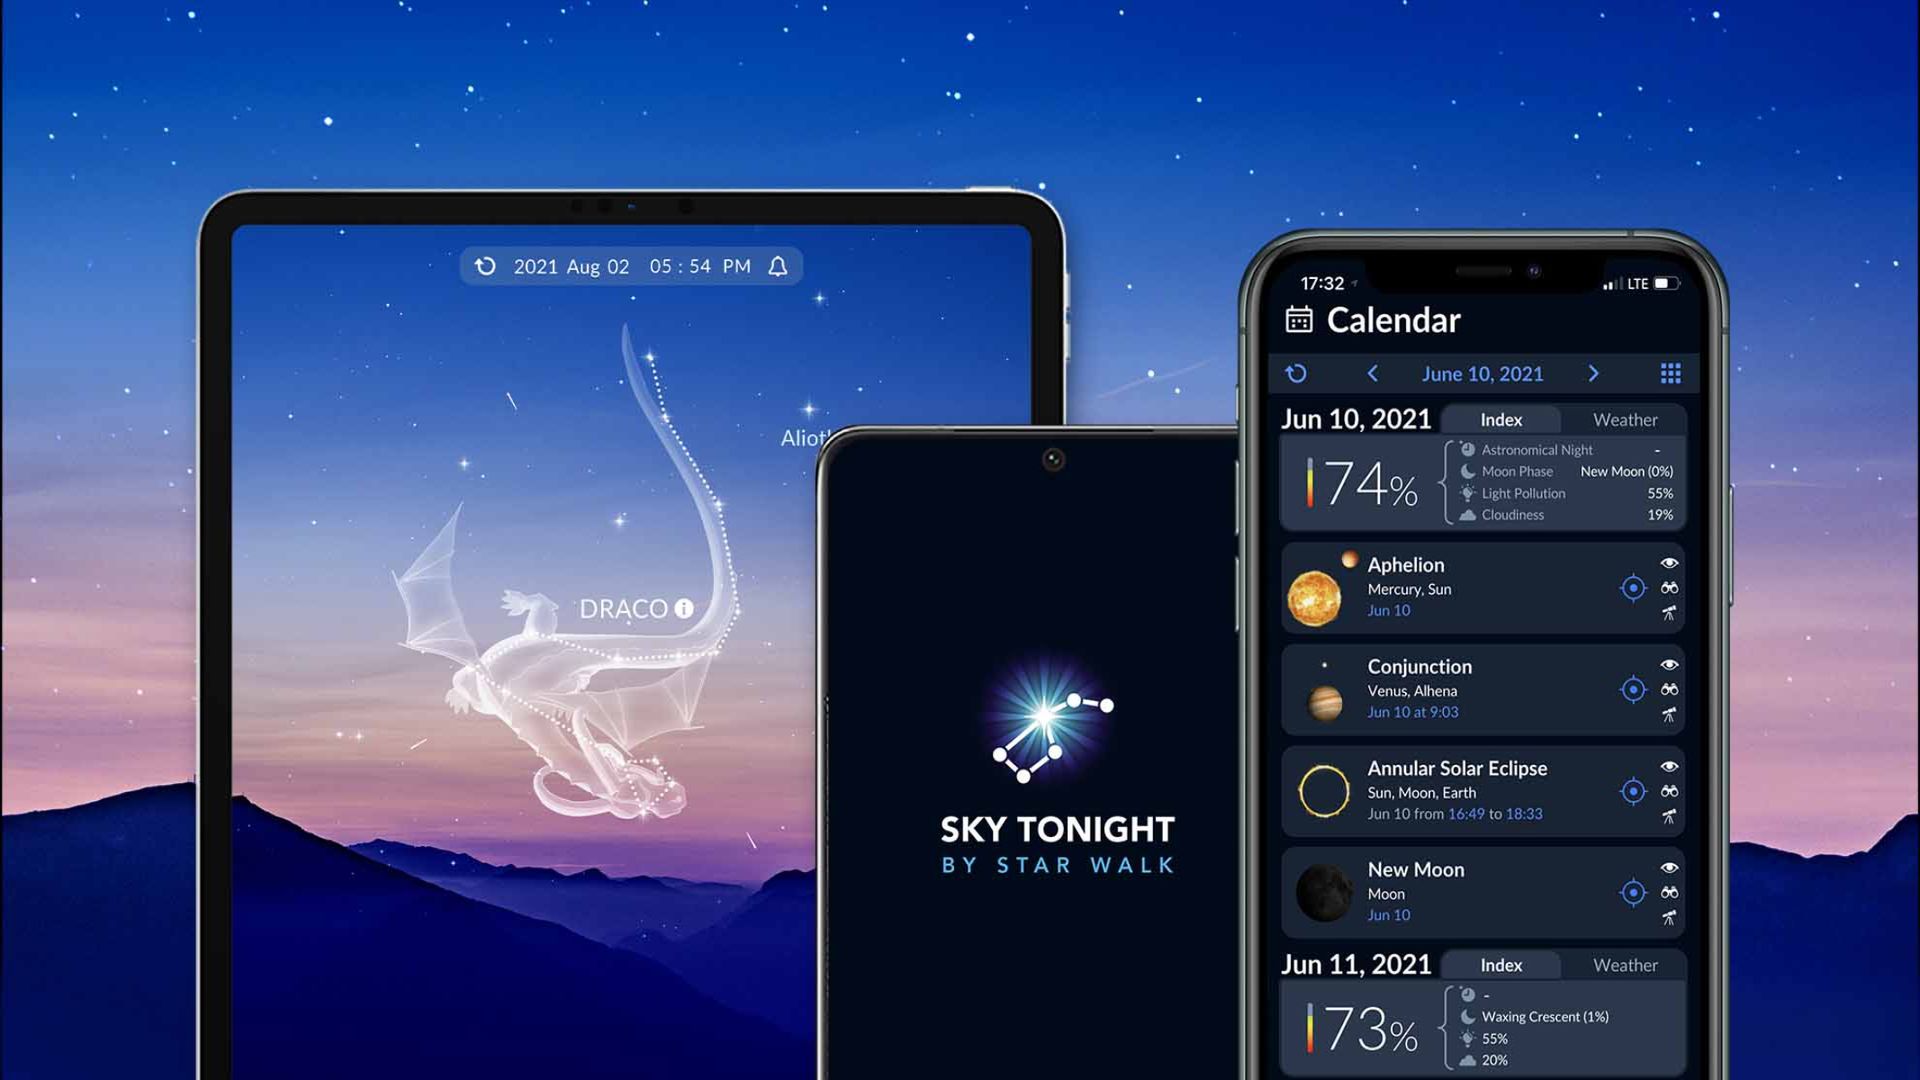
Sky Tonight app shown on three different devices set against the night sky.

Sky Tonight is one of the apps that, via AR, can be used to identify stars and other objects. (Image credit: Vito Technology)

One of the most common and convenient uses for stargazing apps is identifying stars, constellations and more, just by pointing your phone's camera at them.

It really is that simple. Take Sky Tonight, which we think is the best stargazing app for AR (augmented reality). Launch the app, grant it camera access and turn it towards the object you want to identify. The name will appear on screen and you can also tap to learn more about it, whether it's a star, constellation, planet or nebula.

Conversely, you can also use the app to find specific objects in the sky. Want to view Uranus at opposition this Nov. 25 but aren't sure where to look? Search for it in Sky Tonight and the app will point you to it.

Identifiying stars from photographs

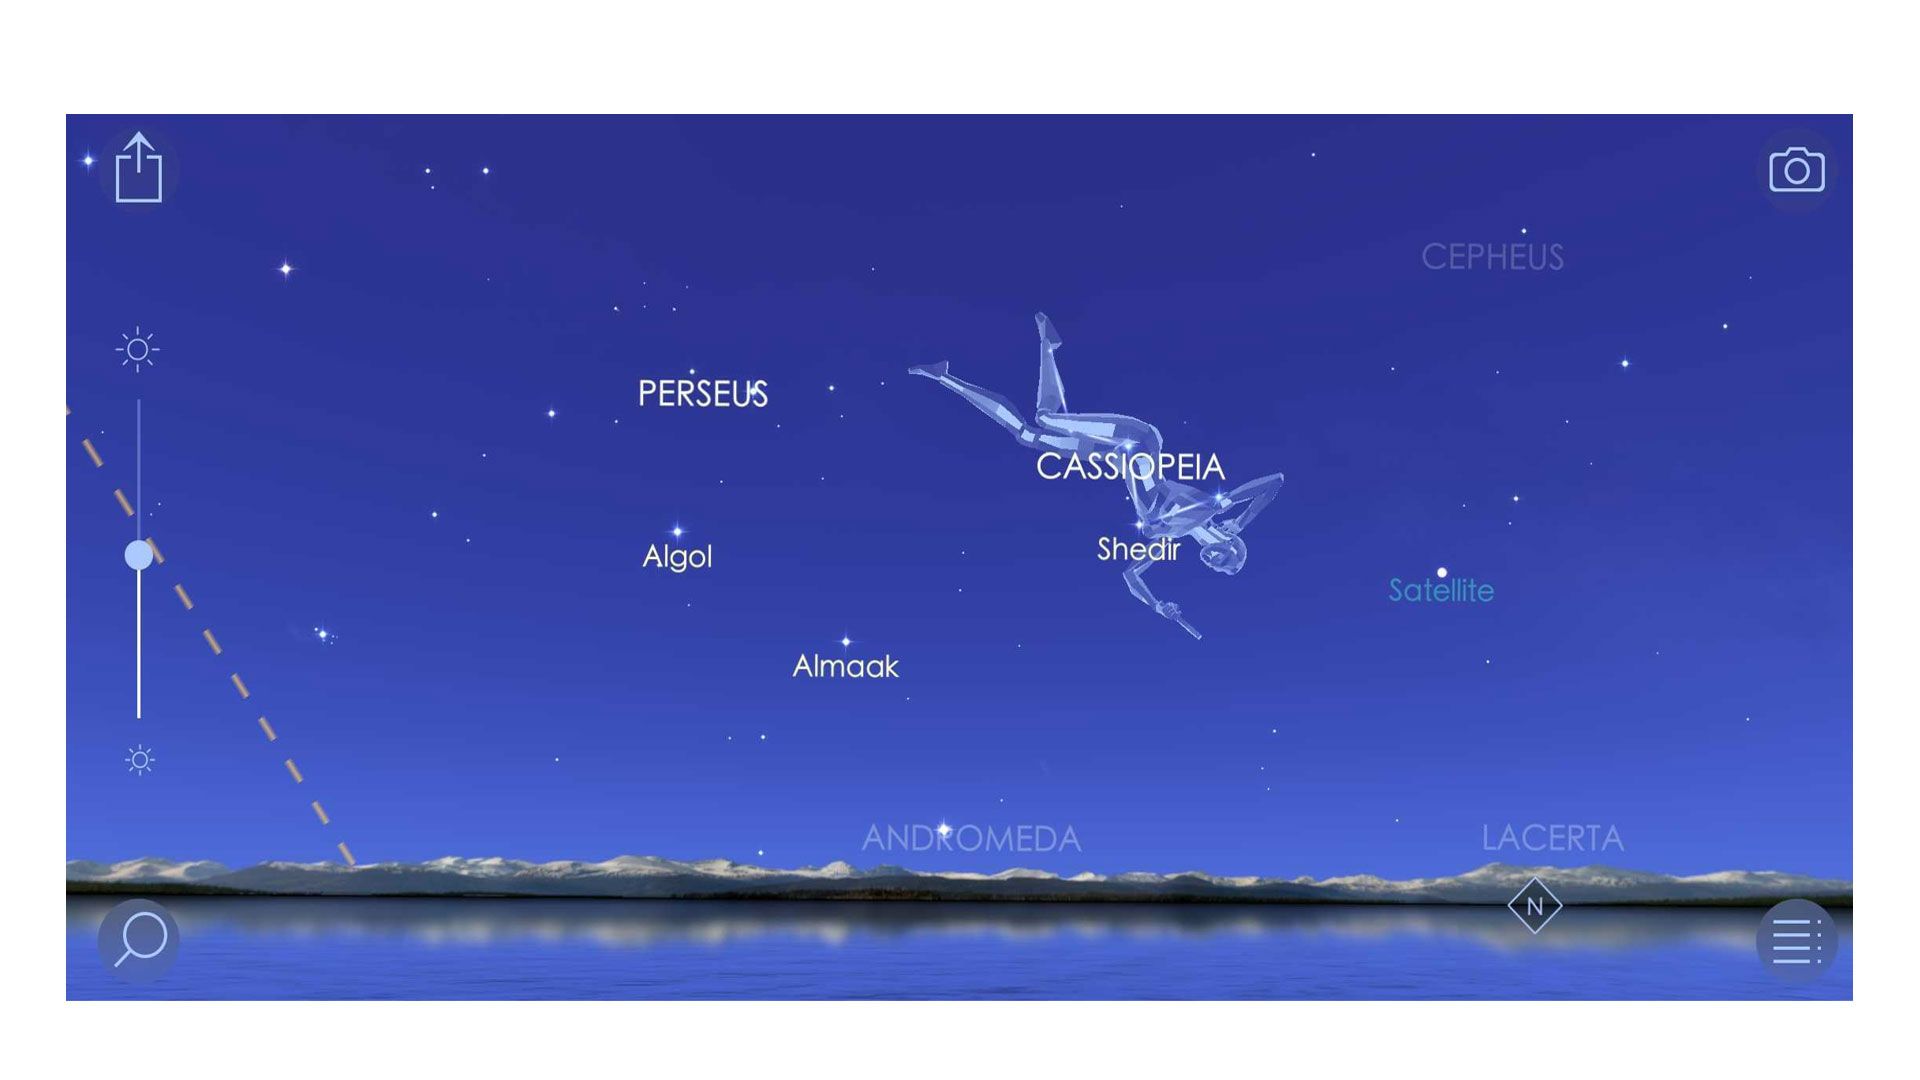
Star Walk 2 review: Image shows constellations in the app.

Sky Walk 2 lets you rewind and advance time, showing you where stars and other objects were or will be on that date. (Image credit: Future)

Being able to identify night sky objects in the field is a real boon, but what if you've already taken a photograph and want to identify which stars were visible?

That's where apps like Sky Walk 2 come in. If possible, you should return to the location where the photograph was taken, but if that's not possible, you can input GPS co-ordinates and Sky Walk 2 will show you the view from that location.

Next, using the clock icon and slider, alter the date to the exact time you took the photograph (or as near as possible). You will then be shown the night sky as it was at the time. You can now tap on the star or stars you want to identify and Sky Walk 2 will tell you the name.

Sky Walk 2 isn't the only app to offer such a facility, but in Sky Walk 2's case this feature is present in the free version of the app.

Finding dark sky sites

A night sky showing the constellation Orion peaking between large craggy rocks. At the bottom is a human holding up a light.

As Earth's population continues to grow, so does the problem of light pollution, so seeking out dark sky sites is essential for the best experience. (Image credit: Inigo Cia via Getty Images)

It's a sad fact that light pollution has made it harder for astronomers to study the night sky. While the planets in our solar system are still visible, sky glow obscures more distant objects, such as fainter stars.

You could travel to a dark sky reserve but, with the aid of one of several stargazing apps, it is also possible to find dark sky sites closer to home.

Apps like Sky Safari and the simply named Light Pollution Map will show you the light pollution levels locally and globally, estimated on the Bortle scale. The latter app colors the map, with pink the most light pollution and black the least.

In just a few seconds you can find out how light polluted your local area is, and use the map to find a location nearby where the sky is dark, or at least darker.

Planning a stargazing trip

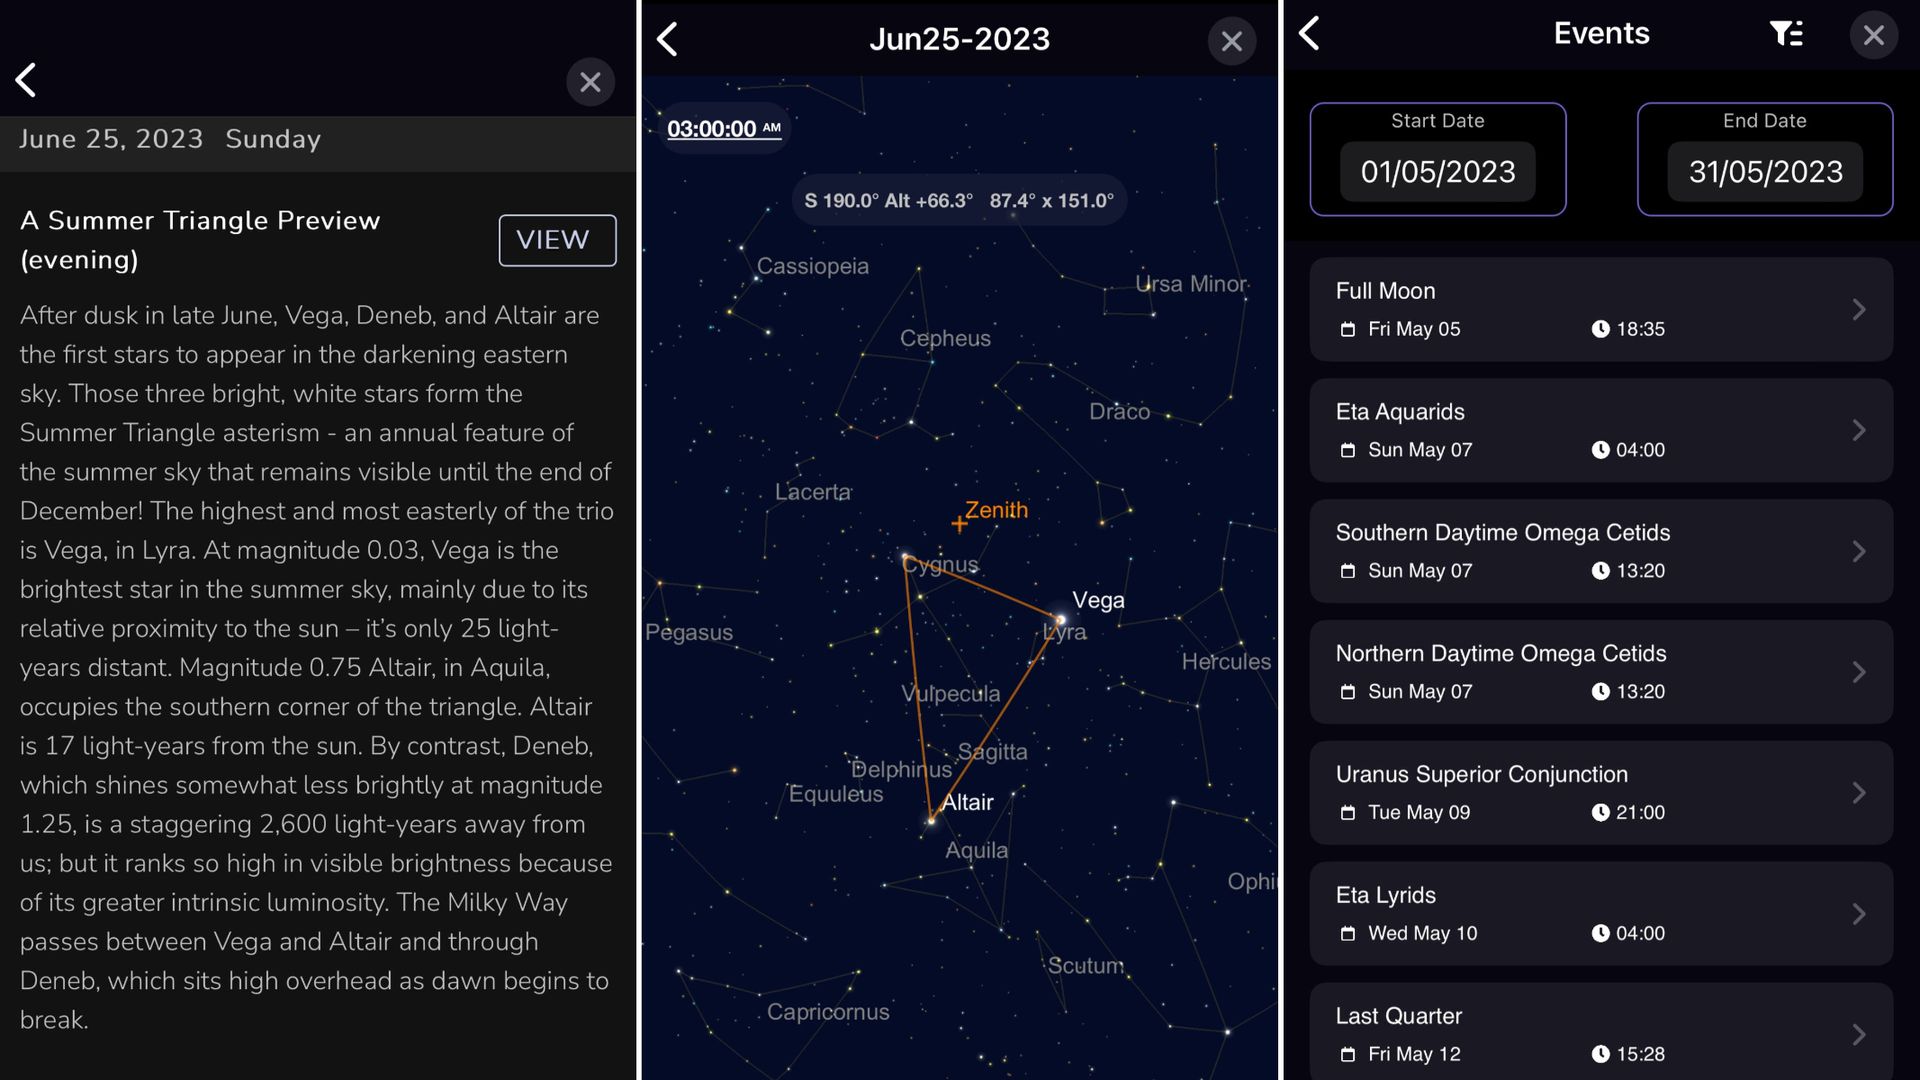
Calendar view with an example of the Summer Triangle asterism set against the night sky.

Sky Safari 7 Pro is a stargazing app that will help you choose what you want to see and where. (Image credit: Jamie Carter)

Are you planning a stargazing trip? Then you'll be happy to hear there's an app for that. There are several, in fact, but Sky Safari has all you need to plan your next outing. You can create observation lists, find out when and where objects are visible, and while it won't book your tickets for you, it comes close.

Our reviewer Jamie Carter used the app to plan his observations of conjunctions, specific moon views and astrophotography opportunities. Coupled with its light pollution map, it will be a huge help in putting together an itinerary for your skywatching trip.

Troubleshooting stargazing apps

Hopefully you'll have a smooth experience, but if you're having issues, here are a few things to try.

  • Take your phone out of its case. Magnetic clasps can interfere with internal sensors.
  • Make sure location services are enabled. Many apps use GPS to show you the correct view.
  • Check your phone's clock. If your clock is not set accurately, apps may display an incorrect sky
  • Swoop your phone in a figure eight motion. This can help calibrate your phone's "compass".
  • Make sure you have a signal, and that data is enabled. Unless the app has an offline mode you will still need a connection. Signal may be poor at dark sky sites.
  • Check each app's permissions. Location aside, Augmented Reality (AR) stargazing apps will need camera access.

  •  

International Observe the Moon Night 2026 is on Sept. 19: Here's how to join in

Moon lovers rejoice! International Observe the Moon Night returns on Sept. 19. Here's everything you need to know about how to participate in the annual celebration of Earth's natural satellite both in-person and from the comfort of your home.

International Observe the Moon Night takes place around the first quarter moon in September or October, when the moon is conveniently visible in the late afternoon and evening. It's also an excellent phase for exploring features along the terminator β€” the boundary between lunar day and night β€” where long shadows help craters, mountains and other features stand out according to NASA.

The global celebration aims to raise awareness of lunar observation, science and exploration, which has intensified in recent years as NASA and its partners work to return humans to the surface of the moon as part of its Artemis program.

How can I participate?

You can join in with the International Observe the Moon Night celebrations either as part of a group or solo from the comfort of your own home!

Looking for an event near you? Search NASA's interactive global map of hundreds moongazing events from star parties organized by local astronomy groups to virtual events hosted by observatories and passionate amateurs.

Or host your own celebration. NASA has advice on how to host your own private or public event to celebrate the occasion, and you can register on the agency's map so other moon enthusiasts can join you.

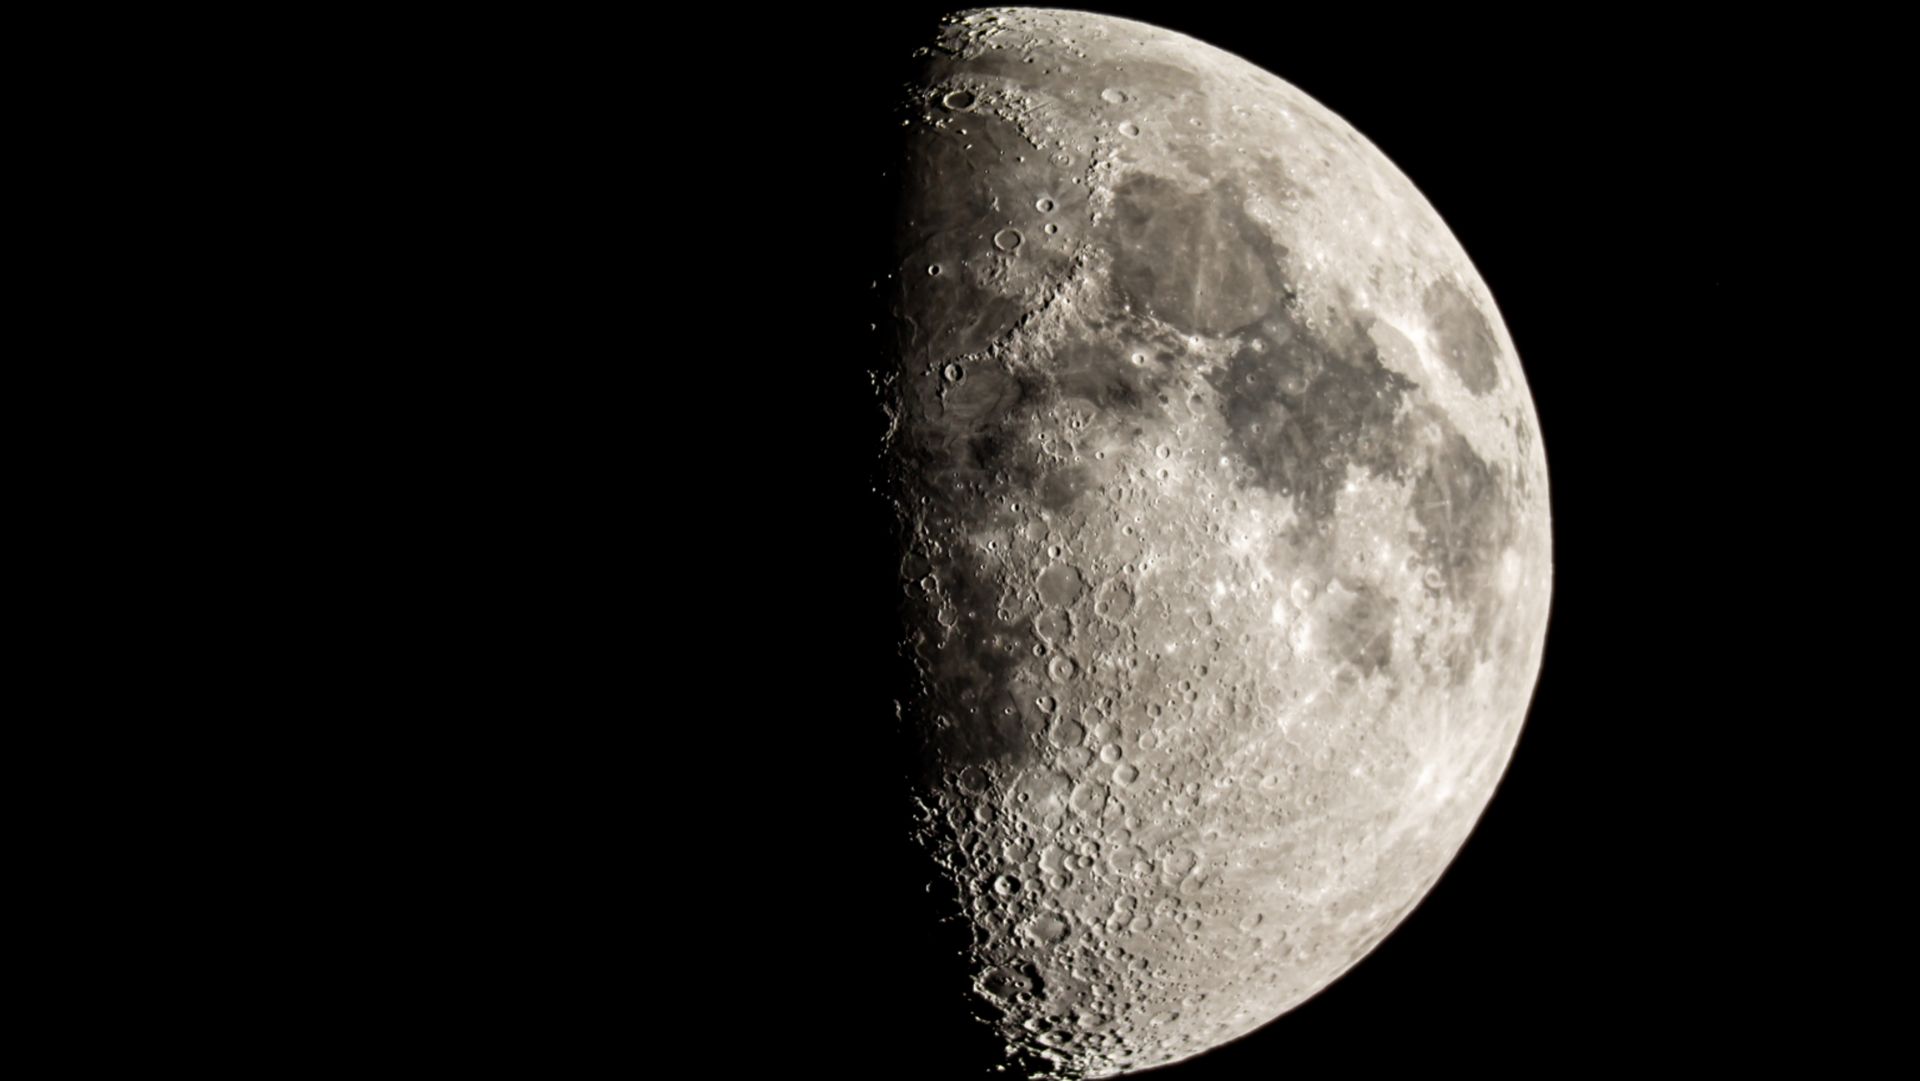
A photo of the moon with its right side lit around the first quarter phase in a black sky.

The first quarter moon shines over Kuwait City. (Image credit: Photo by YASSER AL-ZAYYAT / AFP via Getty Images)

You can also participate from the comfort of your home simply by stepping out to observe the moon with the naked eye, binoculars or a telescope. Or you can peruse hundreds of images of the moon captured by NASA's Lunar Reconnaissance Orbiter and the astronauts of Artemis II as they journeyed to the far side of Earth's moon.

Celestron Nexstar 4SE

Celestron NexStar 4SE

(Image credit: Celestron)

This is a fantastic go-to telescope with a 4-inch aperture that'll help you get quick and steady views of the moon. For more be sure to check out our Celestron Nexstar 4SE review.

Anyone with a 3D printer can also create models of the lunar surface made from LRO data, including the landing site of the historic Apollo 11 mission, which touched down in the Sea of Tranquility in July 1969.

Space.com also has a range of fantastic lunar resources to help you get to know Earth's moon! Be sure to check out our explainer article detailing everything you need to know about the moon, along with the latest news on NASA's Artemis program to return astronauts to the lunar surface and our September full moon guide.

Read more: Apollo landing sites: An observer's guide on how to spot them on the moon.

New to stargazing? No problem! Simply check out our guide to observing the lunar disk, along with our picks of the best binoculars and telescopes that'll have you exploring the wealth of craters and lunar seas scarring the near side of the moon's surface in no time.

Editor's Note: If you would like to share your astrophotography with Space.com's readers, then please send your photo(s), comments, and your name and location to spacephotos@space.com.

  •  

Pre-order the Unistellar Envision AR binoculars and learn about the night sky in real-time

When we had an early preview of the Unistellar Envisions last year, our editor-in-chief Tariq Malik said they felt like something out of Star Trek. I have been very excited about getting my hands on these for a long time and I can't wait to use them to identify stars and constellations in the night sky.

You can preorder the Unistellar Envision AR smart binoculars right now, available for $1499 exclusively from Unistellar.

Unistellar announced that pre-orders were opening for the highly-anticipated Envisions at this year's IFA 2026 conference in Berlin and have delivered more details on the type of functionality customers can expect. The 10x50 smart binoculars can be used with or without the augmented reality (AR) overlay which is able to recognise constellations, planets and deep-sky objects in real time, with more functionality expected to be released within the coming months.

Pre-order now for guaranteed delivery before Christmas.

The Envisions are the highly anticipated augmented reality (AR) smart binoculars from Unistellar, with night sky object recognition from a database of over 1,000 astronomical targets, shareable target lock and guided navigation mode. Functionality to identify natural landmarks, paths and shelters is expected in the coming months.

$1,499 / Β£1,299 / €1,499

A man looking through the Unistellar Envision smart binoculars with a dock in the background.
Our editor-in-chief Tariq Malik was very impressed with them during a demo and thought they felt like something from Star Trek. Tariq Malik / Future
A side back view of the Unistellar Envision smart binoculars with water in the background.
Controls on the right hand side of the model allow you to activate the AR overlay or just use them as regular 10x50 binoculars.Tariq Malik / Future
A side-front view of the Unistellar Envision smart binoculars with water and houses in the background.
At 10x magnification and with 50mm objective lenses, these smart binoculars also hit the key specs for stargazing binoculars even without the augmented reality (AR) overlay.Tariq Malik / Future
A man looking up at the night sky with the Unistellar Envision smart binoculars with water in the background.
Guided navigation mode when paired with the Unistellar app helps guide you toward specific night sky objects that you want to observe.Tariq Malik / Future
A mountain in the distance with a red AR overlay through binoculars.
On top of night sky object identification, functionality for identifying geographical features is expected to be released soon. Tariq Malik / Future
A smartphone showing the view through the Unistellar Envision binoculars with a red AR overlay of a mountain.
The red augmented reality (AR) overlay displays the name of your chosen target and helps you identify new parts of the natural world.Tariq Malik / Future

Unistellar have already shown their muscle in the smart telescope department with the Odyssey, eQuinox 2 and eVscope 2 delivering easy and professional astrophotography to beginner and intermediate stargazers alike. Now they are pushing into the world of smart binoculars with the release of the Unistellar Envision smart binoculars.

These binoculars are "smart" in a different way to the rest of Unistellar's products. They use augmented reality to help users identify constellations, stars and deep sky objects, with a red overlay displaying names and information within the 10x magnified view. Our editor-in-chief got his hands on a pair of Envisions last year and was struck by how sci-fi they felt, likening them to something from Star Trek.

Whilst connected to the Unistellar smartphone app, users can select "Guided Navigation Mode" which guides them to their chosen target. This can also be used for custom targets that the user selects and can be used during shared viewing to help others find the same target. Functionality for geographical landmark identification is expected to be released in the coming months and subsequent software updates are expected to introduce new and exciting uses.

This Unistellar Envision pre-order guarantees delivery before Christmas, so if there is a stargazing obsessed loved one in your life, these smart binoculars could be the perfect gift. They are ideal for those who love adventuring and prefer dynamic skywatching with a new tool that boasts over 1,000 astronomical targets of interest and more than 200,000 visible stars in its database.

Key features: 10x magnification, 50mm objective lenses, porro prism design, weight 2.65 lbs (1.2 kg), five-hour AR battery life, operates without battery as classic binoculars, six-degree field of view, BaK-4 fully multi-coated optics, 1,000+ astronomy targets, +1,000,000 terrestrial targets (functionality expected to be released within the coming months).

Product launched: 2025

Price history: Unistellar did offer the binoculars for $999 for those who pre-ordered them last year but the current selling price is $1,499.

Unistellar exclusive: $1,499

Reviews consensus: We tried them out before general release and were impressed with their augmented reality (AR) overlay which helped us identify stars and a geographical target.

Featured in guides: best smart binoculars

βœ… Buy it if: You want an interactive display that helps you learn about the night sky and locate targets.

❌ Don't buy it if: You need stronger than 10x magnification for long-distance viewing or features like image-stabilization or extreme waterproofing.

Check out our other guides to the best telescopes, binoculars, cameras, star projectors, drones, lego and much more.

  •  

Don't miss Venus shine beside the crescent moon at sunset tonight

Look west at sunset on Sept. 13 to see brilliant Venus shining close to the delicate arc of the crescent moon. The encounter is a prelude to an even closer meeting the following day, when the moon will pass directly in front of Venus for observers across parts of Europe, Africa and Asia.

Tonight (Sept. 13), Venus will appear as a bright "Evening Star," a little over 5 degrees from the 9%-illuminated waxing moon β€” roughly the width of your three middle fingers held at arm's length against the evening sky.

Venus, often referred to as "Earth's twin" as a result of its similar size and rocky composition, will be easy to spot as a dazzling point of light in the evening sky, while the moon will be a trickier target, with its barely illuminated disk all but lost in the glare of the setting sun.

The moon and Venus will shine less than 10 degrees above the horizon at dusk, so find a spot with a clear view to the west to give yourself the best chance at catching the solar system pairing before they follow the sun out of view a little over an hour after sunset.

The moon and Venus will shine less than 10 degrees above the horizon at sunset and will be visible for less than an hour before the lunar disk follows our parent star below the late summer skyline. Find a spot with a clear view to the west and start scanning the sky as soon as the sun sets to give yourself the best chance at catching the solar system pairing. You can discover the exact timings for sunset for your location using Time and Date's sunset tracker.

Look out for earthshine brightening the unlit side of the lunar disk, as sunlight reflects off our planet to bathe the moon in a subtle glow, revealing ghostly details on the moon's otherwise unlit side. The phenomenon is best viewed on nights surrounding the new moon phase, when Earth is well positioned to bathe its natural satellite in reflected sunlight.

Celestron UpClose G2 10x50

Celestron UpClose G2 10x50 Binocular on a white background

(Image credit: Celestron)

For around $50 you can grab these beginner binoculars for better views of craters and seas on the lunar surface. 10x is enough for a closer look without worrying about excessive shakes during handheld observation.

_

Celestron UpClose G2 10x50 review

Millions of stargazers across parts of Europe, North Africa, the Middle East and southern India will be positioned to see the moon pass directly in front of Venus in the daytime sky starting at 5:26 a.m. EDT (0926 GMT) on Sept. 14, according to in-the-sky.org. Remember: It's never never safe to point a telescope or binoculars at the sun, as doing so can lead to permanent damage to your vision.

The moon and Venus will be below the horizon for viewers in the U.S. as the occultation takes place. By the evening of Sept. 15, the waxing crescent will appear to have leapt to the left of Venus as it nears the point of maximum brightness in its current evening apparition on Sept. 18.

Want to photograph the crescent moon near Venus for yourself? Then check out our guide to photographing the lunar surface with a DSLR or mirrorless camera, along with our roundups of the best lenses and camera bodies for astrophotography.

Editor's Note: If you would like to share your astrophotography with Space.com's readers, then please send your photo(s), comments, and your name and location to spacephotos@space.com.

  •  

Perseid meteors meet mesmerizing star trails over Egypt's Western Desert

Astrophotographer Osama Fathi created this incredible view of Perseid meteors streaking through circling star trails above Egypt's Western Desert on Aug. 13-14, the night following the shower's peak under dark new-moon skies.

Fathi imaged the star trails in 240 consecutive 25-second exposures, which captured the apparent motion of the stars in Earth's sky as they seemed to circle the celestial north pole and the North Star Polaris. The length of each trail reveals how far the stars appeared to move as Fathi captured their ancient light with his Sony A7 III camera and a 16-35 mm lens during the 100-minute shoot.

But Fathi wasn't alone beneath the desert skies as he captured the scene.

"Capturing this photo in Egypt's Western Desert during the Perseids was an unforgettable experience," Fathi told Space.com in an email. "The night was exceptionally clear and I was surrounded by around 200 fellow astronomy enthusiasts sharing stories, stargazing and photographing the sky."

Star trails circle above a desert at night as meteors streak through the sky.
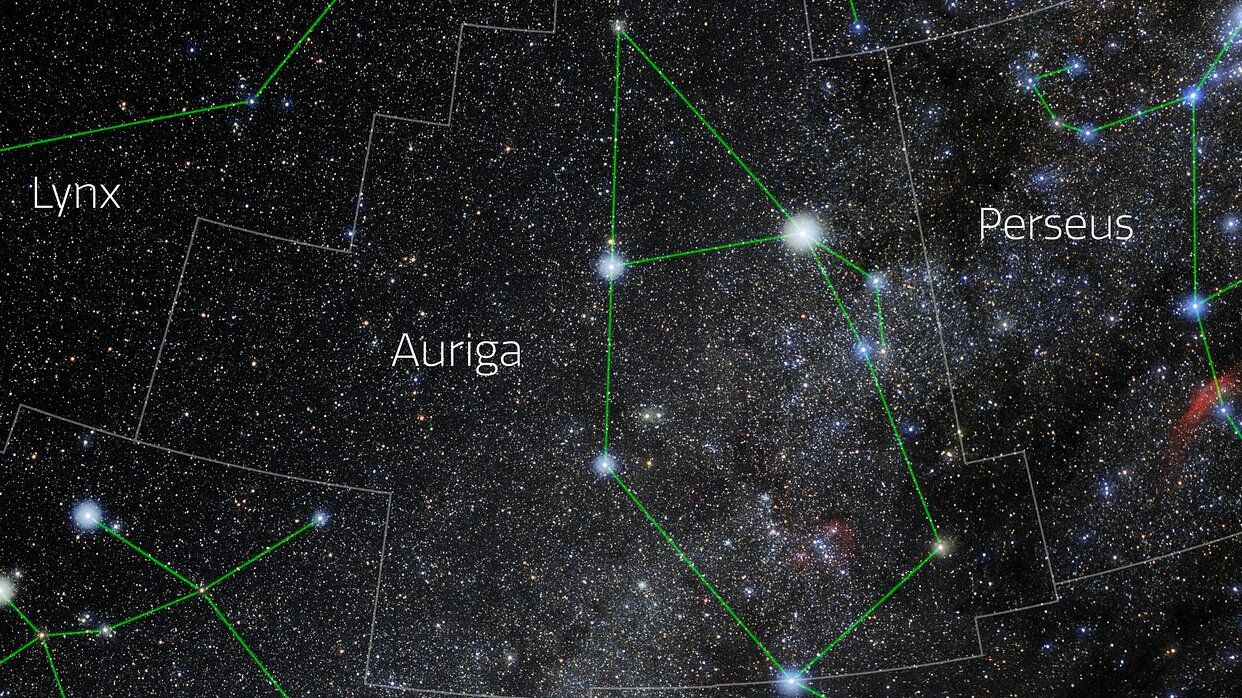
Perseid meteors and satellites intersect star trails in the skies over Egypt. (Image credit: Osama Fathi)
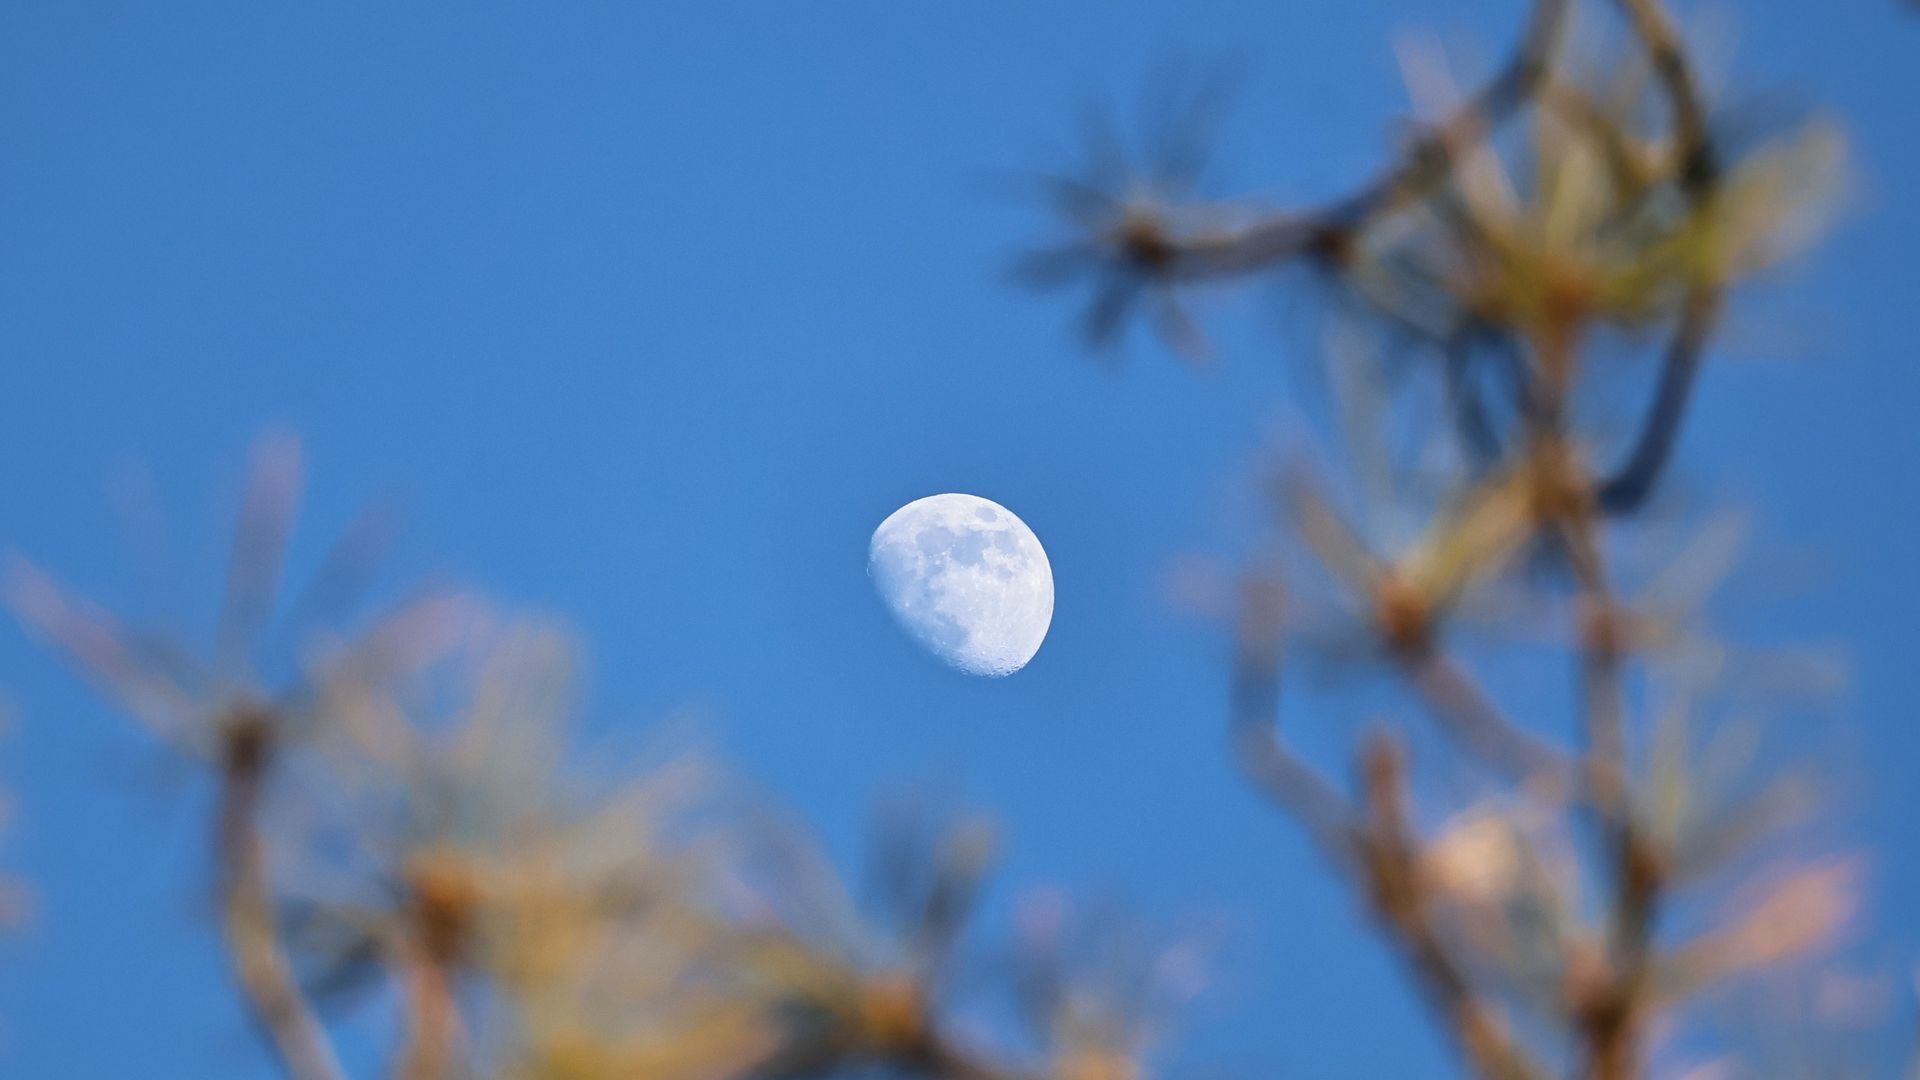
Perseid meteors appear as unbroken streaks of light, captured in a single exposure as tiny particles β€” often no larger than a grain of sand β€” burn up in Earth's atmosphere in the blink of an eye.

Dotted trails closer to the horizon depict the trajectories of satellites as they passed silently through the skies over Egypt's Western Desert. Fathi captured the landscape and starscape separately before combining, or stacking, the images into a mesmerizing image.

The result is a gorgeous nightscape that highlights the beauty of the natural landscape, the rotation of Earth and the natural light show of the Perseid meteor shower that we experience as Earth passes through the trail of debris shed by comet 109P/Swift-Tuttle.

Want to capture beautiful images of the night sky for yourself? Then be sure to read our guide to photographing star trails, along with our picks of the best cameras and lenses for astrophotography available in 2026.

Editor's Note: If you would like to share your photos of the night sky with Space.com's readers, then please send your photo(s), comments, name and location to spacephotos@space.com.

  •  

I've chased the 'false dawn' for years β€” this is the week to find and photograph it

Some stargazing feels like you know exactly what you are looking for, but you're still slightly unsure whether you are actually seeing it. Zodiacal light β€” meaning "light from the circle of animals" β€” is often like that.

I have chased this so-called "false dawn" for years, and the first few minutes are always the same. I stare toward the horizon and wonder whether the sky is genuinely brighter there, or whether I am simply seeing distant light pollution, the first hint of morning twilight, or something my eyes have invented because I badly want to see it.

However, under a genuinely dark sky β€” and particularly in a long-exposure image β€” its cone shape becomes obvious.

Zodiacal light is enormous. It appears as a broad, softly glowing pyramid rising from the horizon. It can be fainter than the Milky Way and has no hard edges, which is precisely why it is so easy to overlook.

This week is a particularly good time to try because the new moon occurs on Sept. 10-11. With no moonlight interfering with the predawn sky, the main problems become familiar ones to any skywatcher: clouds, haze and artificial light.

The phenomenon itself could hardly be more epic. Zodiacal light is sunlight scattered by dust spread through the inner solar system, concentrated broadly around the plane in which the planets orbit. From Earth, we see that dusty structure edge-on along the ecliptic β€” the path through the sky followed by the sun, moon and planets. It's home, of course, to the 12 (actually 13) constellations of the zodiac β€” from Pisces the fish to Leo the lion. This is the circle of animals.

From the Northern Hemisphere around the September equinox, dust-hunting observers should look east before morning twilight, when the ecliptic rises steeply away from the horizon, and the faint glow becomes easier to separate from the murk below. It will reach about 30 to 40 degrees above the horizon.

Zodiacal light is the solar system itself made faintly visible β€” and one of the most subtle and strangest sky sights of all.

What's happening and when to look

Skywatching map showing the northern hemisphere looking east 2 hours before sunrise.

Zodiacal light is a faint pillar of brightness stretching upward from the horizon. (Image credit: NASA/JPL-Caltech)

For observers at mid-northern latitudes, September mornings offer one of the year's best windows for spotting the "false dawn" β€” but it's not easy to see. The essential ingredients are an unobstructed eastern horizon (preferably over the ocean or a large body of water) and no light pollution. You'll need to start looking before astronomical twilight begins rather than waiting until the sky is already visibly brightening, which means getting up very early in a very dark place.

Check the time astronomical twilight begins at your location and aim to be outside before then, giving your eyes at least 20 to 30 minutes to adapt to the darkness. The zodiacal light should appear as a broad triangular glow, widest and brightest close to the horizon and narrowing as it climbs.

It's easy to confuse it with a distant town, but artificial skyglow tends to form a rounded dome above one location on the horizon. In contrast, zodiacal light reaches diagonally β€” or almost vertically upward β€” along the ecliptic.

Give your eyes time and save up that one vital ingredient, a vanishing human trait any skywatcher must constantly nurture β€” patience. Zodiacal light is not something you can walk outside and instantly see. It comes only to those who work for it.

How and when I'm photographing it

Zodiacal light rises over the Badlands of South Dakota.

Zodiacal light is a faint pillar of brightness stretching upward from the horizon. (Image credit: Mike Hollingshead via Getty Images)

A little like a faint aurora, a camera almost always detects zodiacal light before your eyes become completely convinced. The easiest way is to use a tripod and a wide-angle lens, preferably something around 14-24mm, compose with plenty of eastern sky and include a simple foreground to make the triangular shape obvious. A starting point of around f/2.8, ISO 1600, and an exposure of roughly 10-20 seconds usually puts you in useful territory, though sky brightness and lens speed change everything.

Shoot RAW, focus manually on a bright star and capture a series of images. Then, once you've photographed it, try to stop looking at the screen β€” the entire point is to see it with your own eyes.

Stargazer's corner: September 11-18, 2026

With a new moon on Sept. 10, this week sees a run of dark evenings before our natural satellite gradually returns. On Sept. 14, look shortly after sunset for a slender waxing crescent moon beside Venus, extremely low in the western twilight. By Sept. 16-17, the moon moves on towards Antares, a reddish star at the heart of Scorpius. Then Sept. 18 brings a first quarter moon (perfect for exploring with binoculars or a small telescope) and Venus at the greatest brilliancy of its current apparition as the "Evening Star."

Constellation of the week: Orion

night sky map showing the constellation Orion in the night sky.

Orion, "The Hunter," is now visible in the east before sunrise. (Image credit: E. Slawik/NOIRLab/NSF/AURA/M. Zamani, background added in Canva Pro)

Orion is normally thought of as a winter constellation, so September seems an odd time to go looking for it. However, if you're venturing out to an extremely dark place to look for zodiacal light, you're going to be staring Orion in the face. In September, the Hunter is in the eastern sky before dawn, where its stars sit along the same general strip of sky occupied by the zodiacal light. Its famous belt stars will be up, as will be bright Sirius, below. This is one of the pleasures of observing before sunrise. The sky is effectively showing you a preview of another season. The constellations climbing in the September dawn are the ones Earth will face during winter evenings a few months from now. Jupiter and Mars will also be visible β€” right on the ecliptic where you'll also β€” hopefully β€” spy the "false dawn".

  •  

A star is exploding 45 million light-years away β€” here's how you can see it

An extraordinary exploding star has been spotted in a distant galaxy, and astrophotographers are racing to capture it before it fades from view.

The supernova, called SN 2026aaiv, was first seen by the ATLAS survey on Sept. 1 in NGC 7331 (also known as Caldwell 30), a spiral galaxy about 45 million light-years away in the constellation Pegasus, visible in the Northern Hemisphere and at mid-latitudes in the Southern Hemisphere.

That makes this supernova a prime target for amateur astrophotographers and astronomers worldwide to capture an image of this rare event.

Hundreds of astrophotographers have already captured it, including Andrew McCarthy, who posted his image on Instagram on Sept. 7 with the message, "As luck would have it, I happened to be in the middle of a massive project with this galaxy, and caught the supernova." He shot four hours of data, two before and two after the supernova, as part of a 100-hour project. "The final image will be EPIC!" he said.

Tom Masterson, Mountain Operations Manager at the Mount Wilson Observatory, also captured it on Sept. 10 using a 60-inch telescope.

What you'll need to find SN 2026aaiv

At magnitude 15.7 on Sept. 11, 2026, SN 2026aaiv is relatively dim, but still brightening. Many of the images posted online were captured with large professional telescopes or remote telescopes in dark regions. However, you can find and photograph SN 2026aaiv with relatively modest equipment. You'll need a telescope or large binoculars to see NGC 7331 (at magnitude 10) at all, but the supernova is dramatically more challenging visually. To have a chance of seeing SN 2026aaiv, a large telescope is recommended (observers have confirmed seeing it using a 14-inch Schmidt-Cassegrain telescope). Use the averted vision technique: look slightly to the side of the galaxy's core so the eye's more light-sensitive rod cells can reveal faint detail.

The easiest way is to use a smart telescope, which can quickly find and image the host galaxy NGC 7331. According to Seestar (Official ZWO Group) on Facebook, users of the Seestar S50 have managed to image the SN 2026aaiv with about two hours of 10-second exposures (the default mode).

How to find SN 2026aaiv

night sky graphic map showing the great square of pegasus

SN 2026aaiv can be found in NGC 7331, close to the Great Square of Pegasus, right after dark in the east from the Northern Hemisphere. (Image credit: Starry Night)

SN 2026aaiv has the coordinates RA 22h 37m 05.618s, Dec +34Β° 24β€² 35.37β€³. From the Northern Hemisphere, turn toward the east after dark, and you'll see four large, bright stars rising in a vast diamond shape. This is the Great Square of Pegasus, part of the constellation Pegasus. At the northwestern corner of the Great Square is Scheat. Just above it, outside the square, is a dimmer star called Matar. NGC 7331 is close by. In light-polluted skies, only the central core of the galaxy is visible, according to NASA. The galaxy, which we see partially edge-on, has spectacular spiral arms that swirl around a bright central region.

What we know about SN 2026aaiv

SN 2026aaiv is a Type Ia supernova, a catastrophic explosion that occurs when a white dwarf in a binary star system gains enough material from its companion to trigger a runaway thermonuclear reaction, destroying the white dwarf. Remarkably, another Type Ia supernova, SN 2025rbs, was found in the same galaxy on July 14, 2025.

NGC 7331, imaged by the Hubble Space Telescope in 2018, was first found in 1784 by British astronomer William Herschel, who cataloged over 2,500 deep-sky objects and discovered Uranus and its two largest moons. NGC 7331 is similar in size, shape and mass to the Milky Way.

  •  

'I take the compact Nikon Stabilized 12x25 binoculars with me everywhere' β€” they now have $73 off, the best we've seen this year

Jase Parnell-Brookes has reviewed a huge range of skywatching optics, including the best telescopes, binoculars and image-stabilized binoculars. As our trusted authority and expert tester, when they recommend a product and you're in the market for it, their opinions and recommendations are worth paying attention to.

In their Nikon Stabilized 12x25 binoculars review, Jase reckoned they were without doubt the best compact image-stabilized (IS) binoculars they had ever tested. Right now they have $73 off and are at the best price we've seen since Black Friday 2025.

Get the Nikon S 12x25 binoculars, available for just $627 at Best Buy.

Jase awarded them with a perfect 5-star rating, which was mostly thanks to their excellent stabilization, their unobtrusive controls and incredibly small form factor. They also earned a place on our best binoculars guide as the best compact IS binoculars. This Best Buy deal is worthy of your attention if you're in the market for an incredibly versatile pair of binoculars that deliver still views in a compact body.

Save $73 on these pocket-sized image-stabilized (IS) binoculars from Nikon. They offer a strong 12x magnification and are portable enough to just slip into your pocket. In our review, we noted that the compact size and amazing IS system delivered amazing stargazing performance and earned them a perfect five-star review.

Read our Nikon Stabilized 12x25 Binoculars review.View Deal

Nikon Stabilized 12x25 S binoculars held in the hands of the reviewer in front of breaking waves at the beach
The Nikon Stabilized 12x25 S binoculars are incredibly compact and are a handy pair to take wherever you go. Kimberley Lane
Nikon Stabilized 12x25 S binoculars held in the hands of the reviewer in front of breaking waves at the beach
The smaller objective lenses mean that the image looks a stop darker than viewing with the naked eye. Kimberley Lane
Nikon Stabilized 12x25 S binoculars held in the hands of the reviewer in front of breaking waves at the beach
The eyecups rotate freely to adjust the amount of eye relief. Kimberley Lane
Nikon Stabilized 12x25 S binoculars held in the hands of the reviewer in front of breaking waves at the beach
The binoculars are incredibly lightweight, considering their onboard image-stabilization system. Kimberley Lane

These image-stabilized (IS) binoculars punch well above their weight. Tipping the scales at a feathery 13.9 oz (395 g), they pack effortlessly into any bag, giving you rock-steady views wherever you roam. While the compact objective lenses yield a slightly dimmer view than the naked eye, they still deliver fantastic, crisp performance for casual stargazing.

In their testing, Jase managed to see the Andromeda galaxy (M31) with averted vision and the Orion nebula (M42), so these are worth taking out with you at night for a better look at the stars and some of the brighter deep sky objects.

They are also relatively cheap in the image-stabilized world where models can easily go for $1000 and up, depending on the model. Jase was happy to recommend these over another compact IS model, the Canon 8x20 IS binoculars, and they are actually lighter and smaller too. With their silky smooth steadying and clear views, they highly recommended them for anyone looking to get image-stabilized binoculars but doesn't want to spend big bucks.

Key features: 12x magnification, 25mm objective lens diameter, 4.5-degree angular field of view, 12.3mm eye relief, 13.9 oz (395 g) weight.

Product launched: November 2024

Price history: The Nikon Stabilized 12x25 binoculars usually retail for $699.95 on Amazon. This deal from Best Buy beats the Amazon price easily and, at just $626.95, is the best price we've seen since Black Friday 2025.

Price comparison: Best Buy: $626.95 | Newegg: $629.95 | Amazon: $699.95

Reviews consensus: Space: β˜…β˜…β˜…β˜…β˜… | Digital Camera World: β˜…β˜…β˜…β˜…

Featured in guides: Best binoculars, Best compact binoculars

βœ… Buy it if: You are looking for an affordable way into image-stabilized binoculars and need a pair that you can slip into your pocket.

❌ Don't buy it if: You need really high magnification or bigger objective lenses. For more powerful image-stabilized binoculars, try the Canon IS 15x50 binoculars.

Check out our other guides to the best telescopes, binoculars, cameras, star projectors, drones, lego and much more.

  •  

The Summer Triangle β€” 3 stars, 1 seasonal mystery

On clear September evenings, I often find myself looking up just after dusk, expecting the sky to feel a little less like summer. Yet there, still commanding the overhead darkness, are Vega, Altair, and Deneb β€” the three brilliant stars of the famous Summer Triangle.

Their familiar pattern can make the season feel as though it is lingering above us, even as cooler nights and earlier sunsets suggest otherwise. In fact, even as late as mid-November, the Triangle is still nearly overhead soon after sunset at dusk. That contrast raises a simple but intriguing question: if this bright celestial landmark remains so prominent well into autumn, why do we still call it the Summer Triangle?

Why not simply call it the Autumn Triangle?

Why it belongs to summer

The answer lies not in the calendar, but in how the Triangle moves across the sky over the course of a summer night. The chief reason is that, at this time of year, the Triangle does not remain visible all night. By dawn, it has begun to drop beyond the west-northwest horizon. During summer, by contrast, it remains with us from dusk until dawn: already evident in the east-northeast at nightfall, near overhead around the middle of the night, and descending in the west-northwest as daybreak approaches.

A matter of distance and brightness

The stars that compose the Triangle β€” Vega, Altair, and Deneb β€” lie at very unequal distances from us, so their apparent brightness can give a misleading impression of their true luminosity.

The closest of the three is Altair, 16.7 light-years away, followed by Vega at 25 light-years. Deneb, however, is vastly farther off, at roughly 1,600 light-years, though various sources place it between 1,400 and 2,600 light-years. Even though we see Deneb by light that may have begun its journey during the last days of the Roman Empire, it still shines at first magnitude (+1.3, to be exact) because it is a brilliant blue supergiant, at least 55,000 times brighter than the sun.

But their apparent superiority is largely a consequence of distance: Vega and Altair are only a few dozen light-years away, while Deneb lies well over a thousand light-years from Earth. Compared with the stellar lighthouse of Deneb, Vega and Altair are, comparatively speaking, penlight flashlights.

How to say "Vega"

Before continuing with this discussion about the Summer Triangle, it is worth pausing briefly on the pronunciation of Vega, a point that became especially noticeable after the 1997 science fiction drama Contact. Based on Carl Sagan's 1985 novel, the film follows astronomer Dr. Ellie Arroway, played by actress Jodie Foster, as she discovers a radio signal from Vega containing a sequence of prime numbers.

Throughout the film, the star is pronounced "Vey-gah," perhaps echoing Chevrolet's Vega, the subcompact automobile sold in the 1970s. Astronomers, however, generally use a different pronunciation.

The traditional astronomical pronunciation is VΔ“-ga, with the stress on the first syllable. In professional astronomical usage, Dr. Arroway and her colleagues would almost certainly have said "Vee-ga," not "Vey-gah." George Lovi (1939β€”1993), who was widely respected for his knowledge of star nomenclature, often reminded audiences that "Vee-ga is a star and Vey-gah is a car."

Who named the Summer Triangle?

night sky graphic showing the three stars that make up the summer triangle, vega, deneb and altair.

The Summer Triangle and the allegorical figures (Cygnus, Lyra and Aquila) attributed to the three constellations it belongs to, at around 9 p.m. in mid-September.Β  (Image credit: Starry Night Pro 8.0, background added in Canva Pro.)

There has long been debate over who first christened the bright stellar trio of Vega, Deneb, and Altair as the Summer Triangle. Some credit the legendary British astronomer Sir Patrick Moore (1923β€”2012), who wrote, "During a 1958 television broadcast on the BBC, I introduced the nickname of the Summer Triangle, and everyone now seems to use the term, even though it is completely unofficial." Yet several years earlier, in his 1952 sky guide, The Stars β€” A New Way to See Them, H.A. Rey (1898β€”1977) referred to the three stars as a "right triangle," and in his 1954 children's book, Find the Constellations, Rey used the Summer Triangle moniker.

Still others believe the term was popularized through U.S. navigator training manuals during World War II. Interestingly, astronomer Oswald Thomas (1882β€”1963) described Vega, Altair, and Deneb as "Grosses Dreieck" ("Great Triangle") in the late 1920s and as "Sommerliches Dreieck" ("Summerly Triangle") in 1934.

Joe Rao serves as an instructor and guest lecturer at New York's Hayden Planetarium. He writes about astronomy for Natural History magazine, Sky and Telescope, The Old Farmer's Almanac and other publications.

  •  

A ghostly pyramid of light is about to appear before dawn β€” here's how to see it

Starting today (Sept. 9), skywatchers in the Northern Hemisphere have a chance to spot one of the night sky's more elusive sights: the zodiacal light.

Zodiacal light is a faint, pyramid-shaped glow rising in the east before morning twilight. It is caused by sunlight reflecting off interplanetary dust.

The phenomenon is sometimes nicknamed the "false dawn" because its soft glow can be mistaken for the signs of morning twilight. Unlike dawn, however, the zodiacal light appears as a distinct cone or wedge of light extending upwards from the horizon along the ecliptic β€” the apparent path the sun, moon and planets follow across the sky.

Early fall provides a good opportunity for northern hemisphere observers to look for zodiacal light before dawn, when the angle of the ecliptic helps the glow stand more prominently above the eastern horizon.

Timing and location are everything in order to observe the Zodiacal Light. You must be far from city lights, looking east, around 4:00 a.m. EDT. Give your eyes plenty of time to adjust to the darkness and avoid looking at your phone or other bright lights while searching for the faint glow.

How to find it

Trace the cone of light as high as possible. Under pristine, dark skies, you can follow this glow deep into the zodiacal constellations that lie along the ecliptic. The base of the light cone will start near Cancer, resting just above the horizon, stretching upward through Gemini, and reaching high into the predawn sky toward Taurus.

Star chart showing the eastern predawn sky on Sept. 9, 2026, with the zodiac constellations and planets visible above the horizon.

The zodiacal light may be visible before dawn in early September as a faint cone of light rising from the eastern horizon through the zodiac constellations. (Image credit: Jules-Pierre Malartre/Starry Night)

How to photograph it

Capturing the Zodiacal Light is very similar to photographing the Milky Way. You will want a fast, wide-angle lens (such as a 14 mm lens at f/2.8) to properly frame the sweeping diagonal of these constellations. Use a high ISO (1600 to 3200) and take a 15-to-20-second exposure on a fixed tripod.

  •  
❌